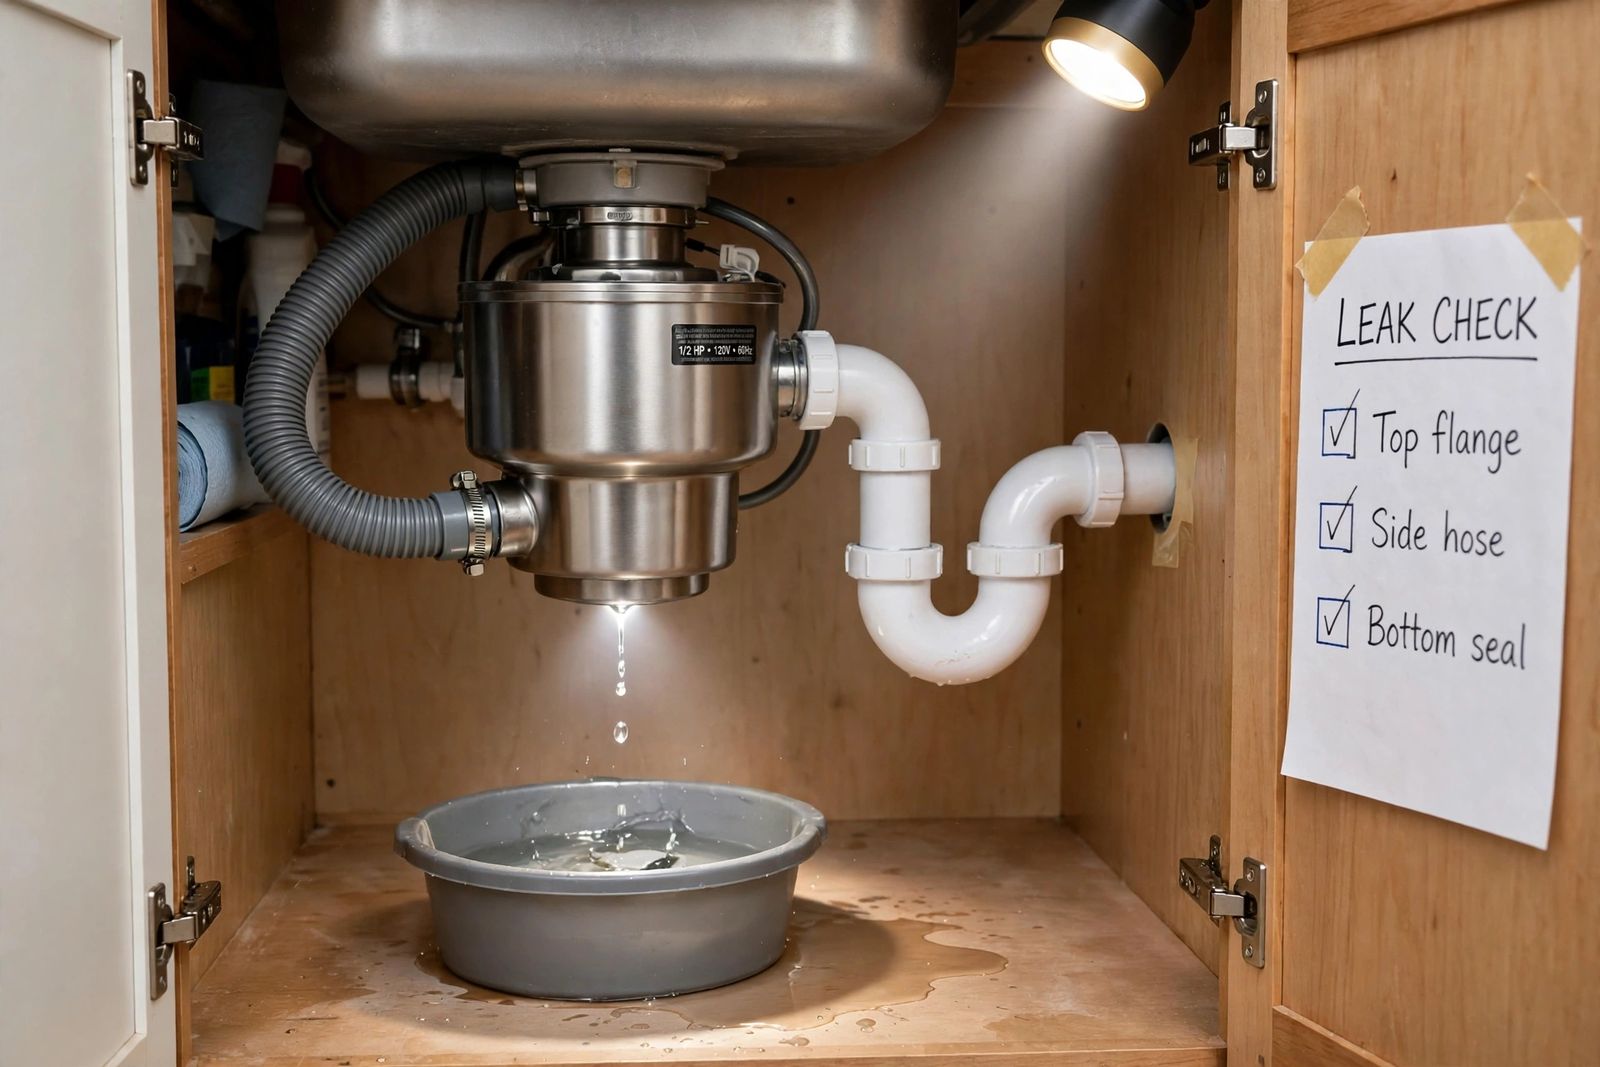
A garbage disposal leak is diagnosed by where the water first appears, because each location is a different fault with a different verdict. A leak at the top is the sink flange or its mounting — reseal or tighten it, and the disposal lives. A leak at the side is the dishwasher inlet hose or the drain discharge connection — a clamp, a hose or a gasket, and the disposal lives. A leak that truly starts at the bottom, with everything above it dry, is a failed internal seal or a cracked shell — that one is not a repair at all: the disposal is replaced. Find the first wet spot before you touch a single screw, because water runs downhill inside a cabinet and the puddle is almost never where the leak began.
Make it safe, then make it dry
Stop before you diagnose. Switch the disposal off at the wall switch, then cut its power at the breaker — not just the switch — if you will loosen anything, reach under the unit, or work near its wiring: this job happens in a wet cabinet around a powered appliance. Unplug the unit as well if it is cord-connected. Never put a hand into the grinding chamber, for this or any other fault; anything that has to come out comes out with tongs or pliers. Empty the cabinet, put a shallow pan or bucket under the disposal, and mop up the standing water — a cabinet floor left wet swells, softens and grows mould quietly, and a floor dried now is also your test baseline: any water that appears after this point is fresh evidence, not the old leak spreading.
And until you know the source: do not run the disposal, and run the sink and dishwasher as little as possible. Every faucet run sends water through the disposal’s connections, and every dishwasher cycle sends a full load of drain water through the side inlet — if either is the leaking point, casual “testing” is just watering the cabinet. The one short, watched test below is the exception, done on a dried unit with towels placed to catch the answer.
The leak-location diagnosis map
Dry the disposal, the pipes and the cabinet floor completely. Then match what you find to one row, and run that row’s confirming check before you order anything, tighten anything or condemn anything.
| Where the water first appears | When it appears | Most likely cause | The confirming check | Verdict |
|---|---|---|---|---|
| Top — around the sink flange and mounting ring, water running down the outside of the unit | While the sink is filled or draining, disposal off | Sink flange seal failed (plumber’s putty or gasket perished), or mounting screws loosened by vibration | Moen’s paper-towel test: wrap dry paper towels around the flange, the discharge elbow and the dishwasher connector; fill the sink, release the stopper — the flange towel wets first, and the unit below it stays dry | Repair. Tighten the mounting screws evenly; if it still leaks, remove the unit and reseal the flange (steps below) |
| Side, upper port — at the dishwasher inlet where the small hose meets the disposal | Only when the dishwasher drains | Loose hose clamp, split or brittle dishwasher hose, or a damaged inlet fitting | Dry the joint, then run the dishwasher’s drain (or a short cycle) watched: the inlet joint wets first while the flange and discharge stay dry. Squeeze the hose — a hose that feels brittle or shows cracks at the bend is the cause even before it splits openly | Repair. Re-seat the hose and tighten the clamp; replace a cracked or brittle hose whole — never tape it |
| Side, lower port — at the discharge elbow where the drain pipe leaves the disposal | While the sink drains or the disposal runs | Worn discharge gasket, loose elbow screws, or an elbow knocked out of alignment | Dry paper towel around the elbow joint through one sink drain: the joint wets first. Check the elbow is seated square — a joint bumped by stored bottles can leak with a sound gasket | Repair. Re-seat the elbow, snug the screws evenly, replace a flattened or cracked gasket |
| Bottom — dripping from the base plate, the seams of the housing, or the reset button, with the top and both side ports dry | While the disposal runs, or while the sink drains through it | Internal seal failure (the seals around the motor shaft and grinding chamber), or a cracked or corroded housing | The full towel test with every towel above staying dry while the base itself weeps — including a drip forming at the reset button. If any towel above is wet, it is not this row: the water is tracking down, so start again at that row | Replace. The internal seals are inside the sealed motor housing, are not sold as a service part for ordinary home models, and cannot be resealed from outside. Do not keep running the unit |
| Nowhere on the disposal — unit dry, water on pipes or cabinet instead | Varies | Not the disposal: a faucet supply line, the sink basket, a sprayer hose, or a countertop seam dripping onto the unit | The same towel test finds no wet point on the disposal itself; follow the water upward to the highest wet fitting instead | Different job. Fix that fitting; the disposal was only the drip tray. A slow sink drain alongside points to the drain itself — see how to unclog a drain |
Two more checks belong on this map even though they are not drip points, because they change the verdict when they are the real story. The reset button: a disposal that has stopped and hums or stays silent after a jam has often simply tripped its overload protector — the red reset button on the underside pops out, and pressing it back in (power off first, jam cleared with the hex wrench in the centre hole) is the fix; that is a no-start fault, not a leak. But a reset button that is itself wet, dripping from a unit whose connections are all dry, belongs to the bottom row above — water has reached it from inside the housing. The splash guard: the black rubber baffle you see down the sink drain keeps grindings and spray in the chamber. A guard that is torn, split or pushed out of shape lets water splash up out of the drain while the disposal runs and can leave the countertop and the sink rim wet — it does not drip under the cabinet, so do not let a splash complaint send you hunting for an under-sink leak, and do not blame an under-sink drip on the guard. A damaged guard is lifted out and replaced from above on most models, with the power off.
All of this belongs on one map. The manufacturer pages test one location per page — Moen’s top-leak and underneath-leak pages are separate documents — and location-by-location prose rarely separates a tracking-down drip from a true bottom leak. The map is the article; the sections below are each row explained.
How the confirming test works
The towel test is the makers’ own method, built on one physical fact: water collects at the lowest point, so where it drips is not where it starts. Moen’s troubleshooting guide wraps paper towels around the sink flange, the drain discharge elbow and the dishwasher connector, then fills the sink and checks which towel is wet — a wet towel names both the area and, in Moen’s words, an installation issue with that specific item. InSinkErator’s version is the same test in different materials: newspaper below the unit, fill the sink and drain it, then run the water and the disposal while you watch. A third variant adds food colouring to the water and wipes the unit with a light-coloured rag — the dye shows exactly where it escapes.
Run the test in stages and read it in order. Filled sink, stopper in, disposal off: only the flange is under load, so a wet flange towel here is a top leak, full stop. Stopper out, sink draining: now the discharge elbow carries the flow. Disposal on briefly with cold water running: now the chamber is pressurised and the internal seals are tested. Dishwasher draining: now, and only now, the inlet hose is under pressure. A leak that appears in exactly one stage has told you its row. A fully dry test counts too — the leak is intermittent, or it is not the disposal: leave the towels down for a day and let the next real use make the mark, rather than dismantling a dry unit on suspicion. The same first-wet-spot discipline separates a wax-ring leak from a tank leak in toilet leaking from base.
Top leaks: the sink flange and mounting
The sink flange is the metal ring set into the sink drain, sealed to the sink with plumber’s putty (or a gasket on some installations) and clamped from below by the mounting assembly the disposal hangs from. It is the hardest-worked joint in the system: every run of the disposal vibrates it, and vibration is exactly what loosens it. The Home Depot’s disposal guide names the pair plainly — vibrations from grinding loosen the mounting flange, and old sealant is the other usual reason a unit leaks from the top. Moen’s own list for an existing unit is the same three items: flange sealant deteriorated, the rubber or fibre gasket or the cushion mount damaged, or mounting screws loose.
Work it in this order:
- Tighten first. With the power off, check the mounting assembly screws from below and snug them evenly, a little at a time, working around the ring rather than driving one screw home — an unevenly tightened mount cocks the flange and can make a small leak worse. Retest with the towel test. A leak that stops here was a loose mount, and it cost nothing.
- Reseal if it still leaks. This means taking the disposal down: power off at the breaker, drain and dishwasher connections off, the unit twisted off its mounting ring and set down — it is heavy and awkward, so have a second pair of hands or a support block under it. Loosen the mounting assembly, lift the flange out from the top of the sink, scrape off all the old putty, clean both faces. Roll fresh plumber’s putty into a rope about the thickness of a pencil, set it under the flange, press the flange into the drain opening, refit the mounting assembly and tighten evenly until putty squeezes out around the flange — that squeeze-out is the sign the seal is continuous — then trim the excess. Rehang the disposal, reconnect the lines, and retest before the cabinet goes back together.
- Inspect while it is apart. A gasket or cushion mount that is cracked, flattened or crumbling is replaced, not reused — Moen lists these parts as leak causes in their own right, and refitting a perished gasket under fresh putty rebuilds the leak you just fixed.
One boundary: a flange or mounting ring that is heavily rusted or eaten away is not a reseal job. Forum reports from owners of older InSinkErator units describe mounting metal corroded through most of its circumference — at that point the mounting assembly, and usually the unit with it, is replaced.
Side leaks: the dishwasher inlet and the discharge elbow
The disposal has two side connections, and they fail differently because they carry water at different times.
The dishwasher inlet is the small upper port. The dishwasher drains through the disposal, so this hose is pressurised only while the dishwasher pumps out — which is why its leak keeps dishwasher timing and is so often missed: the sink and disposal behave perfectly between cycles. The faults are a loosened clamp, a hose gone brittle or split (check the bends and ends first), or a damaged inlet fitting. Tighten the clamp onto a sound hose and the job may be done; a hose that is cracked, stiff or split when flexed is replaced whole — and never taped, and never forced back onto the fitting, because old hoses split when disturbed. The other end of this same hose has its own failure modes — dishwasher leaking works that end, and dishwasher not draining covers the shared drain path, including the knock-out plug that blocks this very inlet on a newly fitted disposal.
The discharge elbow is the larger lower port, where ground waste leaves for the P-trap. One local-plumber guide calls this the most common repairable disposal leak, and its causes are mechanical: the rubber gasket between elbow and disposal body flattens or cracks with age, the elbow screws loosen, or the elbow gets knocked slightly out of square by the bottles and bins stored under most sinks. The fix matches: power off, loosen the screws, lift the elbow, inspect the gasket — a gasket that is flattened thin, cracked or stuck to one face is replaced — reseat the elbow squarely, and tighten the screws evenly. If the leak is actually a step further along, at the P-trap slip joints below, those nuts and washers are the same kind of fix, covered in how to unclog a drain.
A heading trap worth naming, because it sends readers to the wrong verdict: at least one major guide’s section headed “leaking from the bottom” is, in its text, about these side connections — the dishwasher clamp and the discharge gasket. Read the joint, not the heading. A side leak fixed with a clamp or a gasket is a repair; only the next section is a replacement.
Bottom leaks: the internal seal, and why the answer is replace
A true bottom leak — the base plate weeping, water forming at the housing seams, a drip growing on the reset button, with the flange, the inlet and the discharge all proven dry by the towel test — means water has crossed from the wet side of the machine to the dry side. Inside the disposal, seals around the motor shaft and the grinding chamber are all that keep sink water out of the motor housing. When they perish, or when the shell itself cracks or corrodes through, water travels down inside the unit and exits at the only openings it can find: the seams and the bottom plate.
That is why every manufacturer-aligned source lands on the same verdict, stated here without a repair option attached. The Home Depot’s guide puts it in one sentence: a disposal leaking from the bottom indicates a failed seal or a cracked shell, and the disposal has to be replaced. The internal seals are built into the housing; they are not sold as a homeowner replacement part, and there is no outside surface to reseal — anything smeared on the base is decoration over a leak happening inside the machine, next to its motor and wiring. InSinkErator’s own position reaches the public through its owners: in a forum thread, the owner of a bottom-leaking unit reports the maker told him directly that the fault is internal and the disposal needs replacement. Treat any guide that offers to repair an internal seal as mistaken — one service page leaves the door open to “a seal replacement” for a leak that occurs while the unit runs, advice that can send a reader shopping for a part the makers do not supply.
Three qualifications keep the verdict honest:
- Prove it is really the bottom first. Many “bottom leaks” are tracking errors: water from a flange or elbow leak runs down the outside of the unit and drips off the base, the lowest point. Every authority in the set, InSinkErator included, warns to confirm the water is not arriving from above — the towel test, with dry towels above, is that proof. Skip it and you can replace a sound disposal and keep the leak.
- A new unit leaking at the bottom is a different case. Moen’s guide for newly installed disposals lists installation causes for water at the bottom plate — discharge-elbow screws not fully tight, or the drain-elbow gasket misplaced — and a Moen disposals manager quoted by Family Handyman says the same: on a new disposal, a bottom leak is most likely installation, not a failed seal. Check the elbow and gasket, and use the warranty, before accepting the replacement verdict on a young unit.
- Stop using it. A bottom leak puts water inside a powered appliance on every run. Power off, and treat replacement as the scheduled job — the unit is at the end of its life, not on a countdown you can stretch with sealant.
Repair or replace: the honest arithmetic
Price the decision by the row of the map you landed on. A mounting tighten costs nothing. A flange reseal costs a tub of plumber’s putty and an hour. A discharge gasket, a dishwasher hose or a clamp is a small-parts fix. Those repairs make sense on almost any unit that otherwise grinds well and runs quietly. Replacement is the answer for a confirmed bottom leak, a cracked or heavily corroded housing, or a unit that has other end-of-life faults queueing behind the leak — frequent jams, tripped resets, growing noise.
Age is the tiebreaker, and published lifespan numbers disagree enough to state as a range: figures cited run from about 5–10 years (Family Handyman) through 8–12 years (a local plumber’s FAQ) to 8–15 years (Bob Vila) — one honest statement: a typical disposal serves roughly a decade. A bottom leak on a unit well into that range is the expected end; the same symptom on a two-year-old unit points back at installation or warranty. On cost, the figure most often repeated is Bob Vila’s: professional replacement at about $400 on average including parts and labour, fitting it yourself saving roughly $90–$200. A ballpark from 2025, not a quote.
One correction to advice repeated in a widely read guide: you will see instructions to run hot water before and after grinding “to keep fats from congealing.” Run cold water instead — while the disposal runs and for a few seconds after, as the makers’ standard operating guidance directs. Cold water keeps grease solid so the chamber can grind it and the flow can carry it away; hot water melts it just long enough to coat the chamber and the pipes beyond, where it sets — building the clogs that back water up against the connections this article has been fixing. That back-pressure is also why a disposal that leaks only when the sink drains slowly deserves a drain check alongside the gasket.
When to call a plumber
- You cannot name the source after a careful towel test. Guessing replaces good parts; a plumber’s diagnosis is cheaper than a second disposal.
- The cabinet floor or base is soaked, swollen or mouldy. The leak has a second repair attached to it, and stopping the water matters more than the disposal verdict.
- A bottom leak is confirmed and you are not comfortable disconnecting wiring and plumbing — replacement is a defined job, and paying for the swap is reasonable.
- There is corrosion around the electrical connections, or the unit hums, trips its reset or trips the breaker alongside the leak.
- The leak returns after the row’s fix was done properly — a resealed flange or a new gasket that still leaks means the cause is something the map’s row did not contain, usually the drain line beyond the disposal.
- The mounting or flange metal is corroded through. That is replacement of the assembly, not an adjustment.
Frequently asked questions
Why is my garbage disposal leaking from the bottom? Because an internal seal has failed, or the housing has cracked or corroded — water has crossed into the motor housing and is exiting at the base, often at the reset button. Prove it with the towel test first (a bottom drip is often a top or side leak tracking down); if the unit above is truly dry, the fix is replacement.
Can a leaking garbage disposal be fixed, or does it always need replacing? It depends entirely on the row of the map. Top leaks (flange seal, loose mounting) and side leaks (dishwasher clamp or hose, discharge gasket) are genuine repairs with cheap parts. Bottom leaks are replacement. Anyone who gives you one answer for all three locations has not found your leak yet.
How do I know if the leak is the disposal or something else under the sink? Dry everything and run the staged towel test: filled sink, draining sink, disposal on, dishwasher draining. If no point on the disposal wets but water still appears, follow it to the highest wet fitting — supply lines, the sink basket and sprayer hoses all drip onto the disposal and borrow its puddle.
Is it safe to keep using a disposal that leaks a little? No. A top or side drip is quietly destroying the cabinet floor while it waits, and a bottom leak is putting water inside a powered appliance. Use the sink as little as possible, keep the dishwasher off if the inlet is involved, keep a pan under the unit, and treat even a slow leak as a this-week job rather than a someday one.
My disposal leaked once and then stopped. Is it fine now? Probably not — it more likely means the leak needs a condition that has not repeated yet: a full sink for a flange leak, a dishwasher cycle for an inlet leak, a long grind for a seal leak. Leave dry newspaper under the unit and check it after each kind of use; the stage that wets the paper names the row.
What does it cost to replace a garbage disposal? The figure most often quoted is about $400 on average for a professional replacement including the unit and labour, with $90–$200 of that being labour you save by fitting it yourself. Prices vary with horsepower, brand and region, and a like-for-like swap that reuses a sound mounting assembly is the cheapest version of the job.
This article is general information, based on the manufacturer troubleshooting guidance linked above (Moen and, via its published test, InSinkErator) and the top-ten guides checked in November 2026. Mounting designs, gaskets and inlet fittings vary by maker and model — your disposal’s manual governs your unit. Work involving hardwired electrical connections, corroded mountings, or a confirmed internal leak you are not equipped to replace belongs to a qualified plumber or appliance technician.