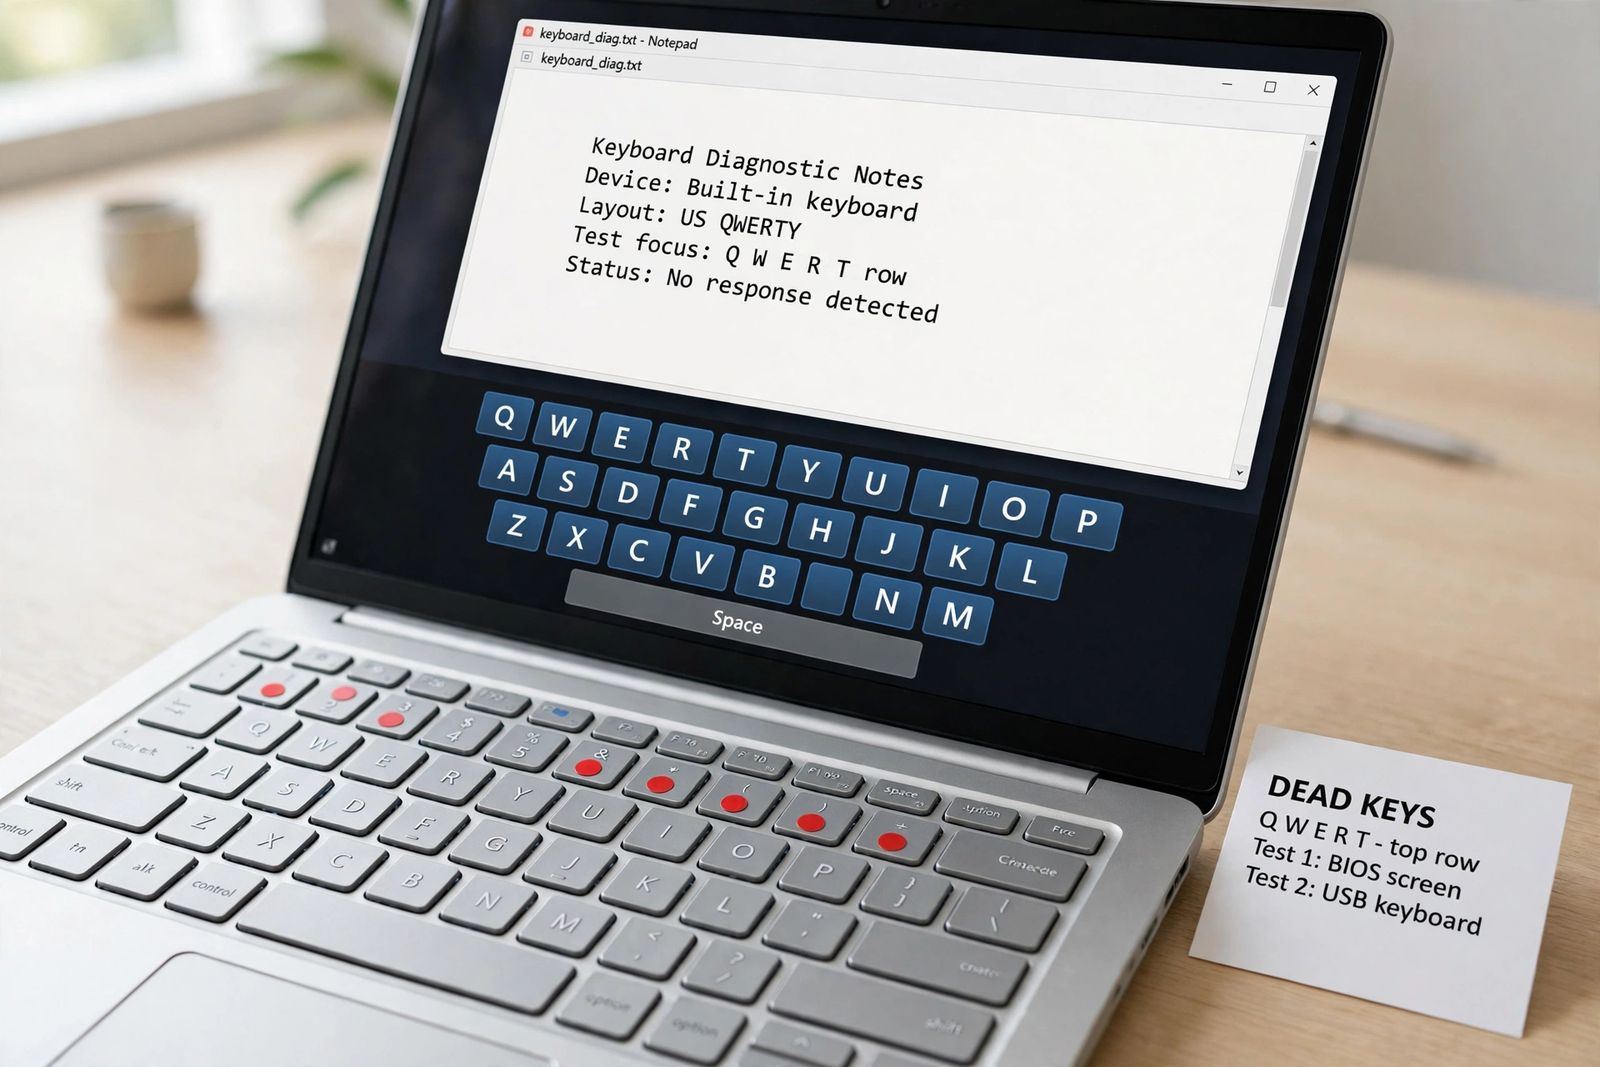
When some keyboard keys stop working and the rest type normally, the pattern of the dead keys is the diagnosis — do not start by reinstalling drivers or cleaning at random. A tight cluster of dead keys, especially after a spill or a drop, points to liquid damage or physical damage under those keys. A whole row or column dying together points to the keyboard’s internal wiring grid or, on a laptop, its ribbon cable. Scattered keys failing at random — or keys that work if you hold them down but ignore a normal tap — point to software: Filter Keys, a changed keyboard layout, or a driver fault. Two tests then prove which side of the line your keyboard is on: type the dead keys in the firmware (BIOS/UEFI) screen or the maker’s pre-Windows keyboard test, where Windows is not running at all, and compare with an external keyboard or the on-screen keyboard inside Windows. Dead in both places is hardware. Working outside Windows but dead inside it is a Windows setting or driver — and that half is free to fix. Find your pattern in the table below and work only on that row.
Step 1: Name your pattern first
Keyboards are not wired one wire per key. The keys sit on a grid — a matrix of rows and columns — and the keyboard’s controller works out which key you pressed from which row and column meet. That single fact explains most partial failures: one break in one line of the grid takes out every key on that line, which is why dead keys so often form a straight row, a column, or a diagonal stripe of keys that look unrelated. It also means the shape of the failure carries information no single dead key does. Before touching a setting, press every key once — in a text document, or on any keyboard-tester web page, which lights up each key the computer actually receives — and write down exactly which keys are dead. Then match the shape:
| Dead-key pattern | What it usually means | Proof test |
|---|---|---|
| One or two keys, neighbours fine | Debris under the keycap, or that key’s switch or contact worn out | Clean around and under the key; if it works only with a hard press, the contact is worn — hardware, but only that key |
| A tight cluster in one area — and especially if there was a spill, a drop, or the keys feel sticky or crunchy | Liquid damage or physical damage under those keys; sugary drinks keep corroding the traces after they dry | Keys stay dead in the firmware test (step 2). Power off and dry first if the spill is recent — see the spill section |
| A whole row or column — a straight line of keys, or a diagonal stripe (for example 1, Q, A, Z) | One line of the key matrix has broken: a corroded or cracked trace, or on a laptop a ribbon cable that has worked partly loose | Firmware test (step 2): dead there too confirms hardware. On a laptop, reseating the ribbon cable is the one fix worth trying before replacement |
| Scattered keys, no shape to them — or the failure began right after a Windows update or a new program | Software first: a driver fault, a remapping or macro tool swallowing keys, or an app capturing them | Keys work in the firmware test, or an external keyboard shows the same dead keys — either result puts the fault in Windows, not the keyboard |
| Keys work only when held down, or brief and repeated presses are ignored | Filter Keys is on — Windows is deliberately ignoring short keystrokes | Settings > Accessibility > Keyboard: Filter Keys is on. Turn it off and the “dead” keys return instantly |
| Keys type the wrong characters — @ and ” swapped, letters coming out as numbers or accented | Not dead keys at all: the layout or input language changed, or the laptop’s Num Lock overlay is on | Press Windows key + Space and watch the layout change; letters typing numbers on a compact laptop is the overlay — Fn + Num Lock turns it off |
| Only combinations fail — a key works alone but drops out when two or three are held together (games) | The keyboard’s rollover limit (ghosting/blocking) — a design limit of cheaper keyboards, not a fault | The same keys register one at a time in a tester. Nothing is broken; change the key bindings or use a keyboard with n-key rollover |
Two timing questions sharpen the pattern before you test anything. Did anything spill, drop or change just before this started? A failure that begins the day of an update is usually that update; one that begins hours or days after a spill is corrosion arriving on schedule. Is it getting worse? Dead keys that multiply over days or weeks are a failing matrix or spreading corrosion — a replacement decision, not a settings hunt.
Step 2: The two tests that separate hardware from Windows
Every fix in this article hangs on one question: is the fault in the keyboard, or in Windows? Two tests answer it, and both are free.
Test 1: Type outside Windows — the firmware test
Restart the computer and enter the firmware setup screen (the BIOS or UEFI screen — commonly F2 or Del during start-up on desktops, Esc then F10 on HP laptops, F2 on Dell and Lenovo) and try the dead keys there: the arrow keys to move, and any dead letter keys in a field that accepts typing, such as a password or search field where one exists. Firmware runs before Windows and its drivers load, so the result is clean:
- Dead keys work in firmware but not in Windows — the keyboard hardware is fine. Your fault is a driver, a layout, Filter Keys or interfering software. Work the software sections below and skip every hardware step.
- The same keys are dead in firmware too — no Windows setting can cause that. The fault is in the keyboard, its cable or its matrix. Work the hardware sections.
The makers build an even better version of this test into many laptops: a dedicated keyboard test that runs before Windows and lights each key as you press it. On HP laptops, restart, tap Esc, then F2 for HP PC Hardware Diagnostics, and run Component Tests > Keyboard. On Dell laptops, press F12 at the Dell logo and choose Diagnostics. A key that fails the maker’s own test has given you the answer — and, on a machine under warranty, the evidence for the service conversation. If the PC produces no picture at all while you try to reach these screens, that is a different fault in the display chain, worked through in order in monitor no signal; and if the machine will not stay on long enough to test, restarting before it loads is its own pattern-first diagnosis — see computer keeps restarting. On a laptop whose own screen stays black while the machine itself is clearly running, the fault sits in that built-in display rather than in the keyboard tests above, and laptop screen is black runs the screen-versus-laptop test sequence that separates the two.
Test 2: Compare inside Windows — external keyboard and on-screen keyboard
Plug in any USB keyboard (or pair a Bluetooth one) and press the same keys — and if that keyboard gets no response in any USB port at all, suspect the ports before either keyboard: USB ports not working splits one dead port from all ports dead, and all-ports-dead makes every USB test instrument unreliable at once:
- External keyboard types the dead keys normally — Windows and its input path are healthy; the fault is inside the built-in keyboard. (On a laptop, first release the two built-in-only lock states — Fn Lock and the Num Lock overlay — because an external keyboard is not subject to them.)
- The external keyboard shows the same dead keys — the fault is in Windows: a layout, Filter Keys, a driver or software that captures keys. Hardware work on the laptop’s keyboard will change nothing.
Windows’ built-in On-Screen Keyboard — Microsoft’s OSK page documents it: Settings > Accessibility > Keyboard > On-Screen Keyboard, or the Accessibility button on the sign-in screen — is your way to keep typing and to run the Settings fixes below when the physical keyboard cannot type at all. Use it for that. Do not use it as a hardware test, the way some guides present it (“if on-screen keys work but physical keys don’t, it’s hardware; if both fail, it’s software”). The on-screen keyboard does not travel the physical keyboard’s path at all — it injects input from the mouse — so it working tells you only that Windows accepts input, which the external-keyboard comparison already shows properly. A layout fault, the commonest “software” cause of all, leaves the on-screen keyboard typing the same wrong characters as the physical one, which that test logic would misread entirely.
If your pattern is scattered: the software causes, in order
Filter Keys — the setting that makes good keys look dead
Microsoft describes Filter Keys as a way to set the sensitivity of the keyboard so that it can ignore brief or repeated keystrokes. It exists for users whose hands tremor or bounce on keys. Switched on by accident, it produces exactly this article’s symptom: keys that seem dead on a normal tap, that register if you hold them down, and repeated letters that never appear. The classic accident is holding the right Shift key down for eight seconds, which turns Filter Keys on (that shortcut can itself be switched off in the same settings page, and should be, once you have been bitten).
Check it before anything else in this section: Settings > Accessibility > Keyboard, and turn Filter Keys off. While you are on that page, turn off Sticky Keys too if you did not enable it deliberately — it changes how Shift, Ctrl and Alt behave (pressing Shift five times in a row is its shortcut) and can make combinations look broken. If your “dead keys” all return the moment Filter Keys goes off, you are done, and nothing was ever wrong with the keyboard.
The layout changed — keys that type the wrong thing
Keys that register but produce the wrong characters are not failing; Windows is interpreting them under a different layout. Windows key + Space cycles through installed layouts and is easy to hit by accident. The tells are consistent: @ and ” swapped is US versus UK layout; Y and Z swapped is a German QWERTZ layout; accented letters appearing from ordinary keys mean a different language’s layout is active. Fix it properly, not just for today: Settings > Time & language > Language & region, open your language’s options, and remove every keyboard layout you do not use — a layout that is not installed cannot be switched to by accident. The number variant of the same trick is the laptop Num Lock overlay: on compact laptops without a separate number pad, letters such as U, I, O and J, K, L double as a numeric pad, and with the overlay on they type numbers. Fn + Num Lock (on some models Fn + F11 or Fn + Insert) switches it back. And if only the separate number pad misbehaves — moving the cursor instead of typing numbers — that is plain Num Lock off: press it once.
The driver — and the troubleshooter that no longer exists
A driver fault is the remaining software cause, and it fits a specific pattern: scattered keys, or the whole keyboard, failing from the moment of a Windows update or a driver change, with the keys working in the firmware test. The fix is a clean reinstall, which sounds drastic and is not — the keyboard driver is a standard Windows component:
- Right-click the Start button and open Device Manager.
- Expand Keyboards, right-click your keyboard (usually Standard PS/2 Keyboard on a laptop, HID Keyboard Device for an external board) and choose Uninstall device. Do not tick any “delete the driver software” box if one is offered for a built-in keyboard.
- Restart the computer. Windows detects the keyboard and reinstalls the driver automatically during start-up.
If the failure began with a specific update, also check Settings > Windows Update > Update history: the same page lets you uninstall the most recent quality update, which is the rollback that matches an update-day failure. Vendor companion software belongs in this section too — keyboard macro tools, gaming overlays and “keyboard enhancer” utilities hook keystrokes at a low level and can swallow specific keys; close or uninstall anything of that kind that arrived when the problem did, and test again.
One correction, because a large share of the guides and forum answers for this problem still give it as step one: on current Windows 11 there is no Keyboard troubleshooter to run. Microsoft has retired the legacy built-in troubleshooters, and in Microsoft’s own deprecation document the Keyboard troubleshooter is on the list of tools removed — not moved into the Get Help app, where some other troubleshooters went. If you follow an older guide to Settings > System > Troubleshoot > Other troubleshooters and find no Keyboard entry, nothing is wrong with your PC; the entry was removed from the product. The Device Manager reinstall above is the supported route that replaced it. (Windows 10 and older Windows 11 releases still show the troubleshooter — it is simply no longer part of a current system.)
While you are in software: if the computer has also become suddenly slow, or the browser’s homepage changed by itself around the same time, run a scan in Windows Security > Virus & threat protection — unwanted software that captures input rarely travels alone, and a machine that is slow and misbehaving has its own ordered checks in why is my computer so slow.
If your pattern is one or two keys: debris and wear
A single dead key with healthy neighbours is almost always local and physical. Power the machine off (or unplug the keyboard), turn the keyboard upside down and tap it, then blow around the dead key with compressed air in short bursts, can upright, at an angle under the keycap. Debris — crumbs, dust, hair — under the key is the commonest cause, and this is the whole fix surprisingly often. The same canned-air rules apply as for laptop vents — upright can, short bursts, never a vacuum cleaner (static) — the reasoning is set out in laptop fan loud.
If air does not revive it, read the key’s behaviour. A key that works when pressed hard, or types twice for one press, has a wearing contact: on a mechanical keyboard the switch can be swapped (pull the keycap, and on a hot-swap board pull and replace the switch; press the exposed switch directly first — if the bare switch registers, the keycap or stabiliser was the problem). On a laptop or membrane keyboard the contact is part of a sheet and cannot be replaced key-by-key; careful keycap removal for cleaning is possible on many laptops — plastic tool, lift gently from one corner, photograph the scissor mechanism before it comes apart — but a worn contact on that design means living with a remap (below) or replacing the keyboard. Do not pry at a laptop key that resists: the scissor clips are the fragile part, and breaking one turns a worn key into a missing key.
If your pattern is a cluster — and especially if liquid was involved
Scattered-in-one-area failures that follow a spill are liquid damage, and time is the variable. If the spill is recent: power off immediately — unplug the laptop and shut it down, or unplug the external keyboard — turn it upside down to drain, and leave it to dry for at least 48 hours before testing. Dell’s spill guidance is the same shape: power off at once, drain, dry thoroughly for 24–48 hours, and do not use the keyboard meanwhile. Do not speed it up with a hairdryer’s heat.
Understand what drying can and cannot do. Plain water, caught fast, sometimes leaves no damage. Sugary or milky drinks leave a residue that stays conductive and corrosive after the liquid itself is gone, which is why keys that come back after drying often fail again days later as corrosion spreads along the traces — and why a cluster that keeps growing is telling you the damage is still travelling. A desktop keyboard can be opened and the board cleaned with isopropyl alcohol; a laptop’s keyboard sits over the rest of the machine, and liquid that reached it may have gone further — a shop clean is the honest route there, and on a basic desktop keyboard, replacement is usually cheaper than the hours.
If your pattern is a whole row or column: matrix and ribbon cable
A straight line of dead keys is one broken line in the matrix grid — a corroded or cracked trace inside the keyboard, or the connection between the keyboard and the computer failing along that line. The firmware test will already have confirmed hardware. What remains depends on the keyboard type:
- Desktop membrane keyboard: the traces are printed on thin plastic sheets and are not repairable in practice. Replacement is the fix.
- Mechanical keyboard: a cracked trace or failed diode on the circuit board. Repairable with soldering, by someone equipped for it; otherwise replace.
- Laptop: the suspect is the ribbon cable — the thin, flat cable that carries the whole grid from the keyboard to the motherboard. Drops, heat cycles and previous repairs can walk it partly out of its locking connector, and a partly seated cable kills exactly these row-and-column patterns. Reseating it — power off, unplug, battery disconnected, bottom panel off, flip the connector’s latch up gently, slide the cable out, check the contacts for dirt or corrosion, slide it back in evenly and lock the latch — is the one internal fix worth trying before replacement, on a machine out of warranty that you are comfortable opening. Check a disassembly guide for your exact model first: on many thin laptops the keyboard is under the motherboard and this is a full strip-down, and if the machine is under warranty, opening it is the maker’s job, not yours.
If reseating changes nothing, the keyboard assembly itself has failed along that line, and replacement — model-specific part, difficulty from a few screws to a full top-case swap depending on design — is the remaining fix.
Work around it while you decide
None of the hardware outcomes above has to stop you working today:
- On-Screen Keyboard — Settings > Accessibility > Keyboard, or the Accessibility button on the sign-in screen. Slow, complete, and built in.
- An external USB or Bluetooth keyboard — on a laptop that mostly lives on a desk, this is a legitimate permanent answer, not just a stopgap, and it is the comparison test from step 2 already in your hands.
- Remap the dead keys — Microsoft’s free PowerToys includes Keyboard Manager, which can move a dead key’s job onto a key you never use. A remap suits one or two dead keys; it is not a plan for a dying row.
If the external setup you fall back on includes a wireless mouse and that stops responding too, work it separately by its connection type — dongle or Bluetooth — in wireless mouse not working, because its faults do not share the keyboard’s pattern logic.
When to stop and hand it over
Stop testing and go to the maker’s warranty service or a repair shop when any of these is true: the maker’s pre-Windows keyboard test (HP Component Tests, Dell Diagnostics) fails the same keys — take that result with you, it is the diagnosis already made; the dead-key cluster is growing over days, which is corrosion or a matrix failing progressively; the laptop’s keyboard deck is bulging or the touchpad no longer clicks down — that can be a swelling battery pressing up from below, which is a safety issue, not a keyboard issue, and the machine should be inspected before further use; or liquid reached a laptop and the machine shows any symptom beyond the keyboard. And make the replacement maths honestly on an old laptop: if a shop’s part-plus-labour quote approaches the machine’s value, the external keyboard above is the rational fix, and there is no loss of face in it.
Frequently asked questions
Why are only some of my keyboard keys not working, while others are fine? Because the causes are local. One key fails from debris or its own worn contact; a row or column fails from one broken line in the keyboard’s wiring grid or a partly loose ribbon cable; a cluster fails from liquid in that area; and scattered keys usually fail in software — Filter Keys, a changed layout, or a driver. The pattern of which keys is the clue, which is why this article starts there.
How do I tell if it is the keyboard or Windows? Two tests. Type the dead keys in the firmware (BIOS/UEFI) screen or the maker’s pre-Windows keyboard test — HP: Esc then F2, Component Tests > Keyboard; Dell: F12, Diagnostics. Dead there too is hardware. Then, inside Windows, plug in an external keyboard: if it types the same keys normally, Windows is healthy and the built-in keyboard is at fault; if it shows the same dead keys, the fault is a Windows setting or driver.
What is Filter Keys, and why does everyone mention it? A Windows accessibility feature that makes the keyboard ignore brief or repeated keystrokes, designed for users with tremor. It turns on by accident when the right Shift key is held for eight seconds, and while it is on, normal taps look like dead keys and only held-down keys register. Settings > Accessibility > Keyboard shows whether it is on; turning it off restores the keys immediately if it was the cause.
Why is there no Keyboard troubleshooter in my Windows settings? Because Microsoft removed it. The legacy troubleshooters were retired, and the Keyboard troubleshooter is on Microsoft’s own list of tools removed rather than moved to the Get Help app — so on a current Windows 11, Settings > System > Troubleshoot > Other troubleshooters has no Keyboard entry. The replacement route is the manual one: check Filter Keys and the layout, then reinstall the keyboard driver in Device Manager.
Can a whole row of keys really die at once? Yes, and it is one of the most informative patterns. Keys are wired as a grid of rows and columns; one broken trace or a partly unseated ribbon cable removes every key on that line together. Look for the stripe — a dead column often takes a diagonal-looking set such as 1, Q, A and Z, because columns zigzag rather than running straight down the board.
Is it worth repairing, or should I replace the keyboard? It depends on the pattern and the keyboard. Software patterns cost nothing. One worn switch on a mechanical keyboard is a cheap part. A dead row on a membrane keyboard, or a growing post-spill cluster, means the keyboard’s internal sheet is failing and replacement is the honest answer; on a laptop, compare the replacement quote with the machine’s value, and remember an external keyboard is a perfectly good permanent workaround on a desk-bound machine.
This article is general information, based on the Microsoft Support on-screen keyboard and troubleshooter-deprecation pages and Dell’s keyboard support guidance linked above, and checked in November 2026. Firmware keys, diagnostics menus and ribbon-cable access vary by model — your laptop maker’s support page for your exact model is the authority for its steps. If the keyboard deck is bulging or liquid reached the inside of a laptop, stop and get hands-on help.