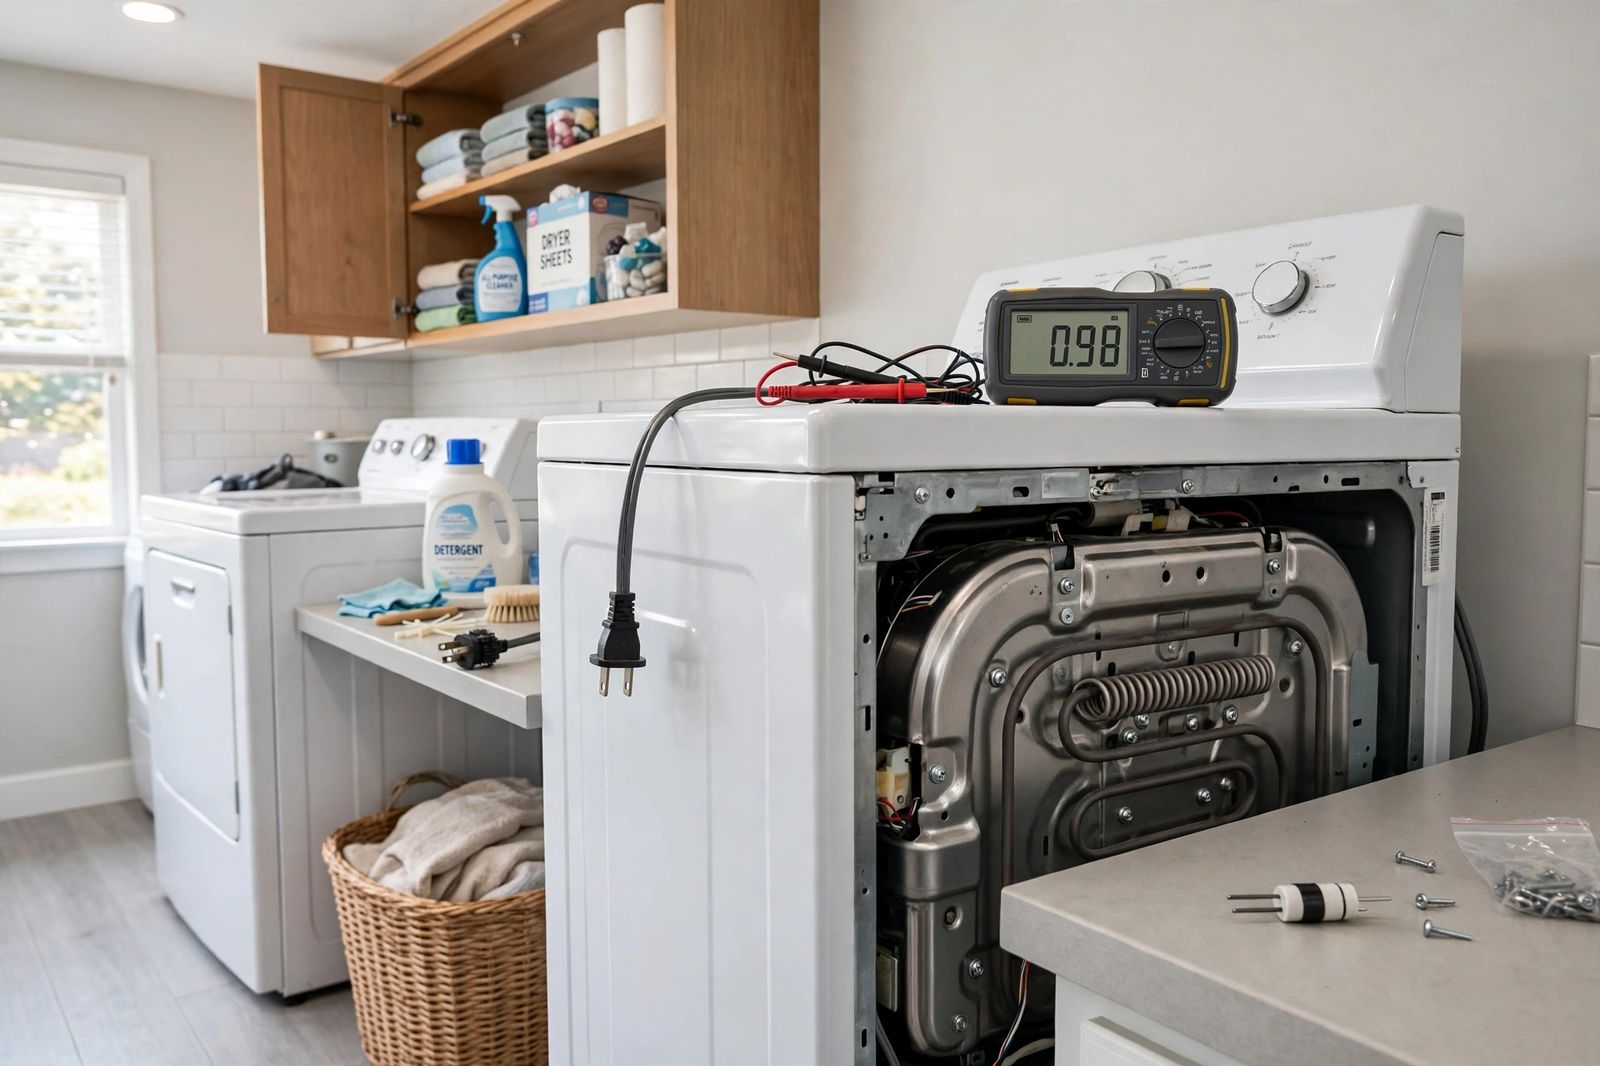
If your dryer tumbles, the timer counts down and the clothes come out stone cold, the drum and motor are almost certainly fine — one link in the separate heat chain has opened, and on an electric dryer the first suspect is not a part at all: it is half of the power supply. An electric dryer needs the full 240 volts to make heat, but only 120 volts to turn the drum, so one tripped leg of its double breaker leaves a dryer that performs a perfect cycle and heats nothing. GE Appliances states the trap plainly: an electric dryer may run on a partial 120 volts, but it will not heat without the full 208/240-volt supply. After the breaker, test in this order — thermal fuse, heating element, cycling thermostat — because each test is done unplugged with the same meter setting, and the first part that fails the test is the answer. Do not buy parts in a different order, and do not skip the breaker: it costs nothing and it fools more people than any failed element.
Two safety rules govern everything below. Unplug the dryer before you open any panel, disconnect any wire or put a meter on any internal part — every test in this article is done with the power off. And gas work is not a home repair: on a gas dryer you may check the supply valve and watch the igniter, but you do not loosen gas fittings or replace gas valve parts. If you smell gas, leave the house without operating switches and call your gas utility from outside.
First, prove it really is a no-heat fault — not a drying problem
Feel at the end of a cycle is unreliable, because most dryers finish with an unheated cool-down. Use the manufacturers’ test instead: Whirlpool’s check is to run the empty dryer five minutes on a heated, timed cycle, then open the door and feel inside.
- Stone cold after five minutes on a heated cycle is a true no-heat fault. That is the only problem this article covers, and the test order below finds it.
- Warm inside, but clothes still damp, or a load needs two cycles, is a different problem — drying performance, not a failed heat part. Its causes are airflow and sensing: a lint screen or vent restriction, an overloaded drum, or a load that went in dripping because the washer under-spun it (a load that keeps arriving soaking wet points back at the washer itself — see washing machine leaking for the washer-side checks that share that symptom family). Do not order heat parts for a dryer that heats.
- It was never asked to heat. Air Dry, Air Fluff and No Heat cycles tumble with room air on purpose, and sensor cycles can end early if the moisture-sensor bars are coated with softener residue or a tiny load barely touches them. Samsung’s troubleshooting page lists “select a heat setting other than Cool air” as its first step for a dryer that does not heat. Cancel everything, run the five-minute test on a plain timed heated cycle, and only then start testing.
The original asset: the 240V half-power trap, explained properly
Almost every guide mentions the half-tripped breaker in one sentence and moves on, which is why readers skip it and buy a heating element. The trap deserves a full explanation, because once you see how the power is split, the symptom stops being mysterious.
An electric dryer’s 240-volt supply is really two separate 120-volt legs arriving together:
| Power leg | What it runs | If this leg is lost |
|---|---|---|
| Leg 1 (120V) | The motor that turns the drum, the timer and controls, the drum light | The dryer looks dead or will not start — a different fault from no-heat |
| Leg 2 (120V) | Joins Leg 1 to give the heating element its full 240V | The drum spins, the timer advances, the light works — and there is no heat at all |
| Both legs together (240V) | The heating element, at full power | Normal drying |
The motor does not know the second leg is gone. It turns happily on its own 120 volts, the blower blows room-temperature air over your clothes for a full cycle, and everything you can see from outside looks like a working dryer with a dead element. That is the trap: the most convincing “failed heating element” symptom in the whole fault list can be caused by a breaker that costs nothing to reset.
The two legs are protected by a double (two-pole) breaker, or by two fuses in older panels. One side can trip while the other stays on — and a half-tripped breaker handle can sit in a middle position that looks “on” at a glance. The fix is one deliberate motion: push the double breaker fully off first (this resets the tripped side), then back on, once. Then rerun the five-minute test.
- Heat returns and stays: the fault was the supply, not a part. Note it, and watch it — see the stop rule below.
- The breaker trips again, immediately or when heat is called for: stop. Do not keep resetting it. A breaker that re-trips is reporting a fault — a grounded element, damaged wiring or a circuit problem — and that is electrician territory. Trips spreading to other circuits are a wider house problem; circuit breaker keeps tripping works through that pattern safely.
- Breaker is firmly on and the drum still runs cold: the supply at the panel is doing its job. Move to the meter tests below.
One boundary on outlet testing: some guides send beginners to probe the live 240-volt outlet with a meter (240V between the two hot slots, about 120V from each hot slot to neutral). That is a live-voltage test on the most powerful ordinary outlet in the house. The breaker reset above gives you the same first answer with the power handled at the panel. If heat does not return after a correct reset, the unplugged part tests below are the safe next step — leave live outlet measurements to someone qualified.
Gas dryers do not have this trap. They plug into an ordinary 120-volt outlet for the motor and controls, and make heat from gas. Their equivalent supply check is the gas valve, covered in the gas section below.
How to read the meter: continuity logic for a beginner
Every remaining test in the electric chain uses one idea, and it is worth learning once, properly, because most guides use the words without explaining them.
Your multimeter’s continuity setting (usually marked with a sound-wave or diode symbol; on some meters it shares the lowest ohms setting) answers one question: can electricity get from one probe to the other through this part?
- Dryer unplugged. Always. Continuity tests are never done on a powered part.
- Pull at least one wire off the part before testing. Left connected, the meter can read a path through the rest of the circuit and lie to you. One wire off isolates the part.
- Touch one probe to each of the part’s two terminals. Then read the screen:
- Beeps, or shows near zero (0 to about 1 ohm): the path is CLOSED. Electricity flows through the part. For a fuse or a thermostat, closed is good — that is their normal state at room temperature.
- No beep, and the screen shows “OL”, “1” or infinity: the path is OPEN. Electricity cannot get through. For a fuse or thermostat, open at room temperature means the part has failed and is replaced.
- The heating element is the one exception to “near zero is good.” An element is a coil designed to resist the current — that resistance is what makes it glow. A good element therefore shows a finite resistance, neither zero nor OL — a typical reading is around 10 ohms, but the correct value is printed on your model’s technical sheet (usually tucked inside the cabinet or console), and the sheet wins over any general number. OL across the element means the coil is broken. Near zero, or any reading from a terminal to the metal housing, means it has shorted to ground — also a replacement.
Two errors in popular guides are worth correcting outright, because they send readers to the wrong part:
- A thermal fuse cannot “trip and then reset.” At least one widely read guide explains intermittent heat that way. It is physically wrong: a thermal fuse is a one-time device that opens permanently, as every manufacturer’s support page states. Heat that comes and goes is a thermostat cycling against a restriction, or a failing gas valve coil — never a self-resetting thermal fuse.
- “Zero resistance means the element is open” is backwards. One repair guide states exactly that. Open means no reading — OL. Zero across an element would mean a short. Swapping those two readings turns a good element into a condemned one and a shorted element into a passed one.
Test 1 — Thermal fuse: the small part that stops the most dryers
With the breaker proven, the thermal fuse is next — before the element, because it fails more often, sits in the same heat circuit, and takes thirty seconds to test once you are inside.
The thermal fuse is a one-time safety device, usually on the blower housing or exhaust duct, wired into the heat circuit. When the dryer overheats, it opens permanently and cuts power to the heater while the drum keeps turning. It cannot be reset, and it must never be bypassed — bypassing it removes the overheat protection from a machine full of lint. (On a minority of models the fuse is wired in series with the motor instead, so a blown fuse there means the drum will not turn at all; your model’s wiring diagram, on its technical sheet, tells you which design you have.)
The test, unplugged: open the panel your manual directs (back panel on many models, front or toe panel on others), find the small fuse with two wires, pull one wire off, and test continuity across its terminals. Beep / near zero = good, move on. OL = blown, replace it with the exact part for your model number — similar-looking fuses carry different temperature ratings and are not interchangeable.
Then the rule that matters more than the test: find out why it blew before you rely on the new one. A thermal fuse is evidence as much as a fault. It blew because the dryer overheated, and the usual cause is restricted airflow. Before the new fuse goes in, do the cause check — this is a short check, not a full drying-performance overhaul:
- Lint screen out, cleaned by hand; if dryer sheets have left it feeling waxy, wash it with warm water and a soft brush and dry it fully, as Whirlpool directs.
- Outside vent flap: with the dryer running a heated cycle, it should open to a strong, steady stream of air. Weak or pulsing air means the duct run is restricted.
- Duct behind the dryer: unplug, pull the machine out, and check the transition duct for kinks, crushing and packed lint at both ends. For the duct itself, GE Appliances recommends solid metal vent pipe, 4 inches in diameter, not white flexible plastic pipe, which collapses and traps lint.
The U.S. Consumer Product Safety Commission’s dryer guidance treats lint build-up in the filter, duct and exhaust as the appliance’s central fire hazard, which is why this check is not optional housekeeping. A second blown fuse after a thorough vent cleaning stops being a fuse problem — it points underneath, at the thermostats in Test 3.
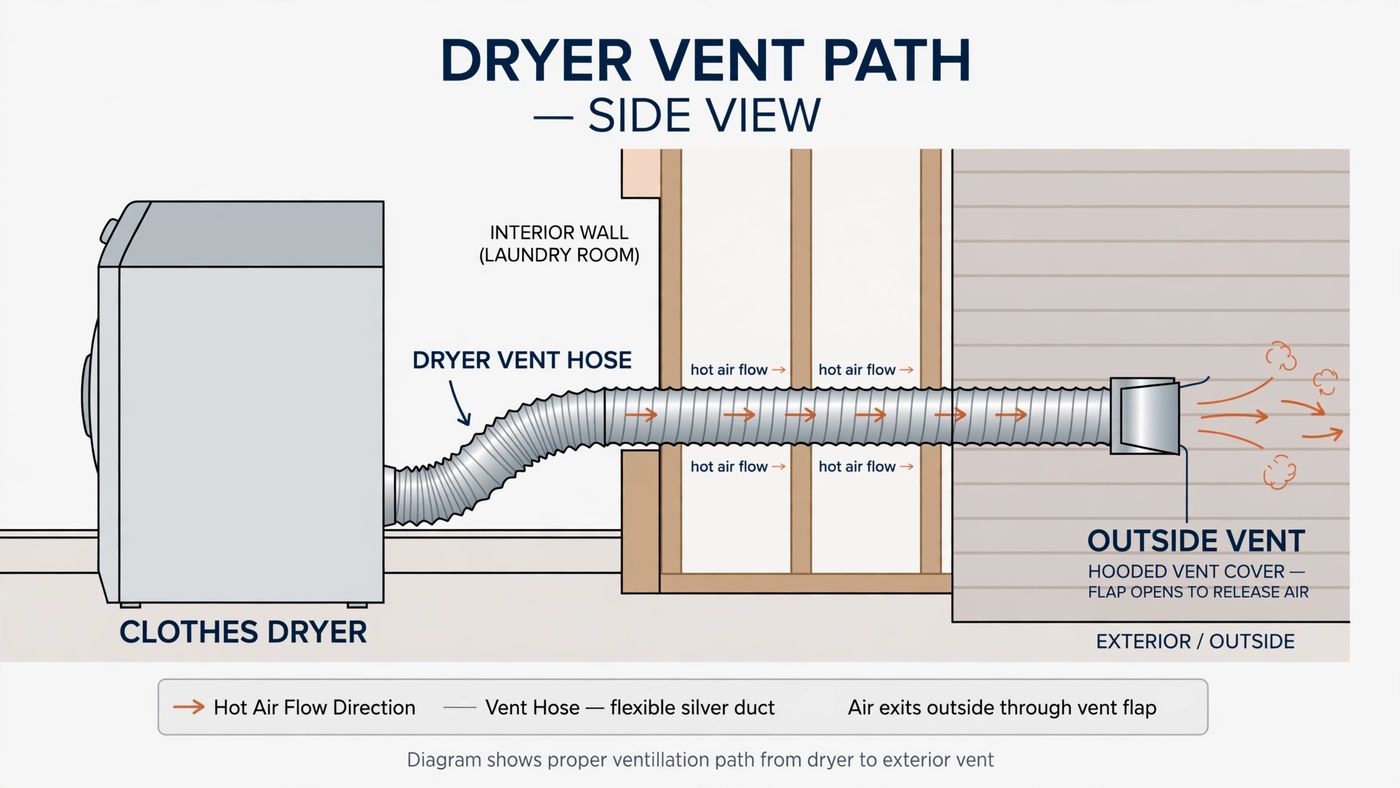
Error codes can save you the panel work here: LG’s error-code library defines d75, d80, d90 and d95 as an exhaust duct clogged 75%, 80%, 90% or 95% — treat those as “clear the airflow, then test the fuse.” Samsung’s error-code page ties its heating errors (HC, hE) to the same overheating root cause. A temperature-sensor code that survives a full vent cleaning (Samsung tS/tC family, LG tE1/tE3) names the thermistor — the temperature sensor — not the fuse, and that is a parts diagnosis, not a prompt to clean again.
Test 2 — Heating element (electric dryers)
The element is a coil of resistance wire in a metal housing, usually at the back of the cabinet. It is what actually makes the heat, and coils age, develop hot spots and eventually break — or sag onto the housing and ground out, which is one cause of the re-tripping breaker in the trap section above.
The test, unplugged: access the element as your manual directs, pull one lead off (both is cleaner), and test across its two terminals.
- Finite resistance — around 10 ohms typical, your model’s sheet decides: the coil is whole. The element is not your fault; move to Test 3.
- OL / no continuity: the coil is broken. Replace the element as a unit, by model number.
- Any continuity from either terminal to the metal housing: the coil is grounded. Replace it — a grounded element can heat uncontrollably or trip the breaker, and it is not a “use it carefully” part.
- Look while you are there: a visible break, a burnt-through spot or a loop sagging against the housing is the same verdict as the meter’s, with no test needed.
Resist the common shortcut of ordering the element first because it is the famous part. In the test order, the element is second, and a good element reading is valuable information: it clears the most expensive common part and sends you to a cheaper one.
Test 3 — Cycling thermostat (and its high-limit partner)
Two thermostats divide the temperature work, and they are tested the same way, in the same visit, because their failures imitate each other.
- The cycling thermostat switches the heat on and off throughout the cycle to hold the temperature you selected. It lives in the airflow path, on the blower housing or exhaust duct.
- The high-limit thermostat sits on the heater housing as the guard: it cuts the heat if temperature climbs past a safe ceiling, and in normal life it should operate rarely. Many models also carry a thermal cutoff beside it — another one-time device, commonly sold and replaced with the high-limit as a kit.
The test, unplugged, dryer cold: pull one wire off each thermostat in turn and test continuity across its terminals. At room temperature, a healthy cycling thermostat and a healthy high-limit both read closed — beep, near zero. Either one reading OL when cold has failed open and is replaced, by model number; ratings are printed on the part and are not interchangeable between similar-looking thermostats.
Reading the pattern matters as much as the single result:
- Cycling thermostat failed open, everything else good: the clean explanation for no heat with a good fuse and a good element. Replace it.
- High-limit or cutoff open: the dryer has been overheating. Replace the cutoff and high-limit as the kit your maker specifies, and go back to the airflow cause check in Test 1 — a guard that fired is reporting a condition, not just failing.
- Heat that works, then dies mid-cycle and returns next load (on an electric dryer) is usually not a dead thermostat but a working high-limit cycling against restricted airflow — the dryer overheating, protecting itself, cooling, and repeating. That pattern sends you to the vent, not to a parts order.
- All three tests good — fuse, element, both thermostats — and still no heat: the heat chain’s parts are proven, so what is missing is the call for heat. That is the control board’s heater relay on newer dryers or a timer contact on older ones, and it is diagnosed last, by elimination, precisely because it is the least common cause and the most expensive part on the list. Replacing a board on suspicion is how a fuse-priced problem becomes a board-priced one. This elimination logic is the same discipline as on an oven not heating, where the control is also convicted only after the element, sensor and fuse have each been tested.
Heat-pump and ventless dryers step out of this chain entirely: they have no element, no thermal fuse in this sense and no burner. Clean their filters and heat exchanger as the manual directs and leave sealed-system faults to a specialist.
Gas dryers: the same order, a different heat source
A gas dryer shares the settings check, the thermal fuse logic and the thermostats above — a blown thermal fuse cuts its heat too, and is tested exactly the same way, unplugged. What differs is the supply check and the heat-maker, and the safe boundary is tighter: you observe the burner; a technician services it.
- Supply first. The shutoff valve behind the dryer should sit with its handle parallel to the pipe (open); across the pipe is closed. GE’s gas dryer guide asks for the same first checks: a heated cycle selected, airflow unblocked, and the gas line turned on. If other gas appliances are also dead, the problem is the gas service, not the dryer.
- Watch the igniter through the observation port, if your model has one, on a heated timed cycle. The pattern names the part:
- The igniter never glows. Either the igniter itself has cracked or burned open, or power never reaches the burner because the thermal fuse has opened. Test the fuse (Test 1) yourself; the igniter is a technician’s test.
- The igniter glows, then goes out, and no flame lights. The classic signature of weak gas valve coils — they open the valve while the igniter is hot, and characteristically work cold and fail warm, which is also why a gas dryer may heat for the first few minutes of every cycle and then run cold. Coils are replaced as a set, by a technician.
- The igniter glows for a long time and nothing happens. That points to the flame sensor, which is responsible for telling the valve the igniter is hot enough.
- Write the pattern down. “Glows and goes out at about a minute, no flame, every cycle” is exactly what the technician needs, and it is the whole of your job on the gas side. The same glow-but-no-flame logic runs in the kitchen — a gas oven whose igniter glows without lighting is failing an equivalent test at its safety valve, worked through in oven not heating.
One contrast is worth holding onto: a microwave not heating also “runs but makes no heat,” but its heat chain sits beside a capacitor that can hold a lethal charge after unplugging, so none of its parts may be meter-tested at home. A dryer’s chain is the opposite case — every test above is done unplugged, on parts that hold no charge — which is why the dryer rewards this orderly testing and the microwave forbids it.
When to call a professional, and when to replace instead
Stop testing and call a technician if: you smell gas at any point; any gas-side part is the suspected fault; the breaker trips again after one correct full reset; you find scorched wiring, a melted plug or a damaged terminal block; a thermal fuse blows a second time after a complete vent cleaning; or fuse, element and thermostats all test good and there is still no call for heat (the control, diagnosed by elimination).
The replace decision is separate from the fault. A thermal fuse, a cycling thermostat, a cutoff kit or a heating element on an otherwise sound dryer is normally worth doing — they are the wear parts of the heat chain, and the tests above have already proven which one you need. Replacement makes more sense when the dryer is well into its second decade, the proven fault is a control board or a motor rather than a heat-chain part, the same fault was already repaired once, or other age faults are waiting behind it. As a working rule, a single repair costing more than about half the price of a comparable new dryer, on an already old machine, is money better put toward replacement — the same arithmetic that decides a dishwasher leaking at its pump seal. Either way, clear the vent before any new dryer is connected to it: a new machine on the old blocked duct inherits the overheating that opened the old one’s fuse.
Frequently asked questions
Why does my dryer run and tumble but not heat at all? Because the motor and the heat are on separate supplies and separate circuits. On an electric dryer, one lost leg of the 240-volt supply leaves the motor turning on 120 volts with nothing reaching the element — reset the double breaker fully off, then on, before testing anything. On either type, an opened thermal fuse or a thermostat failed open cuts the heat while the drum keeps tumbling.
What should I test first: the thermal fuse or the heating element? Neither — the breaker is first, because it is free and its symptom imitates a failed element exactly. Inside the cabinet, the thermal fuse is tested before the element: it fails more often, it is tested with the same continuity setting in less time, and a blown fuse also tells you the dryer overheated, which the element test cannot tell you.
My multimeter shows “OL” on the thermal fuse. What does that mean? OL means the meter found no path at all between its probes — the fuse is open, which for a thermal fuse means blown. Pull at least one wire off before testing so you are reading the fuse alone, replace it by exact model part, and clear the airflow cause first or the replacement opens the same way. A good fuse beeps, or reads near zero.
Can a thermal fuse reset itself, or can I reset it? No. It is a one-time device with no reset. Any guide that describes a thermal fuse tripping and resetting is describing a thermostat, or is simply wrong. A blown fuse is replaced — and never bypassed, because it is the overheat protection.
My dryer heats at first, then the clothes finish cold. Is that the same fault? Not usually. On a gas dryer, heat that dies a few minutes into every cycle is the classic pattern of weakening gas valve coils, which work cold and fail warm. On an electric dryer, heat that cuts in and out with a hot cabinet is usually the high-limit thermostat doing its job against a restricted vent. Both are different faults from a stone-cold no-heat, and both are diagnosed by the pattern sections above, not by replacing the fuse.
This article is general information, based on the manufacturer support pages and safety guidance linked above. Models differ in part locations, test values and access; your dryer’s manual and its technical sheet govern your machine. Gas repairs, live-voltage testing, and any fault involving scorch marks, melted wiring or a repeatedly tripping breaker belong to a qualified technician.