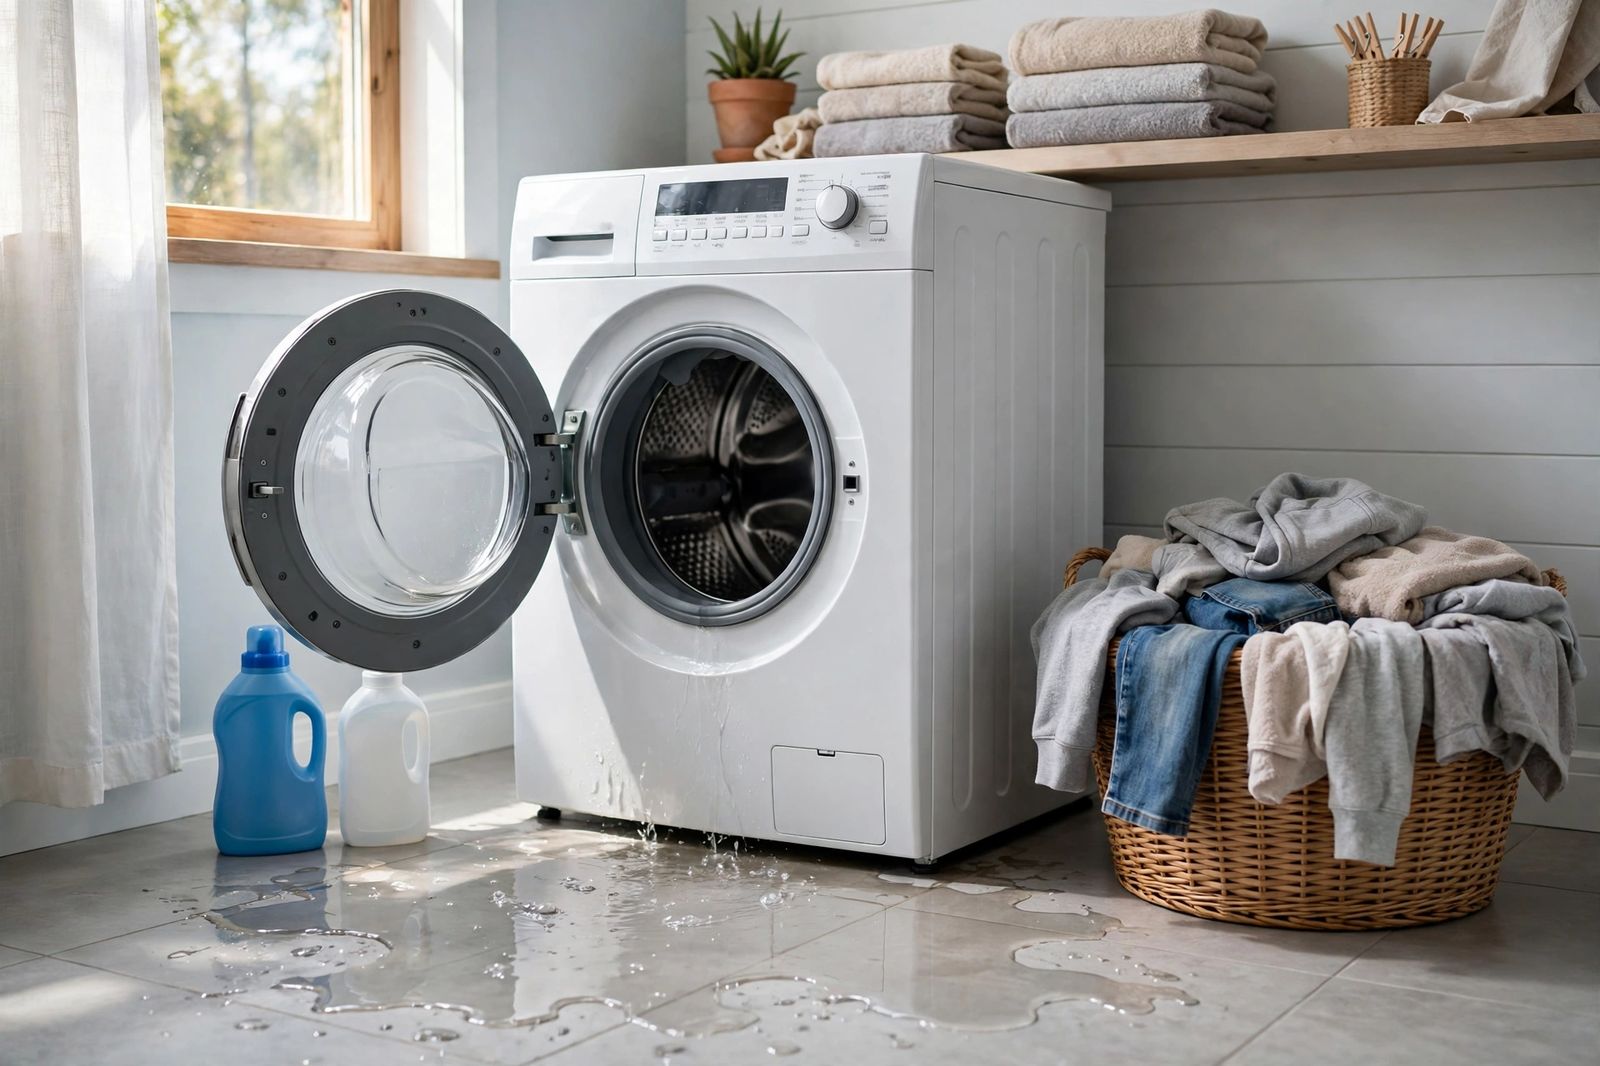
A washing machine leak is diagnosed by two facts together: where the water appears and when in the cycle it appears. Water at the front during the wash on a front-loader is the door boot or suds; water at the back during fill is the supply hoses, their washers or the inlet valve; water at the back during drain is the drain hose or a backing-up standpipe; water underneath during drain or spin is the pump, its filter or an internal hose; and water underneath in the middle, especially with noise on spin, is tub-seal territory. A drip that continues while the machine is off is supply-side, because the fill hoses and inlet valve sit under household pressure around the clock. Stop the water first — close both wall valves and unplug the machine — then use the map below to name the part before you buy anything.
Two safety rules govern everything below. Water and electricity share the floor: if water has reached the cord, the outlet or a power strip, do not touch the plug while standing in water — switch the circuit off at the breaker from a dry spot first. And do not run repeated test cycles on a leak you have not contained: a weak hose or cracked pump housing can go from a drip to a full tub of water in one cycle.
First, make it safe and dry
- Stop the cycle and unplug the washer. If the outlet is wet or unreachable, use the breaker instead.
- Close both supply valves — hot and cold — on the wall behind the machine. A leak that stops when the valves close is on the supply side; a leak that continues is water already in the machine or the house drain.
- Mop up and dry the floor completely. A dry floor is a diagnostic tool: the first new wet spot, and the moment it appears, is the evidence. Note where the old puddle sat before you wipe it — front, back, sides or centre — and whether the water was clean, dirty or soapy and slippery. Soapy, slippery water is a clue in itself (see the suds section below).
- Do not move a full machine. A washer holding water is far heavier than it looks and tilting it spills what is in the tub, hoses and pump. Drain first, move second, and move it only a few inches — enough to see the back.
The map: leak location × cycle stage
No single clue is enough on its own, because water runs along the base and cabinet before it reaches the floor — a back leak can present underneath, and a boot leak can present at the front corner. Cross the two axes. Find your row (where) and your column (when); the cell names the part, and the test beside it proves or clears it before any part is ordered.
| Where the water appears | Fill | Wash / agitate | Drain | Spin |
|---|---|---|---|---|
| Front, at the door (front-loaders) | Dispenser drawer overflowing — clogged drawer or jets backing fill water up. Test: pull the drawer, rinse it and the housing, rerun a fill and watch the drawer. | Door boot (gasket): debris, hair or a tear in the fold. Test: dry the boot, run a wash, watch the bottom of the door — Samsung notes even a single strand of hair or thread in the seal can cause a leak. | Pump filter cap at the bottom front: loose, cross-threaded or dirty seal after cleaning. Test: dry-and-watch restart (below) focused on the filter door. | Boot under load, or suds forced past the seal. Test: empty rinse with no detergent — suds appearing means residue, not a broken part. |
| Front, top / drawer area | Drawer or its housing choked with detergent and softener. Test: remove, wash and reseat the drawer; a fill that now stays dry confirms it. | Suds overflow from too much or non-HE detergent. Test: feel the puddle — slippery and soapy — then run an empty no-detergent cycle. | Rarely the drawer; recheck the filter cap row above. | Overloaded drum sloshing against the door. Test: rerun with a half load. |
| Back of the machine | Supply hoses, hose washers or inlet valve. Test: tissue test (below) on every coupling. | Uncommon — if the back is wet during wash with dry couplings, suspect an internal dispenser-to-tub hose; that is inside the cabinet. | Drain hose: split, loose clamp, slipped from the standpipe — or the standpipe itself backing up. Test: watch the standpipe while the pump runs; water rising out of the pipe is the house drain, not the washer. | Drain hose working loose under vibration, or standpipe overflow at full pump speed. Test: same standpipe watch, through a full drain. |
| Underneath, front half | Dispenser-to-tub hose inside the cabinet (pro opening if externals are dry). | Boot leak running down inside the front panel, or filter housing. Test: dry-and-watch with the filter area and door bottom both in view. | Drain pump, pump filter or tub-to-pump hose. Test: dry-and-watch restart; water first at the filter door clears the pump body, water first behind it indicts the pump or hose. | Pump or tub-to-pump hose under full drain pressure. Test: as for drain — spin and drain overlap on most cycles. |
| Underneath, centre | Internal hose — stop and book a technician if no external source shows. | Tub seal, or a split internal hose. Test: pattern only — water centred under the machine during wash, externals dry. Do not open the cabinet to confirm; this is the diagnosis. | Pump seal or tub-to-pump hose. Test: dry-and-watch; a centred puddle that starts exactly as the pump starts points to the pump circuit. | Tub seal / bearing. Test: the combination itself — centred water on spin plus a new rumble or grind — is the signature. Pro/replace territory (below). |
| Anywhere, machine off | Supply side under constant pressure: hose, washer, wall valve or inlet valve seeping. Test: close the wall valves — if the drip stops and the tub slowly fills when they are reopened, the inlet valve is passing; if the floor drip stops and the tub stays empty, the leak is a hose or coupling. | — | — | — |
The two confirming tests used across the map:
- Dry-and-watch restart. Dry the floor and the machine’s bottom edge, lay dry paper towels at the front, back and both sides, restore water and power, and run a short empty cycle with no laundry and no detergent while you stay in the room. Note which towel darkens first and at which stage — fill, wash, drain or spin. Stop the cycle as soon as you have the answer, then unplug and close the valves again before inspecting. Samsung’s own leak procedure ends the same way: run a test cycle such as Rinse & Spin after fixing a hose, gasket, drain-hose or filter problem, to see whether the leak continues.
- Tissue test on hose joints. Wrap a dry tissue or paper towel around each supply-hose coupling — at the wall and at the machine — open the valves and wait a minute. A damp tissue names that joint. Whirlpool’s leak check is the same discipline: both fill and drain hoses properly connected, and no damaged, loose or missing rubber washers.
If the empty test cycle produces no leak at all, the cause is load-related: too much laundry, too much or non-HE detergent, an unbalanced load, or clothing caught in the door. That result is a diagnosis, not a failure of the test.
1. Supply hoses, washers and the inlet valve — the back, during fill, or while off
GE Appliances Factory Service puts loose hose connections first: they are the most common cause of washer leaks, and a rear leak is found by moving the machine a few inches and hand-tightening every connection between the appliance and the supply pipes. The supply side is also the dangerous side, because it never depressurises: a split fill hose releases water at full pressure until someone closes the valve, whether or not a cycle is running.
Confirm it. Tissue test each coupling. A drip at a coupling with a tight nut is usually the rubber washer inside it — flattened, hard or split with age. Inspect the hose itself for bulges, kinks, cuts, cracks near the ends and crust or corrosion at the fittings; Samsung directs owners to inspect every hose and connection at both ends, including the o-rings inside the hose ends, and to replace damaged hoses and o-rings.
Fix it. Valves off, unscrew over a bucket, seat a fresh rubber washer in each coupling, thread on by hand (hot to hot, cold to cold), then snug about a quarter turn past hand-tight — overtightening cracks plastic inlet threads and damages washers. Replace a damaged hose rather than taping it, and replace both hoses together since they are the same age. Whirlpool’s washer manuals set the preventive interval plainly: replace inlet hoses after 5 years of use to reduce the risk of hose failure, inspect them periodically for bulges, kinks, cuts, wear or leaks, and write the replacement date on the hose. Braided stainless hoses are the usual upgrade, but they age too — the date rule still applies.
The inlet valve sits where the hoses meet the machine and holds back household pressure between cycles. A valve that no longer seals drips steadily with the machine off, or lets the tub fill slowly by itself. Cleaning grit from its inlet screens sometimes restores the seal; a valve that keeps passing water after that is replaced — on many models a technician job, because it is inside the cabinet with wired connections. Until it is fixed, keep the wall valves closed between washes. An overflowing machine that will not stop filling is the same family failing the other way: GE directs an overflowing washer to service for a water-valve or pressure-switch fault, with the power turned off in the meantime.
2. Door boot / gasket — the front, during wash (front-loaders)
The rubber boot seals the gap between the door and the drum, and it is the front-loader’s signature leak. Three different failures share the address:
- Debris in the fold. Hair, lint, coins, hairpins and detergent residue collect in the bottom fold and hold the seal open by a fraction — enough. LG’s front-load leak guide gives the same first check: foreign objects such as hair stuck between the door and the gasket cause the leak, and the gasket is cleaned before anything is condemned.
- Damage. Tears, punctures and perished rubber — zippers, underwires and trapped sharp objects are the usual authors, often in the bottom fold where water sits. Whirlpool’s rule is direct: wipe the seal, pull it back and check underneath, and a torn door seal needs replacement. Samsung likewise sends a damaged seal to service rather than to a sealant tube.
- A door that is not truly closed — clothing caught between door and seal, or an overloaded drum pushing against the glass. Samsung counts a leak only if it drips with the door closed; water that drips from the door after you open it at the end of a cycle is normal trapped water, not a leak.
Confirm it. Clean the whole circumference, dry it, and run a wash while watching the bottom of the door. Water that starts at the door bottom with a clean, undamaged boot and a properly closed door has cleared the boot — look next at suds (section 5) and the dispenser (section 3).
Care that prevents it. Wipe the folds dry after washes, leave the door ajar between loads, empty pockets before washing, and clean the boot as part of the monthly routine in how to clean a washing machine — that routine is what stops mould and trapped debris turning a seal that only needed wiping into one that tears. A boot that is mouldy or worn but not yet leaking is a cleaning problem; once it is split, it has stopped being one and has become this leak.
3. Detergent drawer and dispenser — the front top, during fill
Fill water passes through the drawer, so a drawer choked with congealed detergent and softener — or jets in its housing scaled and blocked — backs water up until it spills down the front of the machine during the fill. It looks like a door leak and is diagnosed as one until the timing is noticed: it starts with the fill, not the wash.
Confirm and fix. Pull the drawer out fully (most release with a tab), wash it and its inserts, clean the housing and the jets above it, and make sure the drawer is fully closed and, on auto-dispenser models, its cover sealed — Samsung lists an unsealed dispenser cover and a drawer not fully closed as leak causes, and directs a leak straight from the drawer to using less detergent and cleaning the drawer before requesting service. Pods belong in the drum, not the drawer, where they do not dissolve properly. If the drawer and housing are clean and the fill still spills, the blockage is in the dispenser-to-tub path inside the cabinet — a technician diagnosis.
4. Drain hose and standpipe — the back, during drain
Everything the pump pushes out travels one corrugated hose to the standpipe or laundry sink. A leak here is timed to the drain, and it splits into two sources that leave the same puddle:
- The hose itself: cracked or split folds, a loose or missing clamp at the pump end, or a hose that has slipped or been pushed out of the standpipe under pump pressure.
- The house drain: a slow or partly clogged standpipe that cannot take the pump’s flow, so water rises and spills over the rim. That is a plumbing problem wearing a washer costume — the washer, hose and pump can all be perfect.
Confirm it. Watch the standpipe through a drain. Water spilling from the pipe’s rim while the hose and its connections stay dry convicts the drain, not the machine. Samsung’s installation figures explain the other failure: the drain hose must sit 6 to 8 inches into the drain pipe, secured so it cannot slip further — less than 6 inches and it can fall out and empty a tub onto the floor; more than 8 inches, or an airtight connection, creates siphoning. Heights are model-specific (Samsung gives 18 to 96 inches for a standpipe run), so your manual’s figures govern your machine. A kinked, crushed or sharply bent hose causes leaks and drain faults on any brand; straighten the run rather than forcing it. The kitchen version of the same verdict — the appliance is fine and the house drain is not — is worked through in dishwasher not draining, where a slow kitchen sink is one of the first tests.
5. The false leak: suds and detergent overuse
Some puddles are not a failed part at all. High-efficiency washers use little water, so too much detergent — or ordinary non-HE detergent in an HE machine, even once — builds suds that push out of the door, the dispenser or the rear vent, then collapse back into soapy water on the floor. Samsung states it without qualification: using too much detergent or non-HE detergent can result in excessive suds, causing residue that contributes to leaks or leak errors, and LG’s leak guidance names the same mechanism, with foam escaping the rear vent and trickling down to form a puddle. GE’s version is the top-load one: a front leak on a top-loader is often oversudsing or overloading, both curable without a part.
Confirm it — this test comes before any part is bought. Feel the water: suds overflow is noticeably slippery and smells of detergent. Then run an empty cycle with no detergent added. If suds appear anyway, they are coming from residue already in the machine — keep running empty cycles until no suds show, as Samsung directs. A machine that leaks only with detergent, only on big loads, or only with one particular product has told you its answer.
Fix it. Use HE detergent in an HE machine, at or below the smaller of the drawer’s MAX line and the detergent maker’s dose for the load — Samsung’s ceiling is whichever of those two is reached first — and find the least amount that cleans, rather than the most the cap holds. The same location-first method applies across the kitchen: a dishwasher leaking is also read by where its water appears before any part is suspected — though check its door seal and spray arms, not a boot and standpipe.
6. Pump filter and drain pump — underneath the front, during drain
On most front-loaders, a debris (pump) filter sits behind a small door at the bottom front. It produces leaks two ways: clogged, it impedes draining until water finds another way out; and freshly cleaned, it leaks itself if the cap goes back cross-threaded, not fully tight, or with lint on its seal. LG’s front-load guide names exactly that second failure: if the drain filter is not properly installed after cleaning, water may leak down the machine — and the remedy is to close the residual-water hose stopper and the pump stopper tightly. Location and access vary by model — some machines have no user-accessible filter at all — so treat “bottom front” as the usual address, not a promise, and let your manual confirm it.
Confirm and clean it, in Samsung’s order. The filter is cleaned at least monthly or about every 40 washes on Samsung’s schedule. Machine off, towel and a shallow pan ready: open the panel, drain the tub’s remaining water through the small rubber drain hose first, then unscrew the filter counter-clockwise — skip the draining and that water comes through the filter hole onto the floor. Clean the filter with a soft brush, check the pump impeller visible inside the housing is clean and turns, then refit the filter clockwise until secured and recap and clip the drain hose. A leak that survives a clean filter, correctly seated, with a sound seal is no longer the filter: it is the pump behind it.
A washer that holds its water without leaking at all is the opposite fault from this one: the filter, hose and pump chain for that is worked in order in washer not draining. A washer that drains fully, stays dry, but will not spin is a third fault again, worked by machine type — lid switch, belt and coupling on a top-loader; drain, door lock and motor on a front-loader — in washing machine not spinning. The pump itself — a cracked housing or a worn seal — leaks during drain from just behind the filter area, and the tub-to-pump hose and its clamps leak with it. Both live inside the cabinet. Tightening a clamp you can reach through an access panel the manual describes is a homeowner check; replacing a pump is where most owners should hand over, and any leak that has reached wiring ends the DIY portion outright. The full filter routine, with the drain-first order, is part of how to clean a washing machine.
7. Tub seal and bearings — underneath the centre, during spin: stop here
The main tub seal keeps water in the outer tub where the drum shaft passes through it. When it fails, water escapes onto the bearings and out of the bottom of the machine, typically during spin, when pressure and speed are highest — and the bearings, now wet, begin to fail with it. That is why the combination matters more than either symptom alone: a centred leak on spin together with a new rumbling, roaring or grinding noise is the seal-and-bearing signature. Rust-coloured staining underneath is the third witness.
There is no confirming test beyond the pattern, and there should not be: confirming it directly means dismantling the machine. Replacing the seal and bearings means the drum comes out; on many modern machines the outer tub is sealed and is replaced as a complete unit, which is what turns this from the most expensive washer repair into a replacement discussion. Stop using the machine — every cycle runs more water through the bearings — close the supply valves, and get a quote before deciding. A refrigerator not cooling is judged by the same discipline in the kitchen: name the fault precisely first, because the cheap parts and the machine-ending parts share early symptoms.
When to call a professional, and when to replace instead
Call a technician — and stop opening panels — if water has reached wiring, the motor or the controls; if the breaker trips when the washer runs; if the leak is centred underneath on spin, or arrives with spin noise; if the tub fills by itself with the machine off and cleaning the inlet screens did not stop it; if a supply hose is bulging or spraying (valves closed, machine unused until it is replaced); or if the dry-and-watch test still leaves the source unfound after one full watched cycle.
The replace decision is separate from the leak’s size. Hoses, washers, a drawer clean, a filter reseat and a door boot on an otherwise sound machine are normally worth doing at almost any age — most leaks are in that family. Replacement makes more sense when the fault is the tub seal and bearings or a cracked outer tub, when the machine is well into its second decade, when the same machine has needed repeated repairs, or when other age faults wait behind this one. As a working rule, a single repair costing more than about half the price of a comparable new washer, on an already old machine, is money better put toward the replacement — and whatever you install, fit new supply hoses with it and date them, so the new machine does not inherit the old one’s most dangerous part.
Frequently asked questions
Why is my washing machine leaking from the bottom? Underneath is a destination, not a source — water runs down inside the cabinet before it reaches the floor. Timed to the drain, it is usually the pump, its filter or the tub-to-pump hose; centred and timed to the spin, with noise, it is the tub seal and bearings; timed to the fill, it is often a back leak from a supply hose that has run down the cabinet. The dry-and-watch test separates them.
Can I keep using a washing machine with a small leak? No. A small leak is a weak part under pressure or a seal already passing water, and either can become a tub’s worth of water in one cycle. Water near the motor, controls and outlet is also a shock hazard. Close the valves, unplug, and diagnose first.
Why does my washing machine leak only sometimes? Intermittent leaks are still patterned: only on large loads points to overload, suds or a boot stressed by the drum; only on hot washes, to a small split that opens with heat; only during spin, to vibration moving water to a weak drain connection — or to the tub seal. Note the programme, load and stage, and run the empty test cycle: no leak when empty confirms a load-related cause.
How often should washing machine hoses be replaced? Whirlpool’s manuals say to replace inlet hoses after 5 years of use, inspecting them periodically in between for bulges, kinks, cuts, wear or leaks, and sooner whenever any of those appear. Write the installation date on the hose so the age is never a guess.
Is it the washer or my plumbing? Three tells: a drip that continues with the machine off but stops when the wall valves close is the washer’s supply side; water spilling from the top of the standpipe while the machine’s own hose stays dry is the house drain; and water that appears when no laundry has run for days, with the valves closed, is neither the washer’s cycle nor its hoses — check the wall valves, nearby pipes and neighbouring appliances.
This article is general information, based on the manufacturer support pages linked above. Part locations, filter access, drain-hose depths and test procedures differ by model; your washer’s manual governs your machine. Leaks involving wiring, a repeatedly tripping breaker, or the tub seal and bearings belong to a qualified technician.