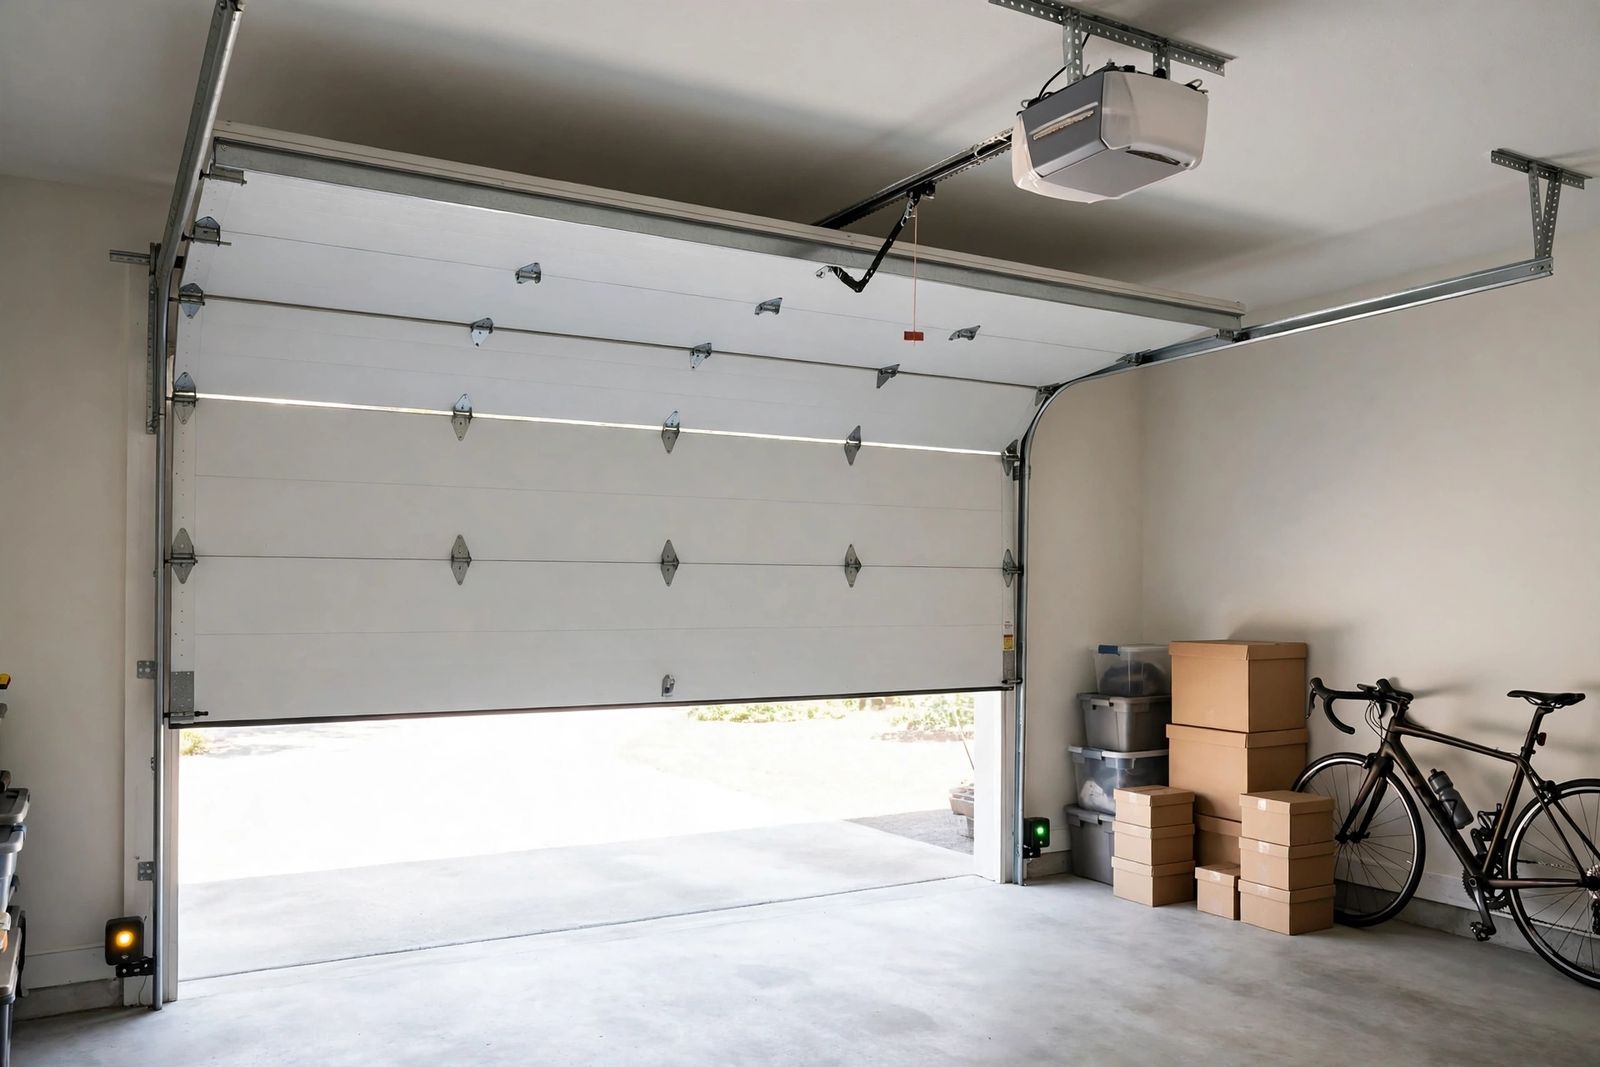
A garage door that will not close is, most of the time, being stopped by its own safety sensors: the two small photo eyes at the base of the tracks cannot confirm a clear, unbroken beam — because something is in the way, a lens is dirty, or the eyes have drifted out of alignment — so the opener refuses to run the door down, and on Chamberlain and LiftMaster openers it tells you so by flashing its lights 10 times. Clean both lenses, clear the doorway, and re-aim the eyes until both of their small LEDs glow steady and the door will usually close again. If both sensor lights are already steady, work down this page in order: the flashing-light codes by brand, the lock mode and remote checks, and the travel-limit setting that makes a door bounce back up off the floor. One rule before any of it: never touch the torsion spring — the wound spring above the door — or anything it is attached to. That warning comes first below, because it is the one part of this job that can seriously hurt you.
The safety line: never touch the torsion spring
Your door weighs far more than the opener lifts. A typical door runs 150 to 400 pounds, and nearly all of that weight is carried by the spring system — a torsion spring wound on a shaft above the door, or extension springs along the tracks. DASMA, the door industry’s own association, states the rule in its homeowner checklist: springs and spring hardware are under high tension and can cause serious injury or death; do not try to remove, repair or adjust springs or any parts they are fastened to — cables, brackets, drums — and if a spring is broken, do not operate the door until a trained door systems technician has replaced it.
So while you diagnose a door that will not close:
- Never unwind, adjust or loosen a torsion spring, and never loosen the bottom brackets, drums or any red-coloured fasteners — they are all connected to the spring under tension.
- Do look, without touching: a visible gap or break in the spring coil above the door, a frayed or snapped lift cable, or a door sitting crooked all mean stop here and call a technician.
- Do run every check in this article — sensors, codes, limits, remotes — because none of them involves the spring system.
If the door feels dead heavy when you lift it by hand, or slams down instead of gliding, the counterbalance has failed. Leave the door as it is and call a pro; running the opener against a broken spring also strips the opener’s drive gear, turning one repair bill into two.
Start with the symptom: what the door actually does
“Won’t close” covers several different faults, and the exact behaviour points at the right one. Find your row before you touch anything.
| What you see | Most likely cause | Go to |
|---|---|---|
| Door does not move; opener lights flash | Safety sensors blocked, misaligned or unpowered | The flash-code table, then the photo-eye test |
| Door moves an inch or two, then goes back up | Sensor wires shorted or reversed | The flash-code table (code 1-2) |
| Door starts down, then reverses partway | Beam broken mid-travel, or something binding in the track | Photo-eye test, then tracks |
| Door goes all the way down, touches the floor, then reverses | Close (down) travel limit set too far | Travel limits |
| Door stops short of the floor at the same height every time | Close limit set too short, or binding at that height | Travel limits, then tracks |
| Wall button works, remote and keypad do not | Lock / vacation mode on, or a dead remote battery | Lock mode and remotes |
| Motor runs, door does not move | Trolley disconnected (emergency release pulled) | Trolley |
| Door only fails at certain times of day | Sunlight flooding the receiving sensor | Photo-eye test, sun check |
| Nothing works from anywhere | No power to the opener | Power check |
Decode the flashing lights first — by brand
When an opener refuses to close, it usually says why — but each brand speaks a different language, and mixing the charts up is how people misdiagnose a wiring fault as a dead sensor. There are three separate signals to keep apart: the main opener lights flashing, the arrow-diagnostic codes on newer Chamberlain/LiftMaster units, and Genie’s sensor-housing LEDs. One widely repeated claim needs correcting up front, because it appears in otherwise good guides: on Chamberlain and LiftMaster openers, 10 flashes of the main lights mean the safety sensor beam is interrupted — not a stuck wall button. Chamberlain’s own manual for its openers states it directly: if an obstruction interrupts the sensor beam while the door is closing, the door reverses and the opener lights blink 10 times; if the door is fully open and the sensors are not installed or are misaligned, the door will not close from a remote at all. A second repeated error is treating those 10 flashes as a universal code for every brand — Genie openers do not use it; they report through the LEDs on the sensor housings themselves, in the third table below.
Chamberlain / LiftMaster: the main lights and the older diagnostic LED
On older and simpler units, count the flashes of the small diagnostic LED near the Learn button:
| Flashes | What it means | First check |
|---|---|---|
| 1 | Safety sensor wires open, broken or disconnected | Wire run and terminals at the opener head |
| 2 | Safety sensor wires shorted, or the wires reversed | Look for a staple or pinch through the wire; colours must match at both ends |
| 3 | Door control (wall button) wire shorted | Wall-button wiring |
| 4 | Safety sensors slightly misaligned (dim or flickering sensor LED) | Re-aim the sensors — the photo-eye test below |
| 5 | Motor overheated, or no RPM detected | Let it cool; if the door moves only a few inches, check for binding and door balance |
| 10 (main lights) | Sensor beam interrupted or sensors misaligned | Clear the beam, clean and re-aim the sensors |
Chamberlain / LiftMaster: UP and DOWN arrow codes (Security+ 2.0, yellow Learn button)
Newer units flash a two-part code on the UP and DOWN arrows beside the yellow Learn button: count the UP flashes, then the DOWN flashes — 1 flash up and 4 down is code 1-4, not “5 flashes”. The codes that matter for a door that will not close:
| Code (UP–DOWN) | What it means | What to do |
|---|---|---|
| 1-1 | Safety sensors blocked, misaligned, disconnected, or a sensor wire is broken | Clear the beam, clean the lenses, re-aim until both sensor LEDs are steady; check the wiring |
| 1-2 | Sensor wires reversed or shorted — the door often moves an inch or two and goes back up | Match wire colours at both ends (white to white, striped to striped); inspect for staple damage |
| 1-3 | Door control wires shorted | Check the wall-button wire run |
| 1-4 | Safety sensors misaligned or momentarily obstructed | Re-aim the sensors; clear anything crossing the beam |
| 1-5 | No RPM detected — door moves 6–8 inches, stops and reverses, or the opener just hums | Check whether the door is binding or out of balance by hand (door closed, release pulled); a heavy door is a spring problem — pro |
| 4-1 | Resistance while closing — door reverses or stops | Remove obstructions, check rollers and hinges; if it reverses at the floor, reprogram travel |
| 4-2 | Resistance while opening — door stops before fully open | Clear the path; run the balance check; do not adjust springs |
| 4-3 | RPM lost while closing — door stops and reverses just before the floor | Clear the tracks, check rollers and hinges; if it persists, the travel module needs a technician |
| 4-4 | RPM lost while opening | Balance check; look (do not touch) for a broken torsion spring |
| 4-6 | Safety sensors momentarily obstructed or misaligned | The most common code on this chart: run the photo-eye test below |
Codes vary by model and generation, and Chamberlain notes that some flash signals were retired on openers and logic boards made after February 3, 2022 — where your model’s manual gives a different meaning, the manual wins.
Genie: read the Safe-T-Beam LEDs on the sensors themselves
Genie calls its photo eyes the Safe-T-Beam system, and the diagnostics live at ankle height: the source sensor carries a red LED, the receiver a green LED. This table is the Genie Company’s own self-diagnostic chart:
| Source LED (red) | Receiver LED (green) | What Genie is reporting | What to do |
|---|---|---|---|
| On | On | Normal operation | Nothing — the fault is not the sensors |
| Off | Off | Powerhead not powered, or wiring from the powerhead is bad | Check breakers, fuses and plugs; check wiring for obvious shorts |
| Off | On | Wiring to the source missing or bad, or power was interrupted | Check the wiring; remove power and reapply |
| 2 blinks, pause, repeating | On | Beam not aligned, beam obstructed, or a sensor is defective | Check alignment and clear the obstruction |
| 2 blinks, pause, repeating | Off | Wire to the receiving sensor missing or bad, or that sensor is defective | Check the wiring |
| 3 blinks, pause, repeating | On | The sensor is receiving interference | Find the interference source — direct sun on the lens is the usual one |
| 4 blinks, pause, repeating | On | Source not sending pulses; source defective | Contact Genie customer service — this is a replacement, not an adjustment |
Note what this corrects: a Genie door that will not close is not diagnosed by counting ceiling-light flashes, and “both sensor lights off” on a Genie is a power or wiring fault, not an alignment problem. Some Genie models also carry red/green status LEDs on the powerhead itself for programming and limit faults — Genie’s own troubleshooting guide covers those alongside the limit, remote and vacation-lock causes below.
The photo-eye alignment test (the fix that solves most cases)
Federal rules have required photo-eye entrapment protection on residential openers made since January 1, 1993, and the opener is built to fail safe: if it cannot positively confirm an unbroken beam, it refuses to close. That is why a dead or misaligned sensor behaves exactly like a blocked one. Work the test in this order:
- Clear the beam line. Move anything crossing the opening — bins, bikes, a broom, a coiled hose, even a spider web on a lens. The beam is invisible and a sliver of anything breaks it.
- Read both LEDs. On Chamberlain and LiftMaster sensors, the sending eye glows amber and the receiving eye green; Chamberlain’s manual is explicit that the LEDs in both sensors must be glowing steady, which indicates they are powered and aligned correctly. On Genie, read the red/green pair against the chart above. One light off, dim or flickering is the diagnosis already: that side cannot see a clean beam.
- Wipe both lenses with a soft, dry cloth. Dust film and cobwebs scatter the beam; do not use solvent, which can haze the plastic.
- Re-aim. Loosen the wing nut on the flickering sensor’s bracket just enough to pivot it, aim it straight across at its partner, and watch its LED: when it goes solid and stays solid, hold it there and snug the nut back down. Chamberlain’s alignment instruction is exactly this — loosen the wing nuts, align the sensors so both LEDs glow steady, tighten. Check both sensors sit at the same height, no higher than 6 inches above the floor — that limit exists so a small child cannot crawl under the beam, which is why raising the sensors to stop false trips is never the fix.
- Test from the remote, not the wall button, so you are not accidentally using the constant-pressure override described below.
- If it only fails at one time of day, suspect the sun. Direct sunlight into the receiving eye washes out the infrared beam and the opener reads it as blocked — Chamberlain’s manual gives the remedy: if the receiving sensor is in direct sunlight, switch it with the sending sensor so it sits on the opposite side of the door. A hand shading the lens is the two-second test that proves it before you swap anything.
If both LEDs are steady and the beam is clear but the door still will not close, the sensors have cleared themselves — move on. If one LED will not light at all no matter how you aim it, that is power, wiring or a failed sensor, not alignment: follow the wire run looking for staple cuts and pinches (a classic — the wire is stapled along the wall and a staple through the insulation shorts it), and check the terminals at the opener head. Both lights dark on a Chamberlain/LiftMaster usually means damaged wiring; on a Genie, use the chart row above.
The hold-the-button test splits the problem in half. Stand at the wall control with the doorway in full view, press the button and keep holding it: on many Chamberlain and LiftMaster openers the door will close under constant pressure despite a sensor fault, because holding the button is the supervised override for exactly that situation. If the door closes only while you hold, the opener, motor and door are fine — the fault is in the sensor system, and the sections above are your whole job. If it still reverses while you hold, the fault is not the sensors: go to travel limits and the door itself. Two cautions: Chamberlain notes openers and logic boards made after February 3, 2022 no longer have this feature, and the override exists for diagnosis and emergencies — never tape the button down or live with it, because while it is held, nothing will stop the door on a child or a pet.
Travel limits: the door that bounces off the floor
Travel limits are the opener’s memory of where “fully open” and “fully closed” are. The close limit produces two opposite symptoms, and telling them apart saves a lot of random adjusting:
- Limit set too far: the door travels all the way down, touches the floor, and immediately reverses. The opener kept driving after the door had seated, felt the floor’s resistance, and read it as an obstruction. Genie’s own guide puts it the same way: limits set too high make the door view the floor as an obstruction and open again right after closing.
- Limit set too short: the door stops at the same height short of the floor every time, with no reversal drama and steady sensor lights.
Adjust only with your model’s manual in hand, because the method differs — older units use limit screws on the motor housing (turn the down screw in quarter-turn increments and test after each), newer Chamberlain/LiftMaster and Genie units set travel electronically with the arrow or program buttons in a learn routine. The discipline is the same on all of them: small increments, one change at a time, test between each, until the door seats fully on the floor without straining or reversing. Then run the safety tests at the end of this article before you trust it.
Do not reach for the force setting to fix a limit symptom. Force is the opener’s other safety system — how much resistance it will push through before reversing — and cranking it up to overpower a binding door or a failing spring defeats the protection and can injure someone. If the door has gradually become harder to close over months, lubricate the rollers and hinges with a garage-door lubricant first; friction creep is the usual story, and it is also why a thermostat that will not run the furnace and a door that will not close so often trace back to a setting drifted rather than a part failed.
Lock mode, remotes and the trolley: the not-really-a-close-problem problems
Lock / vacation mode. Many wall consoles have a Lock feature that disables remotes and keypads — set it for a holiday and it will convince you the opener has died. The signature is exact: the wall button closes the door, remotes and the outside keypad do nothing. Turn lock off at the wall console (on many panels, press and hold the Lock button for a few seconds until its indicator goes out) and test the remote again. Genie calls its version Sure-Lock, and Genie’s guide notes the same symptom and fix.
Remote battery and interference. A weak remote battery gives short range before it gives none, so “works up close, not from the driveway” is a battery until proven otherwise — Genie’s common remotes take a CR2032 coin cell (its GITR-3BX takes an A23). If a fresh battery does not restore range, check that the opener’s antenna wire hangs down freely, and consider radio interference: Genie warns that common LED and CFL bulbs — including the bulb in the opener itself — can emit interference that shrinks remote range, which is why garage-door-rated LED bulbs exist. A remote that lost its programming after a surge or a slow battery change is re-paired at the opener’s Learn button: a quick press, never a long hold — holding Learn erases every remote and keypad paired to the opener.
Disconnected trolley. If the motor runs its full cycle and the door does not move, the trolley has been disconnected — usually the red emergency release cord was pulled during a power cut and never re-engaged, or a tall load caught it. Re-engage with the door fully closed: pull the release cord toward the door until the lever clicks, then run the opener and the trolley will travel and latch onto the carriage. Only re-engage on a closed door — reconnecting a partly open door can let it drop as it latches. The same power check applies when nothing responds at all: plug a lamp into the opener’s outlet (Genie’s suggested test) — no light means the breaker, fuse or GFCI, and a circuit breaker that keeps tripping on that circuit is an electrical fault, not an opener fault. And if nothing responds from any control — no light, no click, no hum — the fault is no longer in the door at all but in the opener itself: our garage door opener not working guide takes over from there, splitting that fault by sound into silent, humming, and blinking, starting with the same outlet test.
The door itself: tracks, rollers and balance
Sometimes the opener is the messenger, not the problem. It cannot tell a child’s shoulder from a roller catching on a bent track — both are resistance, and both make it reverse, usually at the same point in the travel every time. Watch a close cycle and note where it stops; inspect both tracks at that height for dents, debris, a roller out of the track or brackets pulling away from the wall. Clear debris and tighten obviously loose brackets, but never hammer a bent track back into shape — weakened track is how a door leaves the rails later, and track replacement is a technician’s job.
The balance check tells you whether the door’s counterbalance is still carrying its weight. With the door fully closed, pull the emergency release and lift the door by hand to about waist height, then let go carefully. A balanced door stays roughly where you leave it and feels light — around ten pounds of effort. A door that is brutally heavy, slams down, or shoots up has a spring problem: stop, leave it closed, and call a technician — and re-read the safety line at the top, because this is the torsion spring’s territory and none of it is a home repair. A door that will not stay shut for the opposite reason — drifting back up — is the same system out of balance the other way.
Retest before you trust it
After any fix or adjustment, run both of DASMA’s monthly safety tests — the same pair recommended in our garage door cable guide:
- Photo-eye test. Start the door closing, then pass an object through the beam. The door must reverse and return to fully open.
- Contact reversal test. Lay a 2x4 flat on the floor in the centre of the doorway — 1½ inches tall — and close the door onto it. Federal rules require the opener to reverse within 2 seconds of contact.
If either test fails, do not use the opener until it is serviced. A door that closes but no longer reverses is worse than a door that will not close at all — the same class of quiet failure as a smoke detector that keeps beeping being silenced instead of fixed.
When to stop and call a professional
- A broken spring (gap in the coil), a frayed or loose cable, or a crooked door — the safety line at the top of this article.
- The door is heavy, slams, or will not stay put in the balance check.
- Bent tracks, a roller out of its track, or grinding and banging from the opener.
- Sensor LEDs that stay dark after the wiring checks, a code that points at the logic board (2-x arrow codes), or a door that still will not close after sensors, limits and power are all cleared.
- Anything where you would have to touch the spring system to proceed.
Frequently asked questions
Why does my garage door close and then open back up? Two different faults share this symptom. If it reverses partway down, the sensor beam is breaking mid-travel or the door is binding in the track. If it reverses only after touching the floor, the close travel limit is set too far — the opener drives into the floor, reads it as an obstruction, and reverses. The fix for each is in its own section above.
My opener light blinks 10 times and the door won’t close. What does that mean? On Chamberlain and LiftMaster openers, 10 flashes of the main lights mean the safety sensor beam is interrupted — something in the doorway, a dirty lens, misaligned eyes, or a sensor that has lost power. Run the photo-eye test above. Genie openers do not use this signal; read the red and green LEDs on the Safe-T-Beam housings instead.
Why will my garage door only close when I hold the wall button down? Because holding the button is the constant-pressure override that bypasses the safety sensors. It proves the motor and door are fine and the sensor system is not — misaligned, dirty, unpowered or failed. Use it to diagnose and to get the door shut once, with the doorway in view; then fix the sensors. Openers and logic boards made after February 3, 2022 may not have this feature at all.
Can sunlight really stop a garage door from closing? Yes. Low, direct sun into the receiving sensor washes out the infrared beam, and the opener reads a blocked path. It is why a door can fail only in the late afternoon and behave again after sunset. Shade the receiving eye with your hand and retry — if it closes, Chamberlain’s manual remedy is to swap the sending and receiving sensors side for side so the receiver faces away from the sun.
How high should garage door safety sensors be? No higher than 6 inches above the floor, and Chamberlain’s installation guidance puts them at 4 to 6 inches — low enough that a small child cannot crawl under the beam. Both sensors at the same height, facing each other directly.
Can I disconnect the safety sensors to get the door down? No. Photo-eye protection has been required on residential openers made since 1993, openers built to the UL 325 standard will not run normally without the sensors reporting properly, and the sensors are the system that stops the door on a child or a pet. A failed sensor pair is a small, cheap replacement — bypassing them is neither legal nor safe.
This article is general information based on the manufacturer and industry sources linked above — Chamberlain’s opener manuals, the Genie Company’s official Safe-T-Beam diagnostic chart and troubleshooting guide, and DASMA’s homeowner checklist — checked in November 2026. Flash codes and procedures vary by model; where your opener’s manual gives a different meaning or method, the manual is right. Never adjust or remove a torsion spring or any part under spring tension: that work belongs to a trained door systems technician.