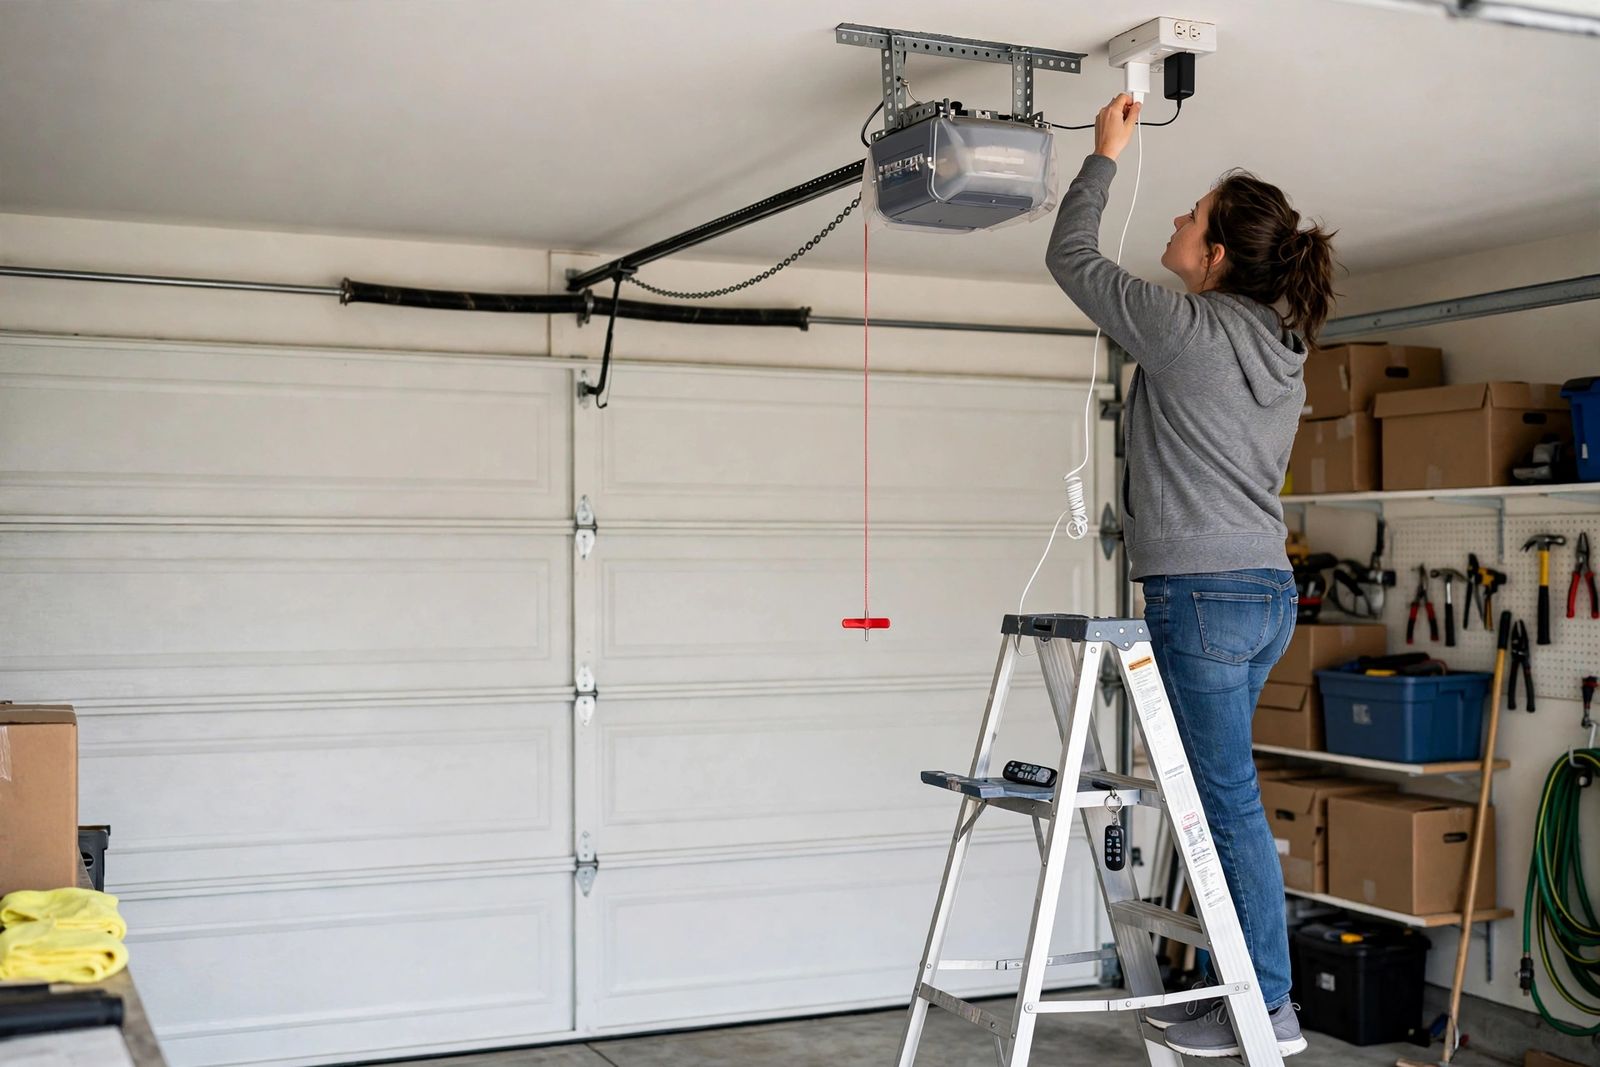
A garage door opener that does nothing when you press the button is usually not a dead motor: the most common causes are no power at the ceiling outlet, a remote or keypad that has lost its battery or its pairing, lock mode switched on at the wall control, or — if the motor hums — a door the opener can no longer lift because a spring has failed. Start with the power test, because it takes thirty seconds and rules out the whole electrical side at once: unplug nothing, just plug a lamp or a phone charger into the same ceiling outlet the opener uses. If the lamp stays dark, your opener is fine and the fault is the outlet, its GFCI or the breaker. If the outlet is live, diagnose by sound using the three-shape table below — completely silent, humming but not moving, or lights blinking and clicks only — and work that row’s checks in order. One boundary before you start: this article is about the opener — the motor unit on the ceiling — failing to run at all. If your opener runs and the door starts down but reverses or refuses to close, that is a different fault in the door and its safety sensors, covered in our guide to a garage door not closing; the two problems share parts but not causes, and mixing them up is how people replace a healthy opener.
The safety line: never touch the torsion spring
The opener does not lift your door by itself. A typical door runs 150 to 400 pounds, and nearly all of that weight is carried by the spring system — a torsion spring wound on a shaft above the door, or extension springs along the tracks. DASMA, the door industry’s own association, states the rule in its homeowner checklist: springs and spring hardware are under high tension and can cause serious injury or death; do not try to remove, repair or adjust springs or any parts they are fastened to — cables, brackets, drums — and if a spring is broken, do not operate the door until a trained door systems technician has replaced it.
That rule matters more on this page than on most, because a failed spring is one of the main reasons an opener “stops working”: the motor hums, strains, and gives up against a door that suddenly weighs its full weight. So while you diagnose:
- Never unwind, adjust or loosen a torsion spring, and never loosen the bottom brackets, drums, lift cables or any red-coloured fasteners — they are all connected to the spring under tension. One widely read guide tells readers to check the suspension cables and “replace them if one has snapped”; do not follow that. A snapped cable is part of the spring system, and replacing it is a technician’s job, not a Saturday fix.
- Do look, without touching: a visible gap in the spring coil above the door, a frayed or hanging cable, or a door sitting crooked all mean stop here and call a technician.
- Do run every electrical and control check in this article — outlet, remotes, lock mode, codes — because none of them involves the spring system.
If the door feels dead heavy when you lift it by hand with the release pulled, or slams down instead of gliding, the counterbalance has failed. Leave the door closed and call a pro; running the opener against a broken spring also strips the opener’s drive gear, turning one repair bill into two.
The three-shape diagnosis: start here
Press the wall button once and watch and listen. Every “opener not working” call falls into one of three shapes, and the shape tells you which checks to run — in this order. Do the outlet test first whatever shape you have: plug a lamp or phone charger into the opener’s ceiling outlet. No light and no charge means no power, and nothing else on this page applies until power is back.
| What the opener does | What it is telling you | Checks, in order |
|---|---|---|
| Completely silent — no light, no click, no hum, from remote and wall button alike | No power is reaching the unit, or the logic board has failed — the opener never received, or never survived, the command | 1. Outlet test (lamp or phone charger in the ceiling outlet). 2. GFCI reset — garage ceiling outlets are often fed by a GFCI in the garage, a bathroom or outside. 3. Breaker for the garage circuit: switch fully off, then on. 4. The plug itself — vibration works plugs loose; reseat it. 5. Unplug the opener for 60 seconds and plug it back in to reset the logic board. 6. If the outlet is proven live and the unit is still dark, the board or internal power supply has failed — a technician, or replacement if the unit is old |
| Hums, buzzes or strains, but the door does not move (or moves a few inches and stops) | Power is reaching the motor and the motor is trying — something mechanical is stopping it, or the motor cannot start. Stop pressing the button: a stalled motor overheats in seconds | 1. Stop cycling it. 2. Look up at the spring above the door for a visible gap in the coil — a broken spring is the first cause on Chamberlain’s own hum list (look, never touch). 3. Check the door’s own manual slide lock — if it is thrown, the opener is pulling against a locked door. 4. Check the trolley is not jammed against the stop bolt at the motor end of the rail. 5. If the opener was run repeatedly just before it quit, wait: motor protectors trip on heat — Wayne Dalton’s manual says allow about 20 minutes to cool and try again. 6. None of the above: a failed start capacitor, a stripped drive gear, motor or board damage — a technician |
| Light blinks, or you hear clicks only | The electronics are alive: the command arrived and the board responded. A repeating blink pattern is a diagnostic code, and a single click with no motor is the board’s relay closing while the motor never starts | 1. Count the blinks — on Chamberlain and LiftMaster units, 10 flashes of the main lights when you try to close mean the safety-sensor beam is interrupted; arrow codes beside the Learn button are counted as an UP number then a DOWN number, never added together. 2. Read both sensor LEDs at ankle height: both steady means the sensors are happy; one dark, dim or flickering is your fault. 3. A single click, then silence, with no blink code: the relay fired and the motor did not answer — the start capacitor is the usual suspect, a technician’s part to test because it can hold a charge after unplugging. 4. A click and a brief motor spin with no door movement is not this row — that is the trolley or gear row in the next sections |
Two splits inside the table save most of the guesswork. Wall button works, remote does not is never a motor problem — the opener has just proved it can run; the fault is in the remote, its battery, its pairing, or lock mode, and that whole branch is covered below. And opens fine but will not close is not an opener failure at all: the safety sensors only ever block closing, never opening. That second point corrects a claim in a widely read guide, which says a dirty photo eye “can keep the door from moving in either direction”. It cannot. If your door will not open, cleaning the sensors will not help you — stay on this page. If it opens but will not close, go to the not-closing guide, where the sensor tests and the by-brand flash codes live in full.
Shape 1 — completely silent: the power chain
Work the chain from the wall outward, because each step is free and each one eliminates a whole layer.
The outlet test comes first, always. Plug a lamp or a phone charger into the ceiling outlet. This is the test the manufacturers themselves prescribe — Chamberlain’s manual troubleshooting for “opener doesn’t operate from either door control or remote” begins “Does the opener have electric power? Plug lamp into outlet. If it doesn’t light, check the fuse box or the circuit breaker”, and notes that some outlets are controlled by a wall switch. Genie’s guide suggests the same lamp test. A dark lamp ends the diagnosis: the opener is not the problem.
Then the GFCI, then the breaker. Garage ceiling outlets are very often on a GFCI-protected circuit, and the GFCI that feeds them may be in the garage, a bathroom, or an exterior receptacle — a tripped one kills the ceiling outlet while every light in the garage still works, which is why this fools people. Press its reset button. Then the breaker panel: find the garage breaker, switch it fully off, then back on; a tripped breaker often sits halfway and looks on.
Then the plug and the reset. Vibration works an opener’s plug part-way out over months; reseat it firmly. If power is reaching the unit but it stays dark or unresponsive, unplug it for 60 seconds and plug it back in — that power-cycles the logic board and clears a surprising number of dead-opener cases after a surge or outage.
Then heat. If the opener died right after being run many times in a row — moving day, kids playing with the remote, repeated testing — the motor’s thermal protector may simply be open. Wayne Dalton’s manual for its drives lists “motor protector trips open due to excessive use” as a cause of a completely unresponsive opener and gives the fix: allow the motor to cool for about 20 minutes and try again. Chamberlain units signal the same event differently — five flashes point to an overheated motor or no RPM detected — which is why the blink row and the silent row can be the same fault an hour apart.
Only after the outlet is proven live, the GFCI and breaker are reset, and the unit has had its 60-second reset and its cool-down is a dark, silent opener an opener fault: a failed logic board or internal power supply, most often after a power surge. That is board-level work. On a unit that is also old, worn or missing modern safety features, price a replacement before paying for a board — see the repair-or-replace section below.
The remote branch: wall button works, remote and keypad do not
If the wall button runs the door, stop troubleshooting the opener — it has power, a working motor and a working board. The fault is in the signal path, and it has four causes, in this order:
- Lock (vacation) mode. Many wall consoles have a Lock feature that disables every remote and keypad while leaving the wall button working — set it before a holiday and it will convince you the opener has died. The signature is exact: all remotes and the keypad stop at once, the wall button works. Turn lock off at the wall console (on many panels, press and hold the Lock button for a few seconds until its indicator goes out) and test again. Genie calls its version Sure-Lock.
- The remote battery. A weak battery loses range before it loses everything, so “works up close, not from the driveway” is a battery until proven otherwise. Most current remotes and keypads use a CR2032 coin cell; some older remotes take an A23 — match what is in yours. Clean the contacts while you are in there.
- Lost pairing. A remote can lose its programming after a surge or a slow battery change. Re-pair at the opener’s Learn button: tap it once — never hold it — then press the remote button within about 30 seconds, until the opener light blinks or you hear clicks. The distinction matters: holding the Learn button for roughly six seconds until its LED goes out does the opposite and erases every remote and keypad paired to the opener. That erase is exactly what you want when you move into a new house, and a nasty surprise when you do it by accident. The Learn button’s colour (yellow, purple, red/orange, green on Chamberlain and LiftMaster units) identifies the opener’s radio generation, which decides which remotes can pair with it at all — check the colour before buying a replacement remote.
- Range and interference. If a fresh battery pairs but range is still poor, let the opener’s antenna wire hang down freely, and suspect the bulb: Genie warns that common LED and CFL bulbs — including the bulb screwed into the opener itself — can emit radio interference that shrinks remote range, which is why garage-door-rated LED bulbs exist. Swap the opener’s bulb for a rated one and retest from the driveway.
A keypad that fails alone follows the same branch: its own battery first, then re-pairing with the same Learn-button sequence, then lock mode.
Shape 2 — hums but does not move: the motor is trying, something is stopping it
A hum is information: the board sent power and the motor could not turn. Do not keep pressing the button to “help” it — a stalled motor converts the current into heat at the windings, and repeated attempts are how a fixable fault becomes a burnt-out motor.
Chamberlain’s own troubleshooting for this symptom on its chain- and belt-drive openers lists seven causes, and the order in this section follows it, cheapest and safest first:
- A broken spring. First on Chamberlain’s list, and the one to rule out before anything else. Look — without touching anything — at the spring above the door for a visible gap in the coil. If you see one, you are done: do not run the opener again, leave the door closed, and call a technician. The full safety rule is at the top of this article.
- The door’s manual lock is thrown. A slide lock or latch on the door itself, engaged by hand, holds the door shut while the opener pulls. Chamberlain lists it second for a hum on a new installation, and it is a ten-second check.
- The trolley is against the stop bolt. If the trolley has run up and jammed against the stop bolt or tab at the motor end of the rail, the motor strains against its own rail. This one usually follows someone running the opener with the door disconnected.
- The door is not connected to the opener. If the emergency release was pulled, Chamberlain’s re-engage instruction is simply to run the opener: the trolley travels and latches back onto the carriage on its own — the release handle is for disconnecting, and you do not force it back by hand. Re-engage only with the door fully closed; reconnecting a partly open door can let it drop as it latches. Note the different sound here: a disconnected trolley gives a motor that spins freely and a rail that cycles with no door movement, which is a harmless fix — while a straining hum with nothing moving is the jammed or overloaded motor above. Telling those two sounds apart is the whole diagnosis.
- A stripped drive gear. The other “motor runs, door doesn’t” cause: on chain- and belt-drive units the main drive gear is plastic and wears smooth over years, so the motor spins and nothing engages. White plastic shavings in or under the motor housing are the tell. A gear kit is a real repair, but it is internal work — most homeowners hand it to a technician.
- A failed start capacitor. The capacitor gives the motor its starting kick; when it fails, the motor hums and never starts turning. It sits inside the housing and can hold a charge after the opener is unplugged, so testing and swapping it is not a casual DIY step — a technician tests it with a meter against the value your model specifies.
- Motor or logic board damage. What is left when the six above are cleared. Combined with the opener’s age, this is usually the replacement conversation, below.
Wayne Dalton adds one more hum-adjacent cause worth knowing: insufficient opening force shows up as a door that will not open with the opener light flashing — a different signature from a plain hum, and one more reason to read the lights as well as listen.
Shape 3 — blinks and clicks: read the code before you replace anything
An opener that blinks at you is not broken in an expensive way by default — it is reporting. Three signals get confused constantly, so keep them apart:
- The main lights flashing 10 times (Chamberlain and LiftMaster, when you try to close) mean the safety-sensor beam is interrupted. That is a closing fault with its own full decoder in our garage door not closing guide — including why one popular blink chart that labels those 10 flashes a “stuck wall button” is wrong against Chamberlain’s own manual.
- The UP and DOWN arrow codes beside the yellow Learn button on newer Chamberlain and LiftMaster units are two numbers, counted separately: flashes up, then flashes down. For a dead opener the codes that matter are 1-5 — no RPM detected, the opener hums or clicks and the door moves less than 6 to 8 inches or not at all, which sends you back to the hum section above — and the 2-x family, which is logic-board component failure: Chamberlain’s instruction is to unplug the opener (and its battery backup) for 5 seconds and retest; if the code returns, the board may need replacing.
- A single click, then nothing is not a code at all. It is the board’s relay closing — proof the command arrived, the safety checks passed, and power was sent to a motor that never started. That points back to the start capacitor and the stalled-motor checks, not to sensors, remotes or codes.
One more correction while you are counting flashes: some third-party guides collapse all of this into a single “1 to 6 blinks” list for the main light — transmitter issue, wiring fault, and so on. Chamberlain’s systems do not work that way. The 1-to-5 flash list belongs to the small diagnostic LED on older units (1 = sensor wires open or disconnected, 2 = sensor wires shorted or reversed, 3 = door-control wire shorted, 4 = sensors slightly misaligned, 5 = motor overheated or no RPM), the 10-flash signal belongs to the main lights, and the two-number codes belong to the arrows. Reading the wrong chart for your signal is how a wiring fault gets misdiagnosed as a dead board. Where your model’s manual gives a meaning, the manual wins — codes vary by model and generation, and Chamberlain notes some signals were retired on openers and logic boards made after February 3, 2022.
Retest before you trust it
After any fix, run both of DASMA’s monthly safety tests — the same pair recommended in our garage door cable guide:
- Photo-eye test. Start the door closing, then pass an object through the beam. The door must reverse and return to fully open.
- Contact reversal test. Lay a 2x4 flat on the floor in the centre of the doorway — 1½ inches tall — and close the door onto it. Federal rules require the opener to reverse within 2 seconds of contact.
If either test fails, do not use the opener until it is serviced. An opener that runs again but no longer reverses is worse than one that would not run at all — the same class of quiet failure as a circuit breaker that keeps tripping being reset without anyone asking why.
Repair or replace?
Neither LiftMaster nor Chamberlain publishes an expected service life, so any source that gives you an official lifespan number is inventing it; what repair shops report from the field is roughly 10 to 15 years on a standard door, less on an unusually heavy door or one whose springs are out of balance. The practical split:
- Repair when the fault is a single cheap part on an otherwise healthy unit: a remote, a sensor pair, a capacitor, a drive gear.
- Replace when an older unit needs a logic board or a motor — part, labour and waiting time together come to most of the price of a new opener, and you still own an old machine with no fresh warranty. Replace outright if the unit predates photo-eye sensors (required on residential openers made since January 1, 1993) or uses fixed-code remotes.
- Fix the door first either way. An opener straining against a binding door or a failing spring will burn out its replacement too — and if the door itself is the heavy, slamming kind, that is the cable and spring side of the system, which is professional work.
When to stop and call a professional
- A broken spring (gap in the coil), a frayed or snapped cable, or a crooked door — the safety line at the top of this article.
- The door is heavy, slams, or will not stay put when lifted by hand with the release pulled.
- A hum that survives the spring, lock and trolley checks — capacitor, gear, motor and board territory.
- Burning smell, scorch marks, or an opener that trips its breaker.
- A 2-x arrow code that returns after the unplug-and-retest step.
- An opener that is still completely dark after the outlet has been proven live with a lamp or charger.
Frequently asked questions
Why is my garage door opener completely dead — no lights, no sound? Work the power chain in order: the ceiling outlet itself (plug in a lamp or phone charger), the GFCI that may feed it, the breaker, and the plug worked loose by vibration. Then give the unit a 60-second unplug to reset its board, and — if it died after heavy repeated use — 20 minutes to cool, because its motor protector may be open. A unit that is still dark with a proven-live outlet has a failed board or power supply.
My garage door opener hums but the door won’t move. What is wrong? The motor has power and cannot turn. Chamberlain’s own list for this symptom is: broken spring, the door’s manual lock engaged, the trolley jammed on its stop bolt, the door disconnected from the opener, a failed start capacitor, motor damage, or a failed logic board. Check the spring by looking for a gap in the coil (never touch it), check the slide lock, and stop cycling the opener — a stalled motor overheats fast.
The wall button works but my remote stopped working. Is the opener broken? No — the opener has just proved it works. Check lock (vacation) mode on the wall console first if every remote and the keypad stopped at once, then the remote’s battery (usually a CR2032), then re-pair the remote at the Learn button with a quick tap — holding that button for about six seconds erases all remotes instead.
Why did my opener stop working after a power outage? Outages and surges trip GFCIs and breakers, scramble logic boards, and can erase remote pairing. Reset the GFCI and breaker, power-cycle the opener for 60 seconds, and re-pair the remotes. If the unit stays dark with a live outlet, the surge likely took the board.
What is the difference between an opener that won’t work and a door that won’t close? Different faults in different halves of the system. An opener that will not work does not run at all — power, controls, motor (this article). A door that will not close has a running opener that refuses to lower the door — almost always the safety sensors or travel limits, covered in our garage door not closing guide. The quickest tell: sensors can only block closing, never opening.
How long do garage door openers last? No manufacturer publishes a service-life figure. Repair shops report roughly 10 to 15 years on a standard door as field experience, with heavy doors and tired springs shortening it — which is why an old unit needing a board or motor is usually a replacement, while a young unit needing a remote or a gear is a repair.
This article is general information based on the manufacturer and industry sources linked and cited above — Chamberlain’s opener manuals and the Chamberlain Group diagnostic-code reference, Wayne Dalton’s official troubleshooting page and ProDrive manual, the Genie Company’s guidance, and DASMA’s homeowner checklist — checked in November 2026. Codes and procedures vary by model; where your opener’s manual gives a different meaning or method, the manual is right. Never adjust or remove a torsion spring, a lift cable, or any part under spring tension: that work belongs to a trained door systems technician.