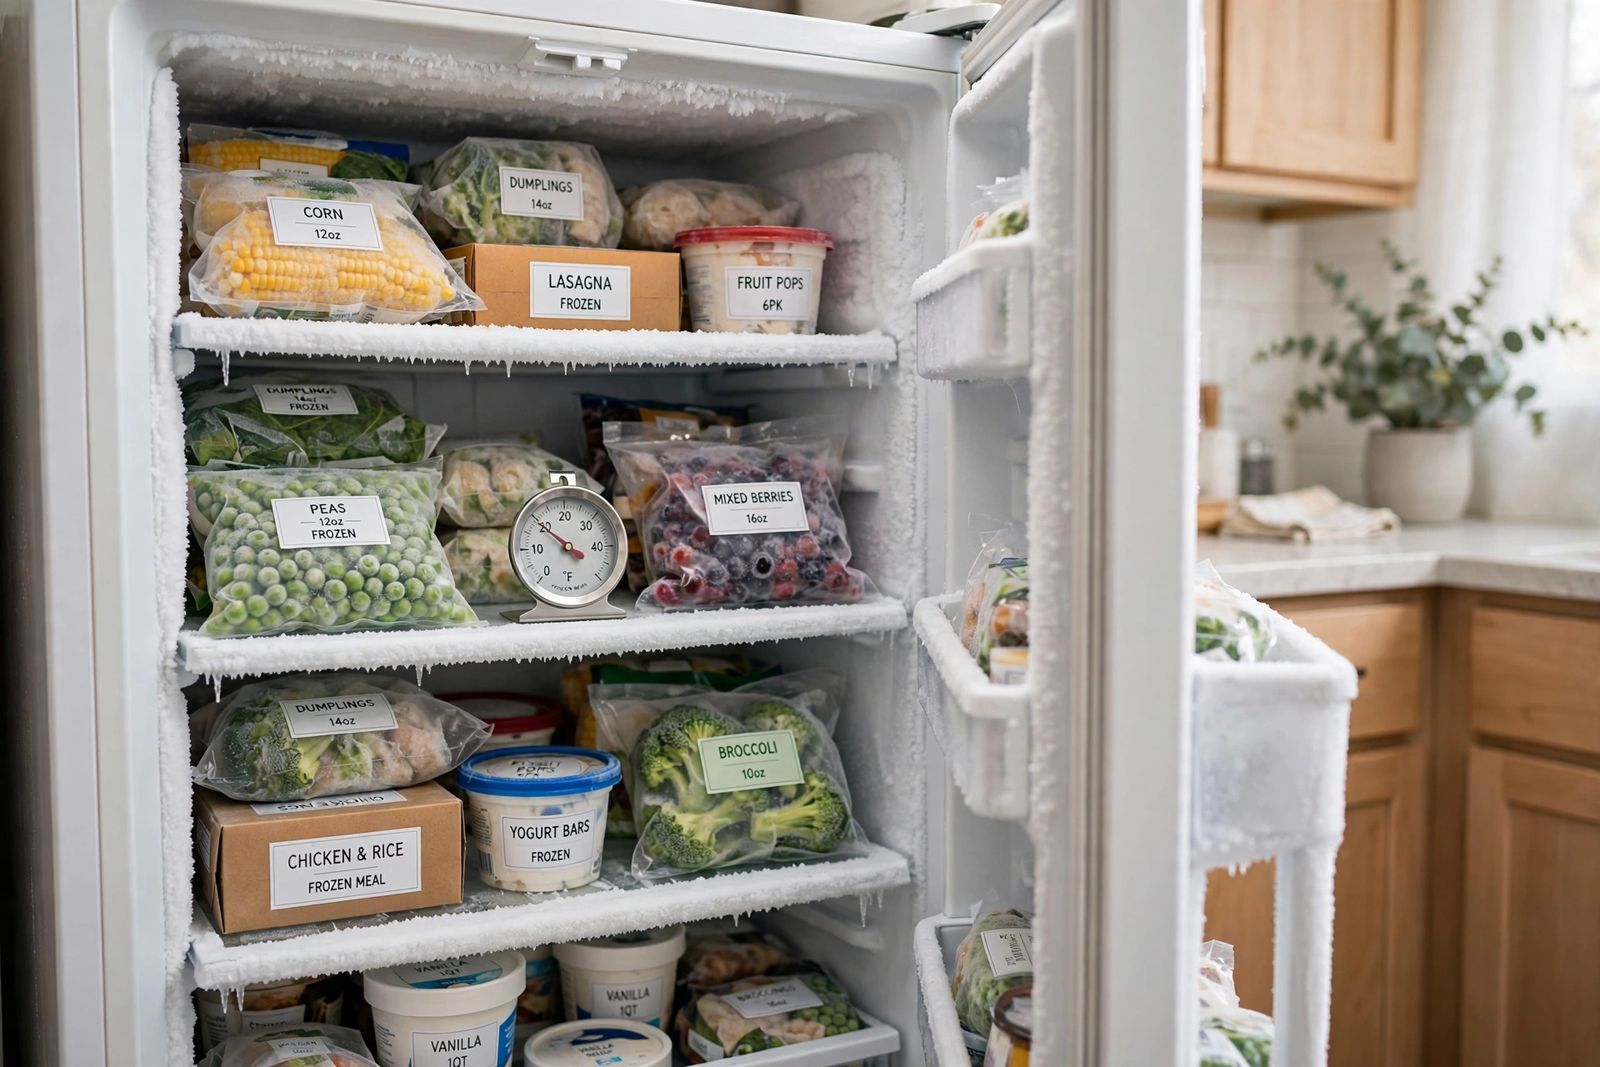
If your freezer is not freezing, the cause is usually not the compressor: in a fridge-freezer it is most often frost choking the evaporator, a failed evaporator fan, blocked vents, dirty condenser coils or a door seal letting warm air in — and the pattern tells you which. If the fridge section is still cold while the freezer warms, work the split test in this article in order: prove the temperature with a thermometer, read the frost pattern, test the evaporator fan, then the defrost system and its thermistor. If both sections are warm together, start with the settings, power and coils instead. Decide about the food early and by the thermometer, not by feel: a freezer must hold 0°F (-18°C), and perishable food that has thawed and spent more than two hours above 40°F (4°C) should be thrown away.
Food safety first. The USDA’s Food Safety and Inspection Service (FSIS) says a freezer should be kept at 0°F and that food stored constantly at 0°F stays safe, with storage times being about quality. In a failure, FSIS guidance is that a full freezer holds its temperature for about 48 hours with the door closed (about 24 hours if half full), food that still holds ice crystals or is at 40°F or below can be refrozen or cooked, and food above 40°F for more than two hours should be discarded. Keep the door shut while you diagnose — every open-door check spends the cold the food is living on.
Step 0: Prove it with a thermometer, and note the split
“Feels cold” is not a measurement. A freezer at 25°F feels cold, blows cold air and keeps ice cubes looking solid for a while, while ice cream goes soft and meat slowly thaws — freezing has already failed well above 0°F. Put a freestanding appliance thermometer in the middle of the freezer, between packages rather than against a wall, close the door, and read it after several closed hours. The door display reports a sensor or the setting; it is not proof of the temperature at the food.
Then record the one fact that routes this whole diagnosis: which sections are warm?
- Freezer warm, fridge still cold — the split this article is built around. The cold is still being made, but the freezer cannot use or move it properly. Go to the split test below.
- Both sections warm — the cold is not being made or not being released. Do the settings, power and coil checks in Steps 1 and 7 first; if those pass, the fault is a component: start relay, compressor or sealed system (Step 8).
- Freezer cold at the back, warm at the front or top — an airflow pattern, not a cooling failure. Vents, packing and the fan (Steps 2 and 4) before anything else.
- A standalone freezer (upright or chest) is warm — there is no fridge split to read. Work Steps 1, 3, 6, 7 and 8; chest freezers have no evaporator fan and no automatic defrost heater on manual-defrost models, so their list is shorter (see the chest-freezer note in Step 5).
One timing fact before you condemn anything: a freezer that was just installed, moved, defrosted or loaded with a large unfrozen shop needs hours — up to a full day — to pull down and stabilise. Judge it by the thermometer after that time, not before.
The split test: fridge cold, freezer warm, in order
On most fridge-freezers there is one evaporator coil, and it lives in or behind the freezer. The compressor and coil make the cold in the freezer first; a fan moves freezer air around the cabinet and sends a share on to the fridge. That is why the freezer can fail first and worst: it carries the full freezing load at 0°F, while the fridge coasts at a much easier 37–40°F on whatever cold still leaks through. Work these tests in order — each one is cheaper than the next, and each result changes what the next result means.
| Order | Test | What you are looking for | If it fails |
|---|---|---|---|
| 1 | Thermometer + settings | Freezer truly above 0°F after closed hours; control actually set to 0°F, not bumped warm; no Cooling Off / demo mode on the display | A setting, not a part — correct it and wait |
| 2 | Vents and packing | Food stacked against the back-wall vents or the fan outlet; one zone frozen, another slushy | Clear the vents, leave air gaps, retest after a day |
| 3 | Frost pattern on the back wall | Heavy white sheet over the rear panel = frost-choked evaporator; light frost only at the door = air leak; no frost and a warm coil = sealed-system territory | Pattern names the system — see Step 3 |
| 4 | Evaporator fan, door-switch test | With the door switch held in, no fan sound and no moving air from the back panel | Fan motor, an ice-locked blade, or the switch — Step 4 |
| 5 | Manual defrost test | Full 24-hour thaw restores freezing for days, then it warms again | Defrost system (heater, defrost thermostat/sensor, board) — Step 5 |
| 6 | Freezer gasket, paper test | Paper slides out with no drag at any point around the door | Warm air leaking in; frost rebuilding from the door side — Step 6 |
| 7 | Condenser coils | Compressor runs almost constantly, cabinet sides warm, coils matted with dust | Clean the coils — Step 7 |
| 8 | Thermistor / sensor check | Temperature swings that ignore the setting, or a sensor fault code, with fan and defrost proven good | Sensor or control — technician territory, Step 8 |
This split only works in test order: three housekeeping checks on their own stop too early, a flat menu of five or six causes gives you no sequence, and calling the compressor the most common cause (see the correction in Step 8) sends you to the most expensive part first. The order above is the asset — do not skip to the part you fear.
Step 1: Settings, Cooling Off mode and power
Controls get bumped during loading and cleaning more often than any part fails. Set the freezer to 0°F — on a numbered dial that is the manufacturer’s recommended mark, not the coldest extreme — adjust by one step at a time, and give it a full day before judging. Cranking to the coldest setting does not fix an airflow fault and can freeze the fridge section without warming your diagnosis.
Check for the mode that switches cooling off while everything looks alive. On Samsung refrigerators, Cooling Off mode (demo or shop mode) leaves the lights and display working while cooling, ice making and the water dispenser are disabled — Samsung’s support page says the display shows OF OF, O FF or scrolling bars in this mode. A recently delivered or recently moved fridge-freezer that has never frozen is in this mode until proven otherwise; the exit buttons vary by model, so follow Samsung’s page or your manual. Then confirm the basics: plug seated, outlet live, breaker on, compressor and fans actually cycling. If the breaker trips again after one full reset, stop — repeated tripping is an electrical or compressor fault, not a reset ritual.
Step 2: Vents, packing and the shape of the cold
Cold air enters the freezer through vents on the back or side walls. Boxes and bags pressed flat against them choke the flow at its source: the area beside the coil stays bitterly cold while the top shelf and door bins drift up toward thawing. Pull food a hand’s width off the back wall and off every vent, and do not stack to the ceiling over the fan outlet. GE Appliances’ own freezer guidance makes the same point from the other side: a freezer packed to the brim can block the evaporator fan itself and prevent circulation.
The opposite loading also misleads: a nearly empty freezer has little frozen mass, so its temperature swings with every door opening and recovers slowly. A well-filled freezer holds cold better — but only while air can still move through it. Rearrange once, close the door, and retest with the thermometer after a day. The mirror-image fault — the fridge starved by these same vents while the freezer stays cold — is worked in refrigerator not cooling; the hardware is shared, the failing compartment is not.
Step 3: Read the frost pattern — it names the system
Frost is evidence, and where it sits separates three different faults that all present as “not freezing”:
- A thick, fairly even sheet of frost or ice over the inside back panel, creeping over the shelves — the evaporator behind that panel is choked. The coil is still making cold, but air cannot pass through the ice to collect it, so the cabinet warms while the compressor runs and runs. This is the signature of a failed automatic defrost system (Step 5) or, less often, a fan that stopped and let the coil ice over (Step 4). Do not chip it off with a knife or screwdriver: refrigerant tubing runs behind that panel, and a puncture converts a defrost fault into a sealed-system repair.
- Light, fluffy frost concentrated near the door, the door bins and the front edges, with the back wall mostly clear — warm, humid room air is getting in and freezing its moisture at the entry point. That is a door that was left ajar, food holding the door open, or a gasket that no longer seals (Step 6) — not a defrost failure.
- Little or no frost anywhere, and the back panel barely cold while the compressor runs constantly — the coil itself is not getting cold. That pattern points past airflow entirely, to the sealed system: low refrigerant from a leak or a compressor that no longer pumps effectively (Step 8). Technician territory, and the one pattern in this article where the expensive fear is justified.
Technicians read the same pattern from inside the panel: coils heavily iced over means a defrost problem; frost on only one small section of coil, or none, means a sealed-system problem. You do not need to open the panel to use the home version above — the wall frost, its location and the compressor’s behaviour carry the same information.
Step 4: Test the evaporator fan with the door switch
The evaporator fan sits behind the freezer’s back panel and moves air over the coil and through both sections. It is the moving part this split most often dies on, in two ways: the motor fails, or frost builds until the blade is locked in ice and buzzes or scrapes against it — a “helicopter” buzzing from the back of the freezer is usually the blade hitting ice, not the compressor.
- The door-switch test. Most models stop the fan when the door opens, so open the freezer door and hold the door switch in with a thumb, as if the door were shut, while the unit is running. You should hear the fan start and feel air moving from the back panel vents. Silence means the fan is not running: a failed motor, an ice-locked blade, or a failed door switch.
- Look before you conclude. Unplug the unit before hands go near the fan. If you open the back panel (model permitting), the blade should spin freely by hand. Ice fouling the blade clears with the Step 5 defrost; a blade that is cracked, or a motor that stays silent with the ice gone, has failed.
- Read the split correctly. With the fan dead, the freezer’s cold pools around the coil and never reaches the food, while the fridge — which only ever received a share of fan-moved air — often stays deceptively cool for a time on the cold that sinks and leaks through. Several top-ten pages contradict each other on whether a dead fan warms the fridge or the freezer first; both can be seen, because it depends on how much air still leaks through the duct. What does not change is the test: no fan noise on the door-switch test, with the compressor running, is a failed fan circuit until proven otherwise.
Fan replacement means removing the back panel and handling wired connectors behind it. It is within reach of a confident owner working from the model’s service information; if that is not you, stop here — telling the technician “compressor runs, coils frost, door-switch test gives no fan” shortens the visit and the bill.
Step 5: The defrost system, proven by the manual defrost test
A frost-free freezer melts the frost off its evaporator automatically, typically on a timed or sensor-driven cycle: a heater warms the coil, a defrost thermostat or thermistor ends the cycle when the ice is gone, and the meltwater drains away — when that drain itself clogs or freezes, the same meltwater instead pools under the crisper drawers or puddles at the front, which is worked step by step in refrigerator leaking water. If the heater burns out, the thermostat/sensor fails, or the control board never calls for defrost, frost accumulates a little more every day until the coil is a solid block of ice — the Step 3 back-wall sheet — and freezing fades over one to three weeks. It is, across the repair-company and forum evidence, the single most common cause of this exact split: fridge still cold, freezer no longer freezing, compressor running.
You cannot meter the heater as a homeowner without opening the panel and working on a live circuit, and this guide does not ask you to. The proving test is slower and safe:
- Move the food to a working freezer, coolers with ice, or a neighbour’s freezer — the USDA clock in the box above is running on anything left at room temperature, so stage the food first.
- Unplug the unit, leave the freezer door open, put towels down, and let it thaw completely — 24 hours for a heavy build-up. No knives, no heat gun, no boiling water on the shelves.
- Dry it, plug back in, close the door, and let it pull down. If it now freezes hard and holds 0°F, the cooling system itself works.
- Watch the calendar, not just the thermometer. If freezing fades again over the following days to weeks and the back-wall frost returns, the defrost system has failed — the thaw treated the symptom. That result is the diagnosis a technician needs: heater, defrost thermostat or sensor, or the board, tested in that order with a meter. Typical healthy readings quoted in service guidance — a defrost heater in the rough 10–150 ohm range depending on model, a defrost thermostat closed (0 ohms) when cold — are the technician’s figures to verify against your model’s tech sheet, not interchangeable values to shop by.
Chest-freezer note. A manual-defrost chest freezer has no defrost heater, no evaporator fan and no back-panel coil to choke — its coils are in the cabinet walls. Cross Steps 4 and 5 off its list entirely: a warm chest freezer after the settings, gasket (lid seal) and room-temperature checks is a thermostat, start relay, compressor or sealed-system fault, and all four are service calls. An upright standalone freezer is the opposite: frost-free uprights have the same fan and defrost system as a fridge-freezer and take the full split test.
Step 6: The freezer door gasket
The freezer gasket works harder than the fridge one: the temperature difference across it is larger, and every leak feeds the frost problem as well as the temperature problem. Warm air entering at a weak corner raises the cabinet temperature and deposits its moisture as frost near the door — which is why the Step 3 pattern check comes before this one: door-side frost plus a failed paper test is a complete diagnosis.
- Clean first. Wipe the gasket folds and the cabinet face they meet with warm water and mild detergent; sticky residue and crumbs hold a sound gasket open.
- The paper test. Close the door on a sheet of paper or a banknote at several points around the frame, including the corners and the hinge side, and pull. You should feel drag everywhere. Where it slides out freely, the seal is weak there.
- Check the door itself. Food or a shelf holding the door a fraction open, a door sagging on its hinge, or a unit leaning forward so the door drifts open all imitate a failed gasket with a healthy one. Level the unit so the door swings gently closed, reseat the contents, and retest before pricing a gasket.
A torn, cracked or permanently flattened gasket is replaced with the exact part for the model. A gasket leak left running also explains a freezer that ices its food — packages near the door grow heavy frost while the back stays merely cold.
Step 7: Condenser coils and room heat
The condenser coils — under the unit behind the front grille, or at the back — release the heat the system removed from inside. Matted with dust, pet hair and kitchen grease they release it badly: the compressor runs longer and hotter, and the freezer, with the hardest job, falls short first while the fridge still just manages. GE lists dirty condenser coils first in its own freezer not freezing guidance for the same reason. The clean is the one in refrigerator not cooling, Step 4, and it is identical here: unplug, expose the coils, brush then vacuum without bending fins or tubing, refit, restore the air clearances (at least an inch at the sides, top and back on GE’s figures), and allow several hours for temperatures to settle.
Room conditions belong in the same check. A freezer in a hot garage in summer is rejecting heat into hot air and may never reach 0°F however healthy it is; a fridge-freezer in a very cold garage can fail the other way, because on models whose thermostat senses the fridge section, a cold room satisfies the thermostat and the compressor rests while the freezer warms. Check the manual’s rated room range before suspecting a part in either season. Blocked heat and blocked air are the same family of fault across appliances — it is what stops a dryer not heating and what a dust-matted coil does here: the machine works hard and the physics loses.
Step 8: Thermistor, start relay, compressor — and a correction
What is left, once the split test above is done, is the short list of genuine component failures:
- The thermistor (temperature sensor). The freezer thermistor tells the control board the cabinet temperature; the board runs the compressor, fans and defrost schedule from what it hears. A thermistor that drifts or fails can report “cold enough” while the food thaws, end defrost cycles early so frost rebuilds, or produce swings that ignore the setting, often with a sensor fault code on the display. Service guidance puts a typical thermistor at roughly 5,000 ohms at room temperature (77°F) and about 13,000 ohms at 32°F, varying by model — a meter test for the technician, who compares it against the model’s own tech sheet. A failed defrost thermistor shows up as Step 5’s returning frost; a failed cabinet thermistor shows up as temperatures that make no sense against your Step 0 thermometer.
- The start relay. The small device that starts the compressor. Its signature is sound: a click, a brief hum, then silence, repeating every few minutes, with no sustained cooling. A relay that rattles when shaken (power off, relay removed by someone comfortable doing so) has burned loose inside. It is an inexpensive part, but it sits on the compressor’s terminals — most owners should hand this one over with the click pattern reported.
- The compressor and the sealed system. The genuine end of the line: both sections warm, no frost pattern at the coil, hissing or oily traces at the tubing, or a compressor that runs constantly and produces no cold at all. Refrigerant work requires certified handling and is never a homeowner job.
A correction worth making visibly. One of the largest pages ranking for this search claims, twice, that a broken compressor is the most common reason a freezer stops freezing. That is backwards. The manufacturer guidance, the repair-company rankings and the technician forum threads all put the compressor and sealed system last and rarest — behind settings, vents, frost/defrost failure, the evaporator fan, the gasket and dirty coils — and several say so in as many words. Believing the compressor claim first leads to the two expensive mistakes: scrapping a freezer whose defrost heater failed, or paying for a sealed-system diagnosis before a $0 vent clear and a thermometer check. Work the order in the table; the compressor earns its place only when everything above it has been tested.
The food: what survives a warm freezer
Keep the door closed from the moment you notice the problem — FSIS’s 48-hour figure for a full freezer (24 hours half full) assumes an unopened door, and diagnosis by repeated looking spends it. Group packages together so the frozen mass shares its cold, and move the most perishable and most valuable items to a working freezer first.
When cooling is restored, or when you empty the unit for the Step 5 thaw, judge every item by temperature and ice, never by smell or taste:
- Still holds ice crystals, or measures 40°F or below — safe to refreeze or cook. Quality suffers (texture, freezer burn on a second freeze); safety does not.
- Thawed and above 40°F for more than two hours, or for an unknown time — discard it. That applies first to meat, poultry, seafood, dairy, eggs and cooked leftovers. Hard cheeses, bread and many fruits tolerate refreezing for quality reasons in FSIS’s charts, but the two-hour rule governs anything perishable, and “when in doubt, throw it out” is the FSIS instruction, not a slogan.
- Ice cream is the household canary, not the judge. It goes soft around 15–20°F, well before food becomes unsafe — soft ice cream proves the freezer is above 0°F and failing its job, but food at 25°F with ice crystals is still refreezable. The thermometer and the ice crystals decide, not the dessert.
The same discipline — measure first, let location and timing name the problem — runs through the rest of the appliance cluster: dishwasher leaking reads a leak by where the water appears, and washing machine leaking by where and when in the cycle it appears. A freezer is read by its frost and its split.
When to call a technician, and when to replace instead
Book service — and stop at observation — if you meet any of these:
- The manual defrost test restores freezing and the frost returns within days to weeks (defrost heater, defrost thermostat/sensor or board).
- The door-switch test gives no fan and you are not comfortable opening the back panel, or the blade is free of ice and the motor still does not run.
- The compressor clicks repeatedly without starting, is silent and hot, or the breaker trips again after one reset.
- There is no frost at the coil with the compressor running constantly, a hiss, or oily traces on tubing — the sealed-system pattern.
- Temperatures swing against the setting or a sensor fault code shows, with the fan and defrost proven good (thermistor or control board).
- A burning smell, scorched wiring, or a chest freezer that fails the settings, lid-seal and room checks — its short list is all service parts.
Leave the unit plugged in while you wait unless it is a safety case above, so the symptoms are present when the technician arrives, and hand over your notes: the Step 0 thermometer readings, which sections were warm, the frost pattern, the fan test result and how long a manual defrost held. That page of notes is most of the diagnostic fee already spent wisely.
The replace decision follows the same rule as the rest of the cluster (oven not heating uses it too): a defrost heater, a fan motor, a gasket or a start relay on an otherwise sound unit is normally worth doing at almost any age — they are the wear parts of the system. Replacement makes more sense when the failed part is the compressor or the sealed system on a unit well into its second decade, when the same fault was already repaired once, or when other age faults are queuing behind it — and a single repair costing more than about half the price of a comparable new machine, on an already old unit, is money better put toward the replacement. Check warranty before paying for the expensive end: some makers cover sealed-system parts, and certain compressor families have had extended coverage, for far longer than the standard one year.
Frequently asked questions
Why is my fridge cold but my freezer not freezing? Because the cold is made in the freezer and the freezer carries the harder target. A frost-choked evaporator, a failed evaporator fan, blocked freezer vents or a leaking freezer gasket all cost the freezer its 0°F while the fridge coasts at 40°F on the cold that still gets through. Work the split test in order: thermometer, frost pattern, fan, defrost.
How cold should a freezer be, and how do I know mine is not? 0°F (-18°C), verified with a freestanding thermometer placed between packages and read after several closed hours — not the display and not by touch. A freezer at 20–25°F feels properly cold and still is not freezing food safely or well.
My freezer is cold but not freezing. Is that a different problem? It is the same problem at an earlier stage: the cabinet is somewhere between 0°F and 40°F. Settings, vents, coils and the gasket cause the slow version; frost build-up and a weakening fan cause the worsening version. The thermometer reading plus how fast it is drifting tells you which — recheck after each free fix rather than replacing parts on a feeling.
Can I refreeze food after the freezer warms up? Yes, if it still holds ice crystals or is at 40°F or below — expect a quality loss. No, if it has thawed and spent more than two hours above 40°F, or you do not know how long it was warm: discard perishables and never taste food to test it.
Why does my freezer work again after I unplug it for a day, then stop? Because the day unplugged was a manual defrost: the ice choking the evaporator melted, airflow returned, and freezing resumed — until the failed defrost system let the frost build back. That cycle is the proof of a defrost fault (heater, defrost thermostat/sensor or board), not a cure.
Is it worth fixing a freezer that is not freezing? Usually, yes — the common causes are a setting, a cleaning, a gasket, a fan or a defrost part. It stops being worth it when the diagnosis lands on the compressor or sealed system in an old unit, under the half-the-price-of-new rule above. Get the split-test diagnosis first; the answer depends entirely on which row of the table your freezer lands on.
This article is general information based on the manufacturer and USDA/FSIS guidance linked above and checked in November 2026. Freezer layouts, fan and defrost arrangements, sensor values and mode exits vary by model — follow your manual for part locations, unplug the appliance before opening panels or cleaning coils, and leave refrigerant, compressor and live-circuit testing to a qualified technician.