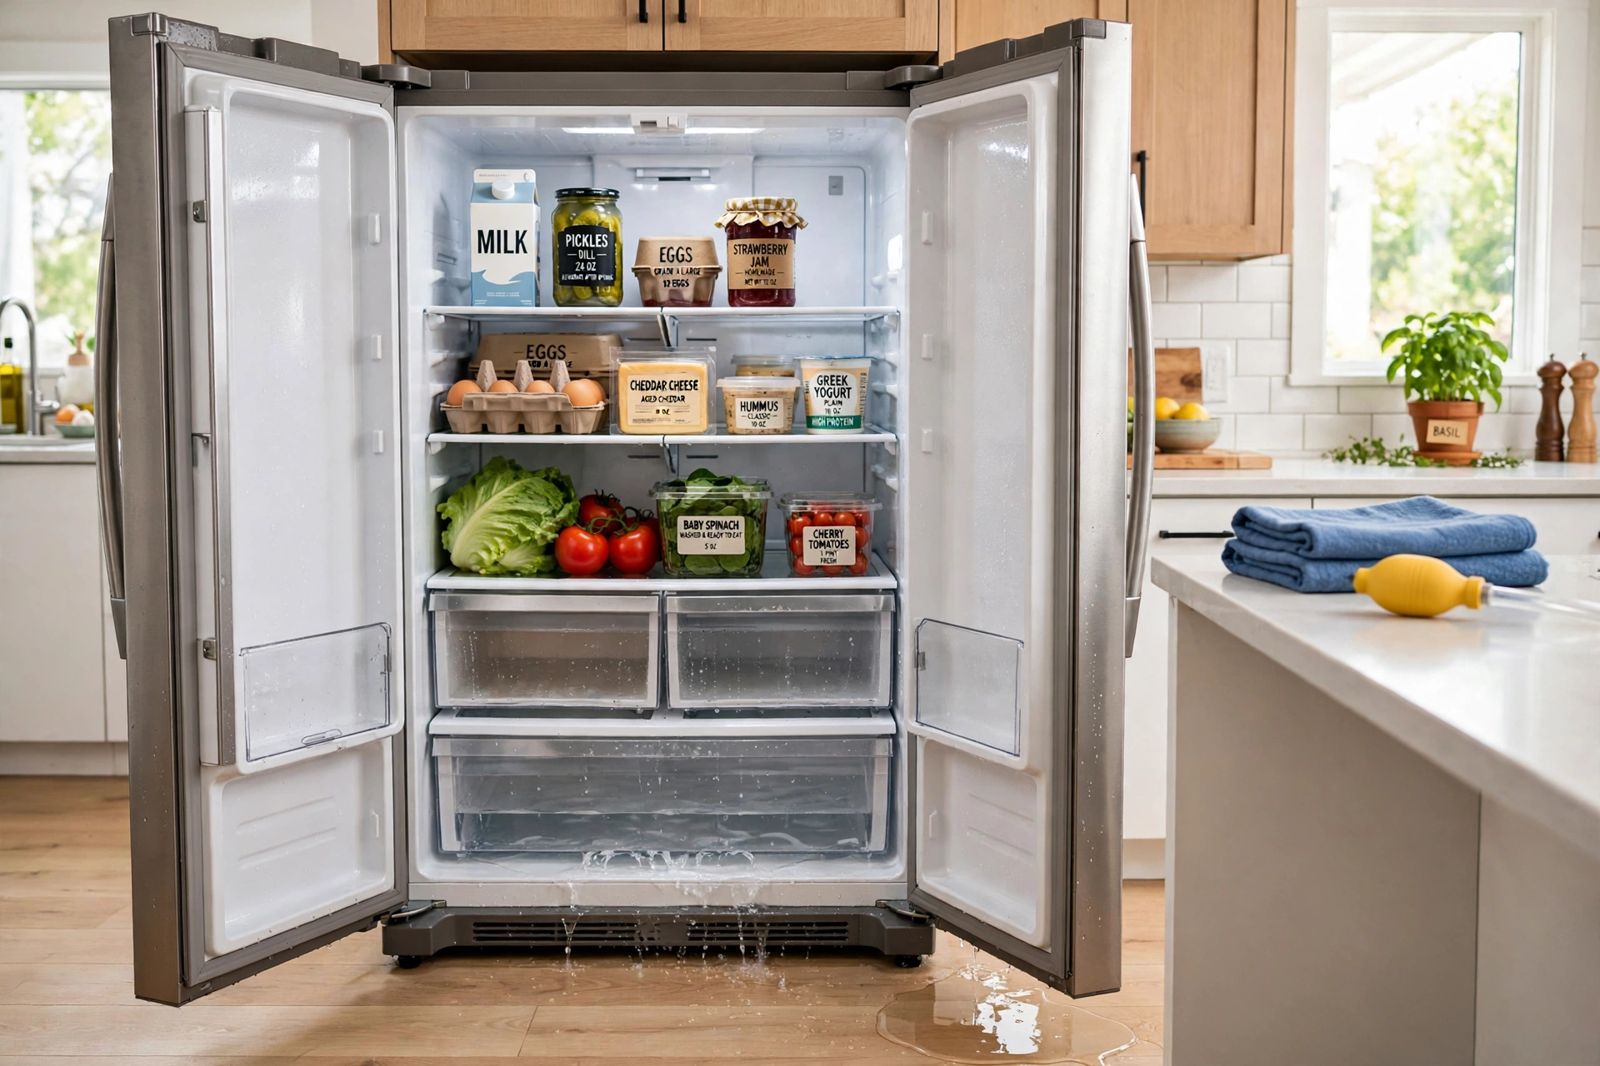
If your refrigerator is leaking water, read the puddle before you touch a part: water inside, pooled under the crisper drawers, is almost always a clogged or frozen defrost drain; a puddle at the front is usually that same meltwater overflowing forward — often once or twice a day, on the defrost rhythm — or a drain pan and door-seal problem underneath it; water at the back is the pressurised side — the water inlet valve, the supply line, or the filter. A refrigerator makes water on purpose every defrost cycle, and it has a second, separate water source if it has an ice maker or dispenser. Which system the water came from decides the fix, and one free test splits them: turn the water supply to the fridge off for a day — if the leak stops, it was supply water; if it keeps coming on its rhythm, it was defrost water.
Safety first. Mop up and keep the floor dry — a kitchen puddle is a slip hazard, and water that has reached the power cord, an outlet or a power strip is not to be touched until the power is off. Unplug the refrigerator before removing any panel, and turn the water supply off before loosening any water fitting. If the puddle keeps growing fast, shut the water off first and diagnose second: a supply-side leak does not pause between defrost cycles.
The leak-location diagnosis: where the water is names the cause
Dry the floor and the inside of the cabinet, then watch where water reappears first. Water runs downhill and forward, so the edge of the puddle is not the source — the first wet place is. Match it to this table, and work that row’s fix order before you consider any other row.
| Where you find the water | What it usually is | Cause, in order | Fix order |
|---|---|---|---|
| Inside, under the crisper drawers (fridge section; in a top-freezer, water dripping down from the freezer) | Defrost meltwater that could not drain | 1. Defrost drain hole or tube clogged with food debris or slime 2. Drain frozen shut with ice 3. On a side-by-side, a leaking water tank/reservoir can sit in the same place — rule it out if the drain is clear | Clear and flush the drain (warm water, baster) → thaw a frozen drain fully → if it refreezes within days, the defrost system itself needs a technician |
| Inside the freezer: ice sheet on the freezer floor, ice under the bottom basket | The same blocked drain, seen on the freezer side | 1. Clogged or frozen defrost drain 2. Drain trough iced over | Melt the ice sheet, clear and flush the drain → watch whether ice rebuilds (a rebuild in days points past the drain, to defrost) |
| Puddle at the front, on the floor — appears or grows once or twice a day, then pauses | Meltwater overflowing forward, not a pressurised leak | 1. Blocked defrost drain overflowing past the door seal 2. Drain pan underneath cracked, displaced or overflowing 3. Fridge tilting forward, or a door seal sweating so much extra frost melts | Check the inside drain first → pull the front grille and inspect the pan → level the unit front-high → test the gasket |
| Puddle at the back or underneath, growing steadily, no daily rhythm | Pressurised supply water — it leaks whenever the pipe is live | 1. Loose or split supply line or fitting 2. Cracked or weeping water inlet valve 3. Drain pan cracked (the one unpressurised cause in this row — it follows the defrost rhythm instead) | Shut the water off → dry and watch which fitting beads first → tighten or replace the line → valve is a replacement part |
| At the dispenser or filter housing; drips inside near the filter | Supply water escaping at the filter or dispenser | 1. Filter not seated, damaged, or a poor-fitting non-genuine filter 2. A few drops after dispensing are normal — not a leak | Reseat or replace the filter (Whirlpool’s own first check) → hold the glass 2–3 seconds after dispensing → if it still drips steadily, the valve or housing needs service |
| Beading all over the walls, shelves and door — no single source, no puddle | Condensation (“sweating”), not a leak | 1. Door gasket leaking warm, humid air in 2. Door left ajar or opened constantly in humid weather 3. Warm food put in uncovered | Clean and paper-test the gasket → check the door closes and the unit levels front-high → cover warm food and re-check in a day |
All three locations belong in one table with a fix order per location: treated one location at a time, or as a flat menu of causes, the pattern is easy to miss — one widely read page even sends a front puddle to the water line, which is at the back (see the correction below). The location is the diagnosis; the table is the asset.
The one test that splits the two waters: shut the supply off for a day
A frost-free refrigerator produces meltwater on a schedule. Frost collects on the evaporator coil, a heater melts it during the automatic defrost cycle, and the meltwater should run down a drain tube to a pan under the cabinet, where the warmth around the compressor evaporates it. That is why a defrost leak has a rhythm — GE’s classic description, repeated across the service literature, is water on the floor in front of the fridge once or twice a day, often with ice under the bottom basket of the freezer on a side-by-side.
Supply water has no rhythm. The line from the house, through the inlet valve to the ice maker, filter and dispenser, is under pressure all the time, so its leaks grow steadily and do not pause.
So, before you pull the fridge out:
- Turn the refrigerator’s water supply off — the small shut-off valve behind the unit, under the sink, or on the pipe feeding it.
- Dry everything — floor, under the crisper drawers, the freezer floor.
- Wait a full day of normal use. If the water is gone, the leak is on the supply side: line, valve, filter or tank. Turn the water back on and watch the back fittings with a dry paper towel to find which one beads first. If water still appears — especially on that once-or-twice-a-day rhythm — the supply is innocent and the defrost drain path is the fault. Turn the water back on; your ice maker was never the problem.
This one test is what stops the two expensive mistakes: replacing an inlet valve for a drain clog, and flushing a drain for a split supply line.
Inside, under the crisper drawers: the defrost drain
This is the most common refrigerator leak of all, and Frigidaire’s symptom guidance states the mechanism plainly: if the defrost drain is frozen, the water will overflow the drain trough and drip down to the bottom of the compartment, and that water can eventually leak onto the floor. In a top-freezer model the overflow drips down into the fresh-food section and collects under the crisper drawers; in other layouts it sheets across the freezer floor as ice first. The clog is usually food particles, slime or ice in a small drain hole and the tube below it — the hole is roughly pencil-width, at the back of the compartment or under the evaporator, and your manual shows its exact place on your model.
Clear it in this order:
- Unplug the refrigerator and take out the crisper drawers and anything against the back wall. Mop up the pooled water so you can see the drain area.
- Find the drain hole — low on the back wall of the fridge section on many models, or in the freezer under the evaporator cover on others. If yours sits behind a panel you are not comfortable removing, stop here: several makers treat a drain that is not directly accessible as a service job, and forcing a panel risks the coil behind it.
- Flush, do not stab. Fill a turkey baster or bulb syringe with hot — not boiling — tap water and squirt it into the hole, repeatedly. GE’s version of this flush, quoted across its service guidance, is 1 tablespoon of baking soda dissolved in 2 cups of hot tap water. You will know it has cleared when water runs freely down to the pan underneath. A pipe cleaner or flexible drain brush can tease out debris at the opening — Whirlpool lists pipe cleaners among the tools for this job — but never force a rigid or sharp tool down the tube: a punctured drain line or liner turns a free fix into a repair.
- If the drain is frozen, thaw it properly. Warm water flushes, patience, and time. Melt any ice sheet on the freezer floor the same way — never chip it with a knife or screwdriver near the coil and liner. If the tube stays frozen deep down, unplugging the unit with the doors open until it thaws is slower and safer than heat guns and boiling water, which can crack plastic parts.
- Dry, reassemble, and watch for two or three days. A drain that stays clear is fixed. A drain that refreezes or reclogs within days is telling you the blockage was a symptom: the defrost system (heater, sensor or control) or a drain tube that freezes at its top — Sears’ GE guidance notes a technician may fit a heat probe at the top of the drain tube to stop exactly that refreezing. That is a service call, and “flushed clear, iced again in three days” is the sentence that gets it diagnosed in one visit.
A close cousin lives in the same place: if a freezer is not freezing and icing its floor, the two faults share this drain and the defrost system behind it — work the leak here, then the frost pattern there.
At the front: overflow, the drain pan, the tilt and the seal
A front puddle confuses people because nothing at the front of the fridge carries water. It arrives there: meltwater that cannot drain overflows inside, runs down and out under the door seal — Whirlpool notes that water trapped by a clogged drain tube can do exactly that — or a full pan underneath spills forward. Work it in this order:
- The inside drain first. If there is also water under the crisper drawers or ice on the freezer floor, you do not have a second fault — you have the drain clog above, overflowing. Fix that and the front puddle stops with it.
- The drain pan. The pan sits under the cabinet, usually reached behind the front grille or the rear machine-compartment cover, and catches everything the drain delivers. Frigidaire’s design note is the key fact: the condenser fan blows warm air across the pan so the water evaporates — the pan never needs emptying in normal use. A pan that is full is therefore either cracked and weeping, displaced so the tube misses it, or being fed far more water than it should (which points back to excess frost from an air leak). Dry it, check it for cracks against a light, reseat it under the tube outlet, and replace it if it is split. Note GE’s caution that on many models from 1987 onward the pan is fixed and not easily accessible — a wet pan area you cannot reach is a service call, not a reason to tip the fridge.
- The tilt. A refrigerator should not sit dead level, and it should never lean forward: the makers set the front slightly higher than the back, so the doors swing gently closed and meltwater runs back toward the drain instead of forward toward the seal. If the unit was recently moved, or the floor has settled, reset the front levelling feet so the front sits a little high, side-to-side level.
- The door seal. A gasket that no longer seals feeds the front puddle two ways: humid air enters, condenses and frosts, and every defrost then melts more water than the system expects. Clean the gasket folds first, then paper-test it — close the door on a sheet of paper at several points and pull; it should drag everywhere. A torn or flattened gasket is replaced with the exact part for the model. The same discipline — trace the water to its highest wet point instead of guessing from the puddle — is what separates a valve from a dead tank in water heater leaking.
A correction worth making visibly. One of the largest how-to pages for this search tells readers that water on the floor in front of the refrigerator “suggests a kinked or frozen water line.” That sends you to the wrong end of the appliance. The water line enters at the back, under pressure, and its leaks appear at the back and grow steadily. A front puddle that comes and goes once or twice a day is on the defrost rhythm — it is meltwater overflowing forward from a blocked drain, a failed pan, or a forward tilt, as GE, Frigidaire and Whirlpool all describe it. The same site contradicts itself elsewhere by (correctly) blaming the defrost drain for inside pooling — which is the same water, one step earlier. Check the drain before you touch a fitting. A second error on another top-ten page claims a blocked drain makes “the condenser coils work overtime and start dripping”: condenser coils shed heat, they do not carry or drip water, and the drain opening does not vent humid air. The water is defrost meltwater with nowhere to go — nothing more exotic, and nothing to do with the coils.
At the back: the inlet valve, the supply line and the filter
If the shut-off test proved the leak is supply water, the suspects live at the back, in this order:
- The supply line and its fittings. With the water back on and the fridge pulled forward — get help; a full fridge is heavy, and dragging it alone kinks lines — dry every fitting, then watch with a paper towel: the connection at the house shut-off or saddle valve, the connection at the back of the refrigerator, and the full length of the line. Whirlpool’s bottom-leak guidance is exactly this: check the line is not cracked or damaged, and that the tubing is firmly inserted into every fitting. Tighten a weeping fitting gently; replace a line that is split, brittle or kinked — plastic lines harden with age and a pinhole sprays a fine mist that soaks a wall before it ever puddles.
- The water inlet valve. The electrically operated valve at the back, low down, that feeds the ice maker and dispenser. It leaks when its body cracks, when a fitting at the valve loosens, or when it fails to close fully and drips through. Its signature is a leak at the back that pulses or worsens around ice-maker fill cycles. Shut the water off before touching it; a cracked valve is a replacement part, not a sealant job, and swapping a live water-and-electrics part is a fair handover point to a technician if you are not equipped for it.
- The filter and its housing. Work this one from inside first, because Whirlpool’s own page for water inside the refrigerator leads with it: if the filter was just installed or replaced and the leak followed, the filter is not seated properly — remove it and reinstall it, and check it is not damaged. A poor-fitting filter can leak at the housing and also cause reduced ice production and poor dispensing. And learn the normal from the leak: a few drops from the dispenser after the lever is released are normal — Whirlpool’s instruction is to hold the glass under the dispenser for 2 to 3 seconds after releasing it — while a steady drip minutes later, or water at the housing, is not.
- The ice maker itself. An overfilling ice maker, a misaligned fill tube or a cracked mould spills water inside the freezer that then escapes as melt. If the back is dry, the drain is clear, and the ice cubes are oversized, hollow or fused into a sheet, this is the row you are on — usually a valve or ice-maker service call.
Keep the water shut off while you wait for a part or a technician on any supply-side leak. Unlike a defrost leak, it does not pause, and a weekend of it does more floor damage than the repair costs. The location-first method is the same one dishwasher leaking uses: where the water appears, and when, names the part.
The false alarms: condensation, spills and a warm jar
Not every wet fridge is leaking, and the makers say so first for a reason. Whirlpool’s page asks the embarrassingly simple questions before any part: was a warm item just added (condensation forms on the container and drips onto the shelf), and are the containers themselves cracked or leaking? Rule those out before the drain flush:
- A spill or a leaking container is wet in one place, once, and does not refill after you dry it. Meltwater refills on the defrost rhythm; a spill does not.
- Condensation beads evenly — walls, shelves, the outside of containers, sometimes the cabinet sides in a humid kitchen — with no single source and no growing puddle. It tracks the weather and how often the door opens, and it fades when the gasket seals and warm food goes in covered and cooled.
- Dispenser drops — one or two after dispensing — are normal, as above.
The dry-and-watch test separates all three from a true leak: dry everything completely, use the fridge normally, and note where wetness returns first and when. One point, returning — a leak. Everywhere, evenly — condensation. Nowhere — it was the soup container.
When to call a technician
Book service — and stop at observation — if you meet any of these:
- The drain refreezes or reclogs within days of a proper flush (defrost heater, sensor or control, or a drain tube that needs a heat probe).
- The drain is behind a panel you cannot safely remove, or the pan is fixed and inaccessible on your model and its area stays wet.
- The inlet valve body is cracked, the leak is at the valve, or water has reached electrics at the back.
- The supply line is split inside a wall or under a floor, or the house shut-off itself will not close.
- Ice keeps sheeting across the freezer floor after the drain is proven clear — the fault has moved into the defrost or ice-maker system.
- There is any sign the water is not water: an oily feel, a chemical smell, or the fridge also losing cooling — that is no longer a plumbing problem, and refrigerator not cooling is the diagnosis to work, with refrigerant work left to a certified technician.
Hand over your notes when you book: where the water appeared first, whether the shut-off test stopped it, and how many days a cleared drain held. That is most of the diagnostic fee already spent wisely.
Frequently asked questions
Why is my refrigerator leaking water inside, under the drawers? Because defrost meltwater cannot drain. The drain hole or tube is clogged with food debris or slime, or frozen shut, so each defrost cycle overflows into the bottom of the compartment — Frigidaire describes the overflow dripping to the bottom of the compartment and eventually onto the floor. Flush the drain with hot (not boiling) water from a baster until it runs freely to the pan.
Why is there a puddle in front of my fridge every morning? That rhythm is the clue: it is meltwater, not supply water. A blocked defrost drain, a cracked or displaced drain pan, or a fridge tilting forward lets each defrost cycle’s water escape at the front, once or twice a day. Check the inside drain and the pan before any water fitting — the supply line is at the back.
Can a refrigerator leak water if it has no water line connected? Yes. Every frost-free refrigerator makes meltwater on each defrost cycle, plumbed in or not. With no ice maker or dispenser there is no supply side at all, so the leak must be the defrost drain, the pan, the tilt or condensation — which makes the diagnosis shorter, not impossible.
Is it safe to keep using a refrigerator that is leaking water? A defrost-side leak can run while you arrange the fix, with a towel down and the floor kept dry — but do not ignore it: standing water damages floors and the water inside spoils food hygiene. A supply-side leak is different: shut the water off the same day, because it leaks continuously under pressure. Any water near the cord or an outlet means power off until it is dry.
How do I stop my fridge drain from clogging again? Keep food and loose labels away from the back wall and the drain area, wipe the drain channel when you clean the fridge, and repeat the warm-water (or baking-soda) flush once or twice a year — GE recommends that interval for exactly this prevention. If it still refreezes within days, the cause is the defrost system, not your cleaning.
My freezer floor is a sheet of ice as well. Is that the same fault? Usually, yes — the same blocked drain, seen from the freezer side: meltwater that cannot drain sheets across the freezer floor and freezes there. Clear the drain as above; if the freezer also will not hold its temperature, work freezer not freezing next, because a defrost-system failure produces both.
This article is general information based on the Whirlpool, Frigidaire and GE manufacturer and service guidance linked above and checked in November 2026. Drain, pan, valve and filter locations vary by model — follow your manual for your unit, unplug the refrigerator before removing panels, shut the water off before loosening fittings, and leave inlet-valve replacement and any refrigerant work to a qualified technician if you are not equipped for them.