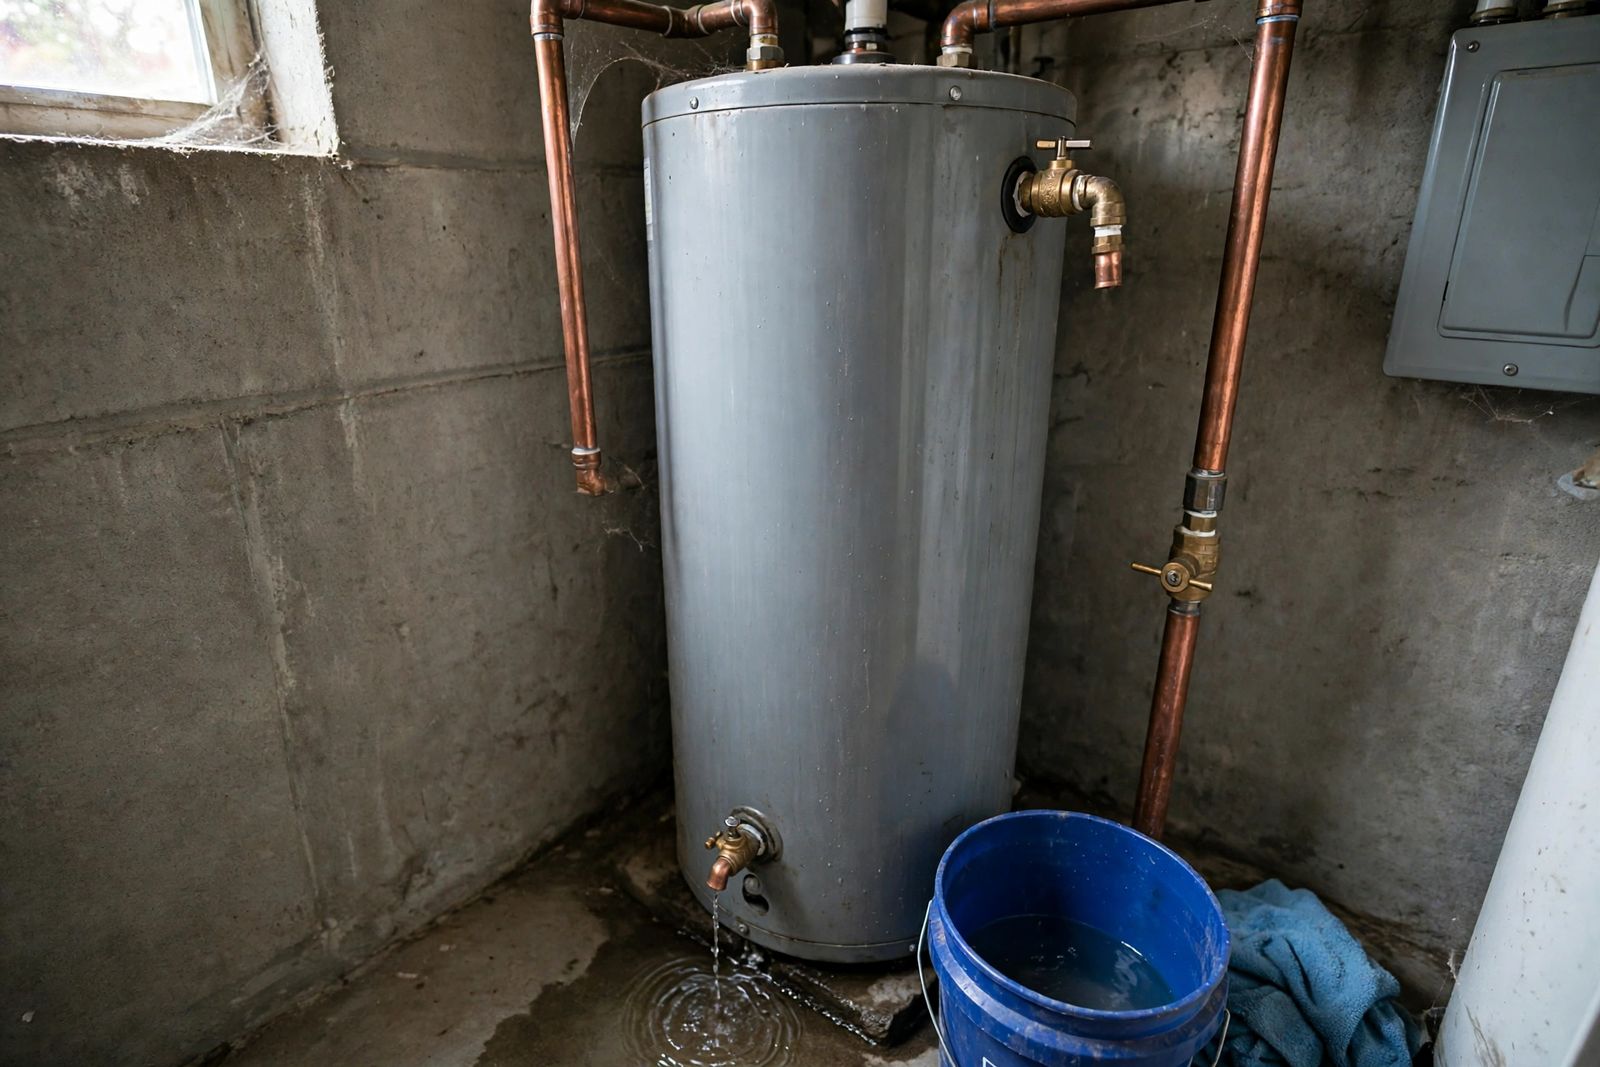
If your water heater is leaking, make it safe before you diagnose it: turn off the energy first — on a gas heater turn the control knob to OFF or PILOT, on an electric heater switch its breaker OFF — then close the cold-water inlet valve on top of the tank, and only then open a hot tap or drain the tank if you need to. With the heater safe, find where the water is coming from, because that one fact decides everything: most leaks come from a valve or fitting that can be fixed, but water coming through the tank itself means the heater is finished and needs replacement, not repair. A. O. Smith’s own guidance for a leaking heater gives the same order: power or gas off, water supply off, then check whether the moisture is condensation or a true leak, and locate the source before anything else.
Safety — read this before any check. The water in the tank can scald, and the heater runs on gas or a high-voltage electric supply. If you smell gas, leave the house and call your gas company or emergency service from outside — do not touch switches or try to relight anything. If water is pooling near electrical outlets, a breaker panel or the burner, keep clear until the power is off and the area is dry; never stand in water to reach a breaker. Never cap, plug or block the temperature-and-pressure (T&P) relief valve or its discharge pipe — that valve is the tank’s protection against dangerous pressure, and defeating it is the one “fix” that can turn a leak into a rupture. If any step below feels beyond you, stopping and calling a licensed plumber is the correct outcome.
Step 1: Shut it down in this order
Do these in sequence, in this order — the order itself matters:
- Turn off the energy. Gas: turn the heater’s control knob to OFF (PILOT also stops the main burner if your control will not stay at OFF while you work). Electric: switch the water heater’s breaker OFF at the panel. A heater left powered while its tank drains can burn out an electric element in seconds, and a gas burner firing against a partly empty tank damages the tank itself.
- Close the cold-water inlet valve. This is the valve on the cold pipe entering the top of the tank. Closing it stops the tank refilling as it leaks — which is what turns a drip into a flood. If that valve is stuck or missing, close the house’s main water shut-off instead.
- Only then, relieve pressure or drain — if you need to. Open a hot tap somewhere in the house to relieve pressure and let air in. If you need to drain water away, attach a garden hose to the drain valve near the base and run it to a floor drain or outside, then open the drain valve. The water can be hot enough to scald, so run the hose somewhere it cannot splash anyone. If you are not draining or opening anything, you can skip this step entirely and move straight to finding the source.
Once those are done, mop up, move anything stored near the heater out of the water, and put a bucket under the drip if there is one. The emergency is over; the rest is diagnosis, and you can take it slowly.
Step 2: Find the source — the leak-source map
Dry the heater and the floor with a towel, then watch where water reappears first. Water runs downhill, so the puddle tells you almost nothing — a drip from a fitting at the top will pool at the base and look exactly like a failed tank. Work from the top down, pressing a dry paper towel at each point in turn: the highest wet point is the source. A. O. Smith’s Bulletin 51, its technical guide to a puddle on the floor, lists the same candidate sources: condensation, the drain valve, the relief valve, the inlet and outlet piping, element gaskets on electric models, and the tank itself.
Then match what you find to this map:
| Leak location | What it usually means | Fixable or replace? | Urgency |
|---|---|---|---|
| T&P discharge pipe (pipe running down the side of the tank) | The relief valve has opened — excess pressure or temperature, thermal expansion in a closed system, or a worn valve that no longer seals | Fixable — but fix the cause (pressure, temperature or expansion), not just the valve | High if flowing steadily or the water is very hot — shut down and call a plumber; medium if an occasional drip |
| Drain valve (small tap near the base, where a hose attaches) | Valve not fully closed, sediment grit holding it open, or a worn — often plastic — valve | Fixable — snug it, clear it, or replace the valve; a hose cap stops a minor drip meanwhile | Low to medium — bucket under it, repair soon |
| Cold-inlet or hot-outlet fitting (pipes on top of the tank) | A threaded joint worked loose by years of heating and cooling, or corrosion at a dielectric union or flex connector | Fixable — tighten if sound; open, clean and reseal or replace the fitting if corroded | Low if a slow weep; medium if steady |
| Top and sides around the elements (electric heaters) | A failed element gasket, or an element leaking at its threads or terminals | Fixable — gasket or element can be replaced, with the power off and the tank drained below the element | Medium — water near electric parts: keep the breaker off |
| Tank body and base (water seeping from under the jacket, rust streaks, no wet fitting above) | The steel tank has corroded through from the inside — the glass lining failed and the anode rod could no longer protect it | Replace — no repair exists. A pressurised, glass-lined tank cannot be patched or welded | High — leave it shut down, drain it if safe, arrange replacement |
| Whole tank and cold pipe sweating evenly | Condensation, not a leak — cold inlet water in humid weather, or a cold tank firing up after heavy use | Neither — normal if it stops once the tank is hot | None — but verify with the dry-and-watch test below |
That table is the whole decision in one place. Four of the six rows are repairs. One row is not a leak at all. Only the tank-body row condemns the heater — which is why guessing from the puddle, instead of tracing the source, leads people to replace heaters that needed a valve.
The T&P discharge pipe: a warning, not just a drip
The temperature-and-pressure relief valve is the brass valve on the side or top of the tank with a pipe running down toward the floor. It opens when temperature or pressure inside the tank goes past safe limits — residential valves are typically rated around 210°F and 150 psi — and the water you see at the end of that pipe is the valve doing its job, or failing to reseal. A. O. Smith’s Bulletin 51 makes the key point: discharge from the relief valve often represents activation, not a broken valve. In a closed plumbing system — one with a check valve, backflow preventer or pressure-reducing valve on the incoming main — heated water expands with nowhere to go, pressure climbs, and the relief valve vents it. That is thermal expansion, and its fix is a working expansion tank, not a new relief valve. High incoming street pressure and a thermostat set too high (or failing) produce the same drip for different reasons.
So treat a dripping discharge pipe as a question, not a part to swap blindly. Check the thermostat setting first — near 120°F is the setting the U.S. Department of Energy’s water-heating guidance is built around, and it lowers both pressure stress and scald risk. If the valve drips after every heating cycle and stops when the tank cools, suspect thermal expansion. If it weeps constantly at normal temperature, the valve seat may be worn or fouled with grit. A plumber can test the house pressure and the expansion tank and tell you which of the three you have. And repeat the safety line, because this is where people get hurt: never cap the discharge pipe to stop the drip. You would be removing the only thing standing between a pressurised tank and a dangerous failure.
The drain valve: the friendliest leak at the base
The drain valve is the small hose-bib tap near the bottom of the tank, used to flush sediment. Because it sits low, its drips pool at the base and imitate a dead tank — always rule it out before believing the worst. A. O. Smith’s fix in Bulletin 51 is plain: check the valve is closed tightly, and if the leak cannot be stopped by closing it, replace the valve. In practice the causes, in order, are: the valve was left not-quite-shut after a flush; a grain of sediment is holding it open (opening it briefly with a hose attached, then closing it firmly, sometimes clears the grit); or the valve itself — especially a plastic one — has worn or cracked. A standard garden-hose cap threaded onto the outlet is a legitimate stopgap for a slow drip while you arrange the repair. Replacing the valve means draining the tank, which is why it pairs naturally with an annual sediment flush if the heater is otherwise healthy.
Fittings at the top: inlet, outlet, unions and flex connectors
Water on top of the tank is the leak you want. The cold inlet and hot outlet are threaded joints, and years of expansion and contraction work them loose; where copper meets the tank’s steel nipples, a dielectric union is meant to slow the corrosion between dissimilar metals, and flex connectors have washers that perish. Dry the top, watch which joint beads first, and try a gentle snug with a wrench — a quarter-turn is often all a sound fitting needs. If the joint is green with corrosion, rust-streaked, or still weeps after a careful tighten, snugging harder is the wrong move: the fitting needs to come apart, be cleaned and resealed, or be replaced. That is the same threaded-joint logic as how to fix a leaky faucet — find the exact joint, shut the water off, and replace the sealing part rather than forcing the metal. Opening pressurised hot-water connections is also a fair handover point to a plumber if you are not equipped for it.
Leaks around the elements (electric heaters)
On an electric tank, water can appear at the access panels on the side, where the heating elements screw or bolt into the tank. The usual cause is a perished element gasket; Bulletin 51 notes these gaskets can be replaced and the element threads resealed. An element can also leak through its own terminals when it fails. Either way this is a repair, not a replacement — but it is electrical work next to water: breaker off, tank drained below the element, and the same caution that applies to any fault in the no hot water in house checks. If the heater is dry but simply not heating, the fault is in the heating chain rather than a leak — water heater not heating works through it by fuel type, electric breaker, reset and elements on one side, pilot and thermocouple on the other. If you are not confident testing and changing elements, this is a plumber’s or electrician’s job, not a learn-as-you-go one.
The false alarm: condensation
Not every wet heater is leaking. Cold water entering the tank can chill the tank and the cold inlet pipe below the dew point, especially in humid weather, and a gas heater firing up with a tank full of cold water condenses moisture that runs down and puddles at the base. A. O. Smith’s manual guidance makes the same distinction: condensation on pipes in humid weather is common, it should stop once the tank is above about 110°F, and a heater should not be condemned until every other source has been checked. The test is the one from the map: dry everything, use no hot water for a while, and watch. Even beading that returns across the tank and cold pipe and then dries is condensation. Water that reappears at one point — a valve stem, a fitting, a seam — and keeps coming is a leak.
If you still cannot separate a hidden tank leak from the fittings, there is a formal test: Bradford White’s professional guide describes pressure-testing the tank — a gauge on the drain valve, the cold inlet closed, fixtures off — where pressure that holds for 15 minutes clears the tank, and pressure that falls slowly with every fitting dry points to the tank itself. That is a technician’s test, but knowing it exists stops a “probably the tank” guess from becoming an unnecessary replacement.
The tank body: the one leak that cannot be fixed
If every fitting, valve and element above is dry and water still seeps from under the jacket or the base seam — often with rust streaks down the tank or rusty hot water in the weeks before — the inner steel tank has corroded through. Inside the tank, a sacrificial anode rod exists to corrode instead of the steel; once the rod is spent and the glass lining is breached, the tank itself rusts from the inside out. Rheem makes the same split: leaks from loose fittings or a failing T&P valve are one thing, but pooling water around the tank body indicates internal corrosion, and once a tank deteriorates from the inside, replacement is the only safe option. There is no patch, sealant or weld for a pressurised glass-lined vessel, and a tank leak never heals — it grows, sometimes slowly, sometimes all at once.
Age is the tiebreaker when the evidence is mixed. Rheem puts a traditional tank heater’s typical life at 8–12 years and suggests planning replacement from around year 10; a valve or fitting leak on a six-year-old tank is a repair, while the same money spent on a twelve-year-old tank with rust at its base is usually money thrown after a heater that is already done. If the tank is confirmed gone, the replacement conversation is also the moment to weigh a like-for-like tank against what is a heat pump water heater — and a leak at the base of any fixture deserves the same trace-it-to-the-source discipline as a toilet leaking from base, where the puddle likewise hides which seal actually failed.
When to call a plumber
Call a licensed plumber — and for a gas smell, the gas company first, from outside — if any of these apply: you smell gas at any point; water is flowing steadily, spraying, or pooling near electrics; the T&P valve is discharging hot water or steam and will not stop; you cannot find the source after the dry-and-watch test; a fitting needs opening and resealing and you are not equipped for it; an element or its gasket needs changing on an electric heater; or the tank body is the source, in which case the visit is a replacement, not a repair. Also call rather than persist if the cold inlet valve will not close — isolating the water is the first job, and a valve that will not shut is itself the repair.
Frequently asked questions
Can I keep using a water heater that is leaking? No — A. O. Smith’s answer is direct: even small leaks worsen, damage floors and walls, and can signal a failure that lets go suddenly. Shut it down in the order above and diagnose it off, not running.
Is a leaking water heater an emergency? A slow drip at a drain valve or fitting, contained in a bucket, can wait for a booked repair. A steady flow, water near electrics, a discharging relief valve, a bulging tank or any gas smell is an emergency — shut it down and call the same day.
Why is water coming out of the pipe that runs down the side of the tank? That is the T&P relief valve’s discharge pipe. Either the valve is worn, or it is correctly venting excess pressure or temperature — most often thermal expansion in a closed system without a working expansion tank. Find the cause; never cap the pipe.
How long do tank water heaters last? Typically about 8–12 years for a traditional tank, per Rheem, with hard water, heavy use and skipped flushing and anode-rod checks pulling a given heater toward the short end of that range.
This article is general information based on the manufacturer and U.S. Department of Energy sources linked above and checked in November 2026. Controls, valves and codes vary by maker and model — follow the instructions and warnings on your own heater first, never defeat a relief valve or safety control, and use a licensed professional for gas work, element replacement and any tank-body leak.