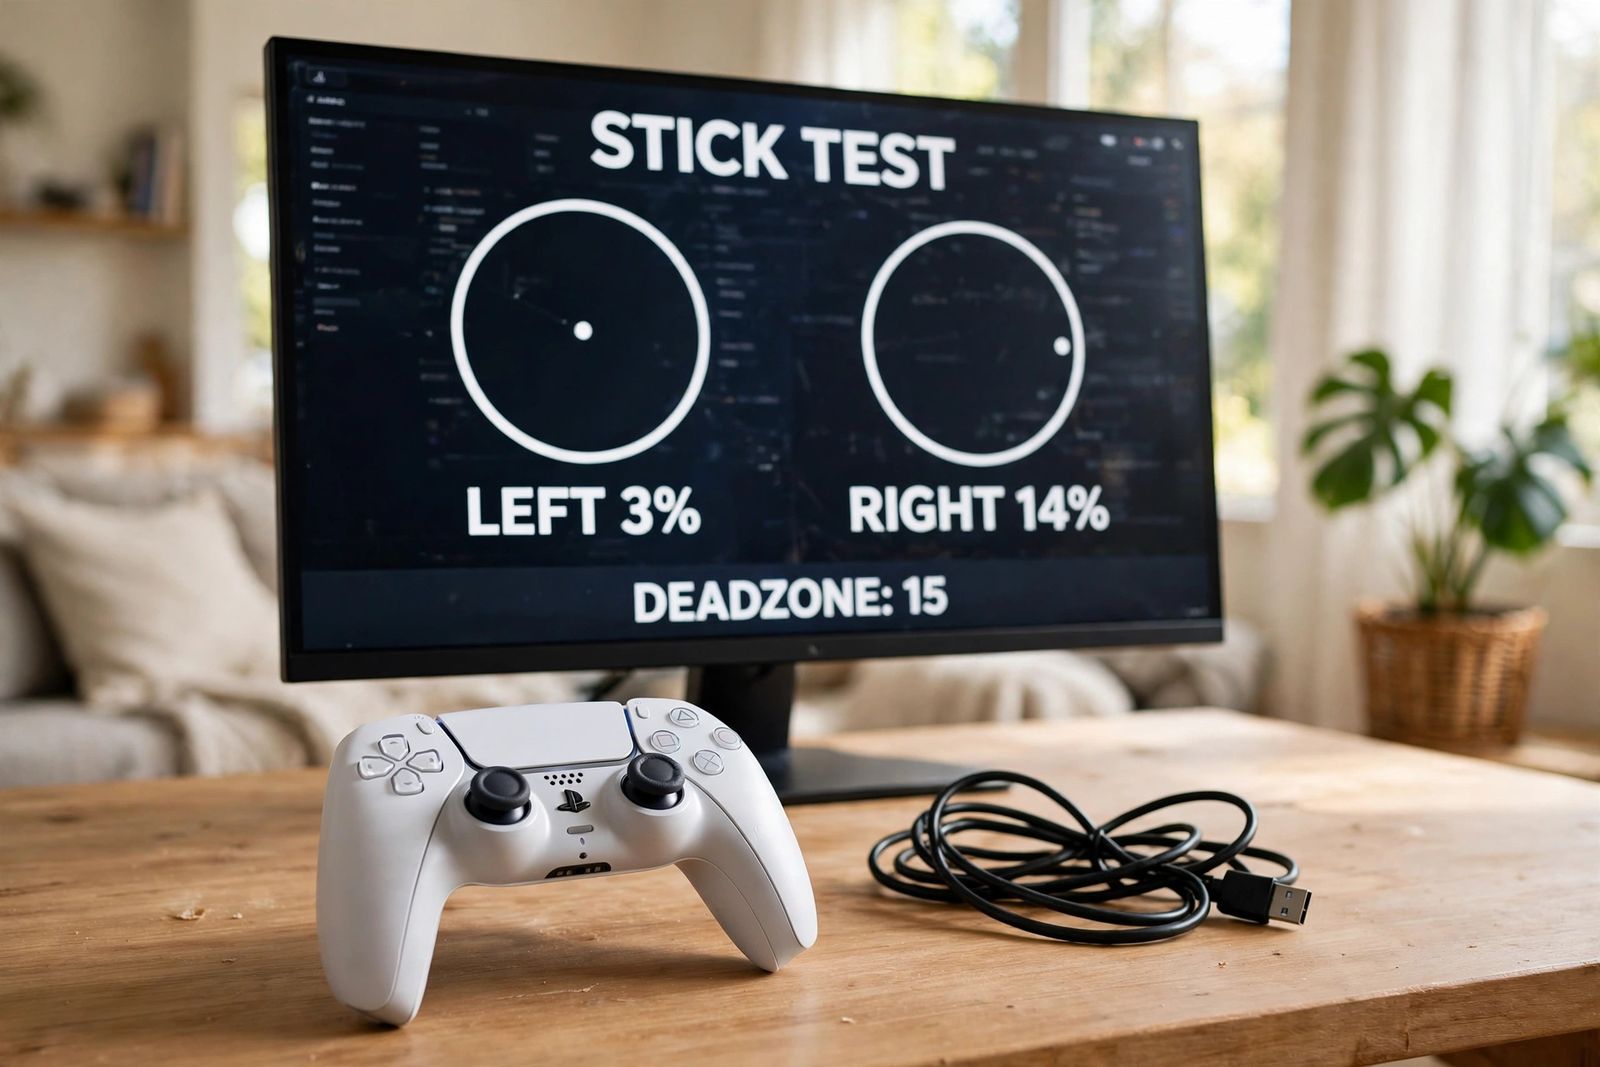
If your PS5 controller has stick drift — your character walks, your camera pans or your aim creeps while your thumbs are off the sticks — do not start by spraying cleaner into it, and do not start by opening it. Start by measuring it. Put the controller on a table, connect it to a computer or phone, open a controller test page, take your hands completely off it and write down the resting number for each stick. That one number, taken before you touch anything, decides everything after: a stick resting at 3% needs nothing, a stick resting at 14% needs its in-game deadzone set to 15 and a watch kept on it, and a stick whose resting number wanders on its own or keeps growing week to week has a worn potentiometer inside it, which no spray, reset or menu can rebuild. The full measure-first sequence is set out below, in order — measure, set the deadzone from the number, do the reset and update for what they are actually worth, clean only what cleaning can reach, and then read the wear verdict honestly. One warning before you begin: if this controller might still be under warranty, the measuring and the deadzone are free and safe, but opening the controller is not — check the warranty position in the last step before anything comes apart.
The measure-first sequence: the whole method on one page
This is the asset to work from. Five steps, in this order, and the order is the point — each step either fixes the problem or produces the evidence the next step is judged by.
Step 1 — Measure the drift and write the numbers down. Connect the DualSense to a PC, Mac or phone (USB is the most reliable for a test; Bluetooth works too) and open any browser controller tester — the kind that draws two circles, one per stick, with a dot showing where each stick says it is, plus a numeric readout. Press any button once so the browser registers the controller, put it down on a flat surface, and watch for a full fifteen seconds without touching it. Record the largest resting offset for each stick, then pick the controller up, push both sticks in full circles, let go, and measure again. A worked example, the one pictured at the top of this page:
| Stick | Resting offset at rest | Reading |
|---|---|---|
| Left stick | 3% (axes around X +0.03, Y −0.02) | Inside normal resting noise — no action, no deadzone change |
| Right stick | 14% (largest axis X +0.14) | Real, stable drift — set that stick’s in-game deadzone to 15 (step 2), retest monthly |
Read your own numbers against these working bands. They are tester conventions, not a Sony specification — PlayStation publishes no official drift threshold, and any page quoting you one as a maker’s figure is inventing it:
| Largest resting offset | What it usually is | Your move |
|---|---|---|
| 0–3% and steady | Normal resting noise. Every potentiometer stick sits a hair off true centre | Nothing. If one game still feels wrong, that game’s settings are the problem, not this stick |
| 4–8% and steady | Light drift — early wear or a small baseline shift | Reset and update (step 3), retest, then cover it with a deadzone set just above the number (step 2) |
| 9–15% and steady | Moderate drift — playable, but the stick is telling you it is wearing | Deadzone from the number (step 2), external clean only (step 4), re-measure in a month and compare |
| Over 15%, or the number wanders, jitters or pulses at rest | The reading itself is unstable — the classic worn-track pattern | Skip to the wear verdict (step 5). Deadzones will chase a moving target and cleaning will not hold |
Two patterns matter as much as the size of the number. A steady offset — the dot sits in one off-centre spot and stays there — is the kind deadzones hide well. A wandering offset — the dot trembles, pulses or drifts around while nothing touches the controller — is worn or dirty contacts reporting noise, and it is the pattern that predicts failure. And if the stick reads clean here but moves in exactly one game, believe the tester: that game has its deadzone set near zero, and your controller is fine.
Step 2 — Set the deadzone from your number, not by feel. Covered in its own section below, because the standard DualSense has no system-wide deadzone on PS5 and the setting lives in each game.
Step 3 — Reset and update, knowing exactly what each one can do. PlayStation’s pinhole reset and the device software update rule out a stuck controller state and stale software. Neither recalibrates a stick — there is no calibration menu on a PS5 for a standard DualSense, despite what ranking guides claim (the correction is below, because it matters).
Step 4 — Clean the outside, and be honest about what cleaning reaches. Loose dust is a real cause and an external clean is cheap. Contact cleaner sprayed inside is not a PlayStation procedure, cannot rebuild a worn track, and buys a shorter reprieve every time. The reality check is below.
Step 5 — Read the wear verdict and check the warranty before spending anything. A worn potentiometer module is a hardware end-state: on a standard DualSense the module is soldered to the board, so the honest options are PlayStation Repairs, a repair shop, or a new controller — in that order if warranty might still cover it. The verdict tests are below.
Step 2 in full: deadzones, set from the measurement
A deadzone is the small area around a stick’s centre where input is ignored. Raise it just past your stick’s resting offset and the phantom input falls inside the ignored area, so the game never sees it. That is the whole trick — and it only works well when it is set from a number:
- Take the largest resting offset from step 1 for the drifting stick — 14% in the worked example.
- Open the game’s controller or aim settings and find the inner (minimum) deadzone for that stick. Shooters and sports games expose it per stick; it may be shown as a 0–99 slider, a percentage, or a decimal like 0.14.
- Set it one point above your number — 15 on a 0–99 scale, 15%, or 0.15 — and test in the game that drifted worst. In the worked example, the camera that crept at rest now sits still.
- If the character or camera still moves at rest, raise it one point at a time until it stops, and no further. If you have to go far past your measured number to stop movement, your at-rest reading is wandering, not steady — go back to the bands table, because that pattern belongs in step 5.
- Repeat per game. This is the part players miss: a standard DualSense has no global deadzone setting on the PS5. There is no system slider quietly governing every game. Each game’s own setting is the setting, so a fix dialled into one shooter does nothing for the next game until you set it there too.
Every point of deadzone beyond what you need is a cost, not a bonus: it is fine aim near centre — the small corrections you make constantly — being ignored along with the drift. A deadzone of 30 to hide 14% of drift will stop the creeping and make the game feel muddy, and players routinely blame the game for it. Set from the number, stop at the number plus one.
DualSense Edge owners have the better version of this. The Edge is the one controller where PlayStation itself provides system-level stick settings: Settings > Accessories > DualSense Edge Wireless Controller > Custom Profiles > Stick Sensitivity/Deadzone, per PlayStation’s controllers hub. A deadzone set there rides in a profile and applies across games. If a guide gives you that menu path as the fix for a standard DualSense, it has confused the two controllers — on the standard pad, that path does not exist.
And keep the honest label on all of this: a deadzone hides drift. It does not slow the wear underneath it, and the day the resting offset grows past your setting, the creeping comes back and the setting needs raising again. That day is itself a measurement — a deadzone you have had to raise twice in a few months is step 5 calling.
Step 3 in full: the reset, the update, and the calibration menu that does not exist
Sudden drift that appeared overnight is occasionally a stuck state or stale software rather than wear, and PlayStation’s own route rules those out. Do it exactly as PlayStation’s troubleshoot steps give it:
- Turn off the PS5 console — fully off.
- Find the small reset hole on the back of the controller, next to the Sony logo, and press the button inside with a pin, an unfolded paperclip or a SIM tool (PlayStation notes the tool is not included) for at least five seconds.
- Connect the controller to the PS5 with the USB cable that came with it and press the PS button.
Then update what can be updated. DualSense device software arrives as part of PS5 system software updates; to check the controller manually, go to Settings > Accessories > Controller (General) > DualSense Wireless Controller Device Software. On a PC, Sony’s PlayStation Accessories app updates the controller’s software the same way. Retest on the test page afterwards and compare numbers with step 1: if the resting offset is unchanged, the software was never the cause, and repeating the reset will not change that — a result, not a failure of technique.
Now the correction, stated plainly because it sends readers hunting through menus for hours. There is no stick calibration tool, and no Test Input Devices screen, in the PS5’s settings for a standard DualSense. One of the biggest pages ranking for this problem — Asurion’s drift guide — tells readers that although “there isn’t a built-in calibration tool for PS5,” they can “test and recalibrate using the PS5’s controller settings” at Settings > Accessories > Controllers > Test Input Devices, following “the prompts.” That menu does not exist on a PS5. PlayStation’s own controllers hub — the page that lists pairing, updating and troubleshooting for this controller — contains no calibration and no test screen at all, and the calibration-guide site JoyCheck has publicly corrected its own earlier version for inventing a similar “Recalibrate Input Devices” menu it could not substantiate. The same Asurion page adds that Sony’s PC firmware tool can in some versions “re-center the neutral position” of the sticks; the PC app updates device software, and updating is all it does. Two smaller versions of the same error travel with it: pages claiming the pinhole reset “resets the internal calibration” or clears pairing — PlayStation’s own wording is that a reset “will not reconfigure the controller or affect pairing settings” — and pages locating the reset hole by the L2 trigger or a screw, where PlayStation-derived guides put it by the Sony logo, as in the procedure above.
What about the third-party calibration tools that genuinely exist? Browser-based tools using a computer connection can write a new centre point into a DualSense, and for a small, steady baseline offset they can make the at-rest number drop. They are not PlayStation tools, PlayStation does not document or endorse them for this, and they change what the controller reports as centre — they cannot restore the worn surface the stick is reading from. Treat them as an out-of-warranty experiment for light drift only, after the warranty check in step 5, never as the first-line fix the word “calibration” makes them sound like. On the console itself, the reset and the update above are the whole of the maker’s software route.
Step 4 in full: the contact-cleaning reality check
Cleaning advice for drift ranges from careful to fantasy, so here is the honest split.
What dust can explain. Crumbs, dust and skin oil work their way under the stick’s cap and around its base, and a stick that drifts intermittently, started after the controller lived in a bag, or changes when you rotate the stick hard, may genuinely be dirty rather than worn. For that controller, an external clean is worth ten minutes: controller off and unplugged, push the stick fully to one side, wipe around the exposed base with a cotton swab very lightly dampened with isopropyl alcohol, rotate the stick in full circles for half a minute, let it dry completely, then retest and compare the number. Air from a can, held upright in short bursts while you tilt the stick each way, can shift loose dust the same way. If the resting offset falls and stays fallen, it was dirt, and you are done.
What cleaning cannot do. PlayStation names no cleaning procedure at all for drift — no compressed air, no alcohol, and certainly no spray — so every cleaning method you will ever read, this one included, is workshop practice, not the maker’s route. The limits follow from how the stick works: inside the module, a metal wiper slides across a resistive carbon track every time the stick moves, and wear means that track is physically grooved and its contact surface degraded. A cleaner can wash loose carbon dust out of that mechanism. It cannot put carbon back. That is why the pattern experienced repairers describe is always the same: the first clean of a worn stick helps for weeks or months, the second for less, and a stick that needs cleaning every fortnight is not dirty — it is finished, and each respray is postponing step 5, not avoiding it.
Three rules keep cleaning honest:
- External only while warranty is a possibility. Getting cleaner inside the module means lifting the stick’s skirt or opening the shell. On a controller that PlayStation might still repair free, that trade is backwards — measure and use the deadzone, and let step 5 go first.
- Never ordinary WD-40 or any general lubricant. The guides that recommend spray cleaner mean quick-drying electronic contact cleaner made for this job; household lubricants leave residue inside a sensor that reads resistance, which is the opposite of what it needs. If a page just says “spray WD-40 in it,” it is a page to close.
- Judge by the retest, not by feel. Clean once, dry fully, re-measure. Number down and steady: dirt, solved. Number unchanged: the clean reached everything cleaning reaches, and a second, harder clean of the same stick is not a new idea — it is the wear verdict arriving.
One claim to discount wherever you meet it: “most drift is just dust.” It appears as professional insight in the top results with no measurement behind it, and it sets readers up to clean a worn stick four times before accepting the real diagnosis. Dust explains some drift, especially early and intermittent drift. Drift that arrived gradually, worsened steadily over weeks, and now holds a large, wandering resting offset is the wear pattern — and no incumbent who has opened these modules disagrees about what that pattern means.
Step 5 in full: the potentiometer wear verdict, and the warranty position
The standard DualSense’s sticks are potentiometer modules: the wiper-and-track mechanism above, soldered to the controller’s main board. Wear is not a defect in your particular unit so much as the design’s end-state — the contact that makes the stick work is the contact that wears it out — which is why drift typically arrives gradually, worsens with heavy use, and concentrates in the stick a game works hardest. Call the verdict when two or more of these are true of your controller:
- The resting offset is over 15%, or it wanders or jitters at rest on the test page.
- The offset is bigger than it was a month ago at the same test — this is why step 1 says write it down.
- The deadzone needed to hide it keeps having to rise.
- A clean helped for days, not weeks — or did not move the number at all.
- The drift is there in every game and on the test page alike, ruling out one game’s settings.
Once the verdict is wear, the options narrow to hardware, and they are not equal:
If warranty might still cover it, that route goes first — before opening, before spraying inside, before any module shopping. Warranty terms and duration vary by region and by where and when you bought the controller, so check yours rather than trusting any page’s blanket figure — then go to PlayStation Repairs, PlayStation’s diagnostic route from the same support hub, and tell them the measured facts: which stick, what resting offset, steady or wandering, and what the reset and update changed (nothing, if that is the truth). A warranty repair restores a working controller; be aware it fits the same potentiometer design, so it is a repair, not immunity. Opening the controller before this check risks the warranty to fix a fault the warranty may have covered — the single most expensive ordering mistake in this whole problem, and the reason this step is written before anyone reaches for a screwdriver.
Out of warranty, a standard DualSense stick replacement is a soldering repair. The module is desoldered from the board and a new one soldered in — like-for-like potentiometer modules restore the original feel and the original wear clock; magnetic Hall-effect or TMR modules remove the rubbing contact altogether and are the upgrade repair shops increasingly fit instead. Either way it is intermediate soldering on a board you can kill with a slip, best handed to a repair shop if you do not already solder, and worth pricing against a new controller before committing. The DualSense Edge is the exception that proves the design point: its stick modules are made to be replaced by the owner — PlayStation sells them separately, they swap in minutes with no tools beyond the controller’s own RELEASE latch, per the same support hub — because Sony built that controller expecting its sticks to be the part that wears out.
And a connecting note, because the two faults get confused constantly: a controller that will not pair or charge at all is a different chain from a drifting stick — if yours flashes blue and never connects, work our PS5 controller not connecting guide first and measure the sticks once it connects. The Xbox version of drift runs on the same measure-first logic, except that Microsoft adds a real recalibration step on top — our Xbox controller stick drift guide works that chain, and its Xbox controller not connecting companion covers that controller’s connection side. And if what is actually failing is the console — heat warnings, shutdowns mid-game — that is a placement and dust problem in the console, not the pad; our PS5 overheating guide works through Sony’s clearances for it.
What not to do
- Do not open the controller before the warranty check. It is the one step on this page that cannot be undone, and it is worth nothing until steps 1–4 have produced their numbers.
- Do not set the deadzone by creeping it up until the game “feels okay” and then forget the number. Without the measurement you cannot tell steady drift from wandering drift, and you lose the month-to-month comparison that delivers the wear verdict.
- Do not hunt for a calibration menu that does not exist — not Test Input Devices, not Recalibrate, not a stick test buried in Accessories. If a guide’s steps name a PS5 screen you cannot find, the guide is wrong, not your console.
- Do not spray general lubricants, water or household cleaners into the stick, and do not pour any liquid into the controller. External swab, lightly dampened, fully dried — that is the limit of sensible cleaning.
- Do not hit, flex or slam the stick to “reseat” it. Blunt force is recommended in comment threads for everything and repairs nothing inside a potentiometer; it can crack the module housing and turn a worn stick into a dead one.
- Do not buy a replacement controller as a diagnostic. The test page already told you which stick is at fault and by how much. A new pad bought to “see if it still happens” answers a question the free measurement answered first.
Frequently asked questions
Can stick drift fix itself? Dirt-based drift occasionally clears when the debris moves on. Wear-based drift does not — the track only wears further — which is why the pattern matters: intermittent and recent is worth cleaning; gradual, steady and growing is the wear verdict in step 5.
What deadzone should I set for PS5 stick drift? One point above the resting offset you measured on a test page. A stick resting at 14% gets a deadzone of 15; at 7%, set 8. There is no single right number, because there is no single drift — and on a standard DualSense the setting is per game, since the PS5 has no system-wide deadzone for that controller.
Is there a way to calibrate a PS5 controller? Not on the console, and not in any PlayStation tool. PlayStation documents the pinhole reset and device software updates for a standard DualSense — no calibration menu, no test screen. Third-party computer tools can rewrite the stick’s reported centre, but they are unofficial, they suit only a small steady offset, and they cannot repair a worn track.
Does resetting the controller fix drift? Rarely, and only the kind that was never wear: a sudden, overnight drift from a stuck state can clear with PlayStation’s reset (console off, pin in the hole next to the Sony logo for at least five seconds, reconnect by the included USB cable, press PS). Gradual drift will read exactly the same on the test page afterwards, because the reset does not reconfigure the controller, erase its pairings or recalibrate its sticks.
How long do DualSense sticks last before drifting? No maker publishes a lifespan, and pages quoting exact hours or a percentage success rate for cleaning are giving you unsourced figures. What is consistent across repair sources is the pattern, not a number: drift follows use, arrives faster under heavy stick work, and announces itself gradually — which is why your own monthly resting measurement is worth more than any average.
Is stick drift covered under warranty? It is a hardware fault, so it is the kind of fault warranty exists for — but the term and duration depend on your region and purchase, so check your own position and go through PlayStation Repairs before opening or spraying anything. The costly version of this story is always the same: a controller opened at home for a fault that would have been repaired free.
My controller drifts in one game but the test page says 2%. Which is right? Both. A 2% resting offset is a healthy stick; that game is reading it because its deadzone is set at or near zero. Raise that game’s deadzone to 3–4 and the problem ends there — no cleaning, no repair, and no reason to touch the other games.
This article follows PlayStation’s own DualSense support pages — the controllers support hub for the reset procedure and its will-not-reconfigure wording, the device software update path (Settings > Accessories > Controller (General) > DualSense Wireless Controller Device Software), the DualSense Edge custom-profile deadzone path and owner-replaceable Edge stick modules, and the PlayStation Repairs route — checked in November 2026. The measurement bands in step 1 are tester conventions used consistently by the controller-test tools themselves, labelled as such; PlayStation publishes no drift threshold, no calibration route and no cleaning procedure for a standard DualSense, and this article says so rather than filling those gaps. It covers the standard DualSense wireless controller, with DualSense Edge differences noted where they change the answer.