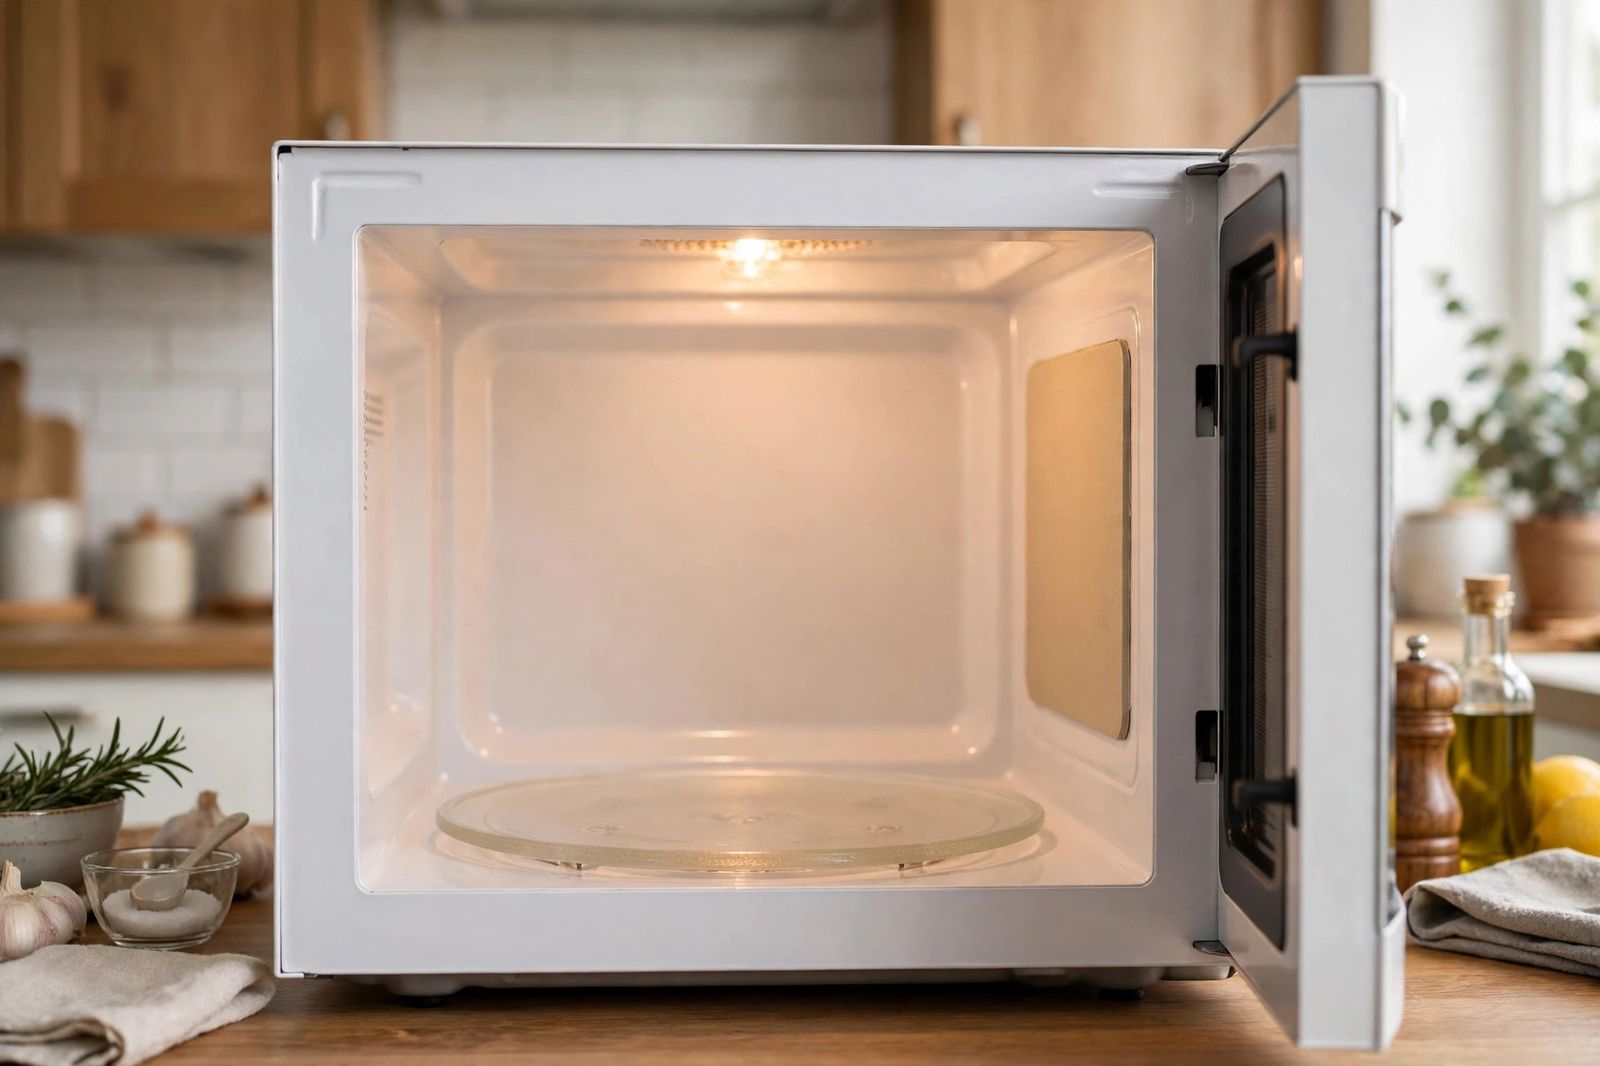
Stop the microwave, open the door and unplug it — that is the whole first step, and it comes before any diagnosis. Whether the microwave is safe to use again afterwards depends entirely on what sparked, and the location of the sparks tells you most of that story: sparks flashing from the small panel on the side wall point to a scorched waveguide cover, which is a cheap part you can replace yourself with the plug out; sparks jumping at one fixed spot on the wall, the rack support or a chipped patch of paint point to bare metal exposed inside the cavity, which is a repair-or-stop decision, not a clean-and-carry-on; and sparks that only happen with one particular dish almost always mean metal in or on that dish — the microwave itself may be completely fine. Arcing is the makers’ own word for this — GE Appliances’ manuals put it in one line: “Arcing is the microwave term for sparks in the oven,” and their instruction when you see it is to press CLEAR/OFF and correct the problem. Samsung’s support page says the same thing in its own words: immediately stop using the microwave if you notice sparks. What neither the makers nor the AI summary at the top of the search results can tell you is the verdict for your spark — that depends on the cause, and the cause is what this page reads.
Safety first — the rules that govern everything below. Unplug the microwave before you inspect, clean or replace anything inside the cavity, and keep it unplugged while you work. Never deliberately put metal inside to “test” whether it sparks again, never run the microwave empty as a test, and never run it with the waveguide cover removed — all three appear as advice on popular repair pages, and all three are wrong, for reasons set out in the corrections section below. And the rule carried over from every microwave fault: never remove the outer cabinet. The high-voltage capacitor inside can hold a lethal charge after unplugging, which is why internal parts are a technician’s job — the same boundary that governs a microwave not heating, where the checks a homeowner may do also stop at the cabinet wall. If you see flame, or smoke keeps coming after you have stopped the cycle, keep the door closed, leave the plug out and treat it as a fire problem, not an appliance problem.
Read the spark pattern first
Do this reading from memory of what you just saw, and from a look inside the cold, unplugged cavity with a torch — not by running the microwave again to watch it spark a second time. One observed spark is data; a second one, produced on purpose, is damage. Match the pattern to a row.
| Where the sparks come from | What it almost always is | Why it sparks | Verdict: safe to use again? |
|---|---|---|---|
| From the small rectangular panel on the side wall (or ceiling on some models) — the waveguide cover — often with a brown or black patch on that panel | A scorched waveguide (mica) cover: food splatter and steam have soaked into the cover over months and carbonised | Carbonised residue on the cover is conductive, so microwave energy discharges across the burnt patch itself, every cycle, in the same place | Fix, then use. Stop now, replace the cover (steps below), clean the area behind it, then test once with a cup of water. Safe to use again only with a new, intact cover fitted — never with the old burnt one, and never with no cover at all |
| At one fixed point on the cavity wall, floor or ceiling, or at a rack/shelf support — the same spot every time | Chipped cavity paint exposing the metal shell underneath, most often beside a rack support where the rack rubs | The cavity’s paint is an insulating coating over a metal box; where it chips, the exposed metal edge concentrates the field and becomes the arc point | Repair small, stop for large. One small chip, away from the door seal, can be repaired with proper microwave cavity paint (below) and the microwave used again once the paint has fully cured. A large, rusted, blistered or holed area — or any damage the arc has pitted deeply — is stop-and-replace: repeated arcing at bare metal only digs deeper |
| Around or under the cooking rack, or when the rack is in a particular position | A rack or shelf support that is loose, mis-seated, or whose own coating has worn to bare metal — GE’s manuals list the metal shelf not installed correctly, touching the wall, as a named arcing cause | Metal supplied with the oven is shaped and coated to be safe in its correct position; touching the wall, or worn through to raw metal at a tip, it stops being safe | Fix, then use — with conditions. Reseat the rack exactly as the manual shows, replace a worn rack or support rather than filing or bending it, and use the microwave again only if sparking was clearly tied to the mis-seated rack. A rack whose coating is gone is a replaced rack, not a cleaned one |
| Only with certain dishes or certain foods — a particular plate, mug, container or takeaway box — and never with your plain everyday dishes | Metal in or on that item: gold or silver rim or trim, metallic paint, a foil liner or lid, a twist tie left on packaging, a metal handle or fastener, or recycled paper containing metal flecks | Sharp, thin metal concentrates the field at its edges — GE’s phrase is that upturned foil edges “act like antennas” — and arcs to the nearest wall | Use again — without that item. The microwave is not faulty. Remove the item, inspect the cavity for any scorch mark the arc left behind (if it marked the wall, that row above now applies), and cook in plain microwave-safe glass or ceramic. The dish is retired from microwave use permanently |
| All over, random, or from a layer of burnt-on splatter on the walls or ceiling rather than one point | Carbonised food residue: old splatter that has been reheated until it turned to carbon | Carbon conducts. A burnt splatter patch behaves like a crude metal fleck stuck to the wall, and it is at its worst on and around the waveguide cover | Clean, then use — once. Unplug, let everything cool, and clean the cavity thoroughly (below). If the residue is on the waveguide cover and the cover itself is stained through, blistered or holed, cleaning is not enough — that is the cover row, and the cover gets replaced |
| From behind the cover, from inside the wall, or anywhere you cannot actually see — with a loud buzz, crackle or burning smell | Arcing inside the waveguide or in the high-voltage section — classically a failing magnetron arcing where you cannot reach | This is no longer a cavity problem; the discharge is happening in the part of the machine behind the cover, next to the charged capacitor | Stop and replace (or technician). Do not run it again, do not remove anything to look behind the cover, and do not be talked into a “new cover” as the fix for a sound-and-smell fault. On a countertop model this verdict is usually replacement; on a fitted model it is a technician’s call, made in person |
Two honest limits. First, the rows can stack: a dish with a gold rim can spark and scorch the waveguide cover in the same incident, so after fixing the row you matched, check the cover and the wall for marks the arc left behind before the verdict counts. Second, “I couldn’t see where it came from” is itself a pattern — if you cannot place the sparks in the cavity, treat it as the last row, not as permission for one more look with the power on.
The safe checks, in order — all with the plug out
1. Confirm the obvious metal is gone. With the microwave unplugged and cool, take everything out — dish, rack, turntable and ring — and look for the stowaways: a twist tie, a foil scrap, a staple in a paper bag, the metallic strip from a takeaway lid, a fork left in a mug. GE’s list of named causes is mostly this layer: metal or foil touching the side of the oven, foil not moulded to the food, twist ties, poultry pins, gold-rimmed dishes, and recycled paper towels containing small metal pieces. Half of all “my microwave sparks” stories end at this step — but only end here if the cavity itself shows no damage (step 3 decides that).
2. Clean the cavity — cold, unplugged, gently. Warm water with a little dish soap on a soft cloth, walls, ceiling, floor and around the turntable ring. The point is removing carbonised splatter, not scrubbing the paint off: abrasive pads and harsh cleaners can chip the very coating whose chips cause the second row of the table. If splatter is baked hard, soften it with a cloth soaked in hot water laid over it — not by running the microwave with a bowl of vinegar water, a tip one well-ranked repair guide gives for exactly this situation; running a machine that has just sparked, in order to clean it, puts the cart before the horse. Clean it cold, then decide.
3. Inspect three things by torchlight. (a) The waveguide cover — where it is, what it should look like, and how to judge it are the next section. (b) The paint — run your eyes and fingertips over the walls, floor and ceiling, and especially around the rack supports and the turntable area, for chips, bubbles, rust spots or a small dark pit with a burnt edge: that pit is an arc point, and its size decides the paint row’s verdict. (c) The rack and its supports — coating intact, tips not worn bright, and seated exactly as the manual shows.
4. One test, done properly, or none. Only if the cause you found is fixed — metal removed, cavity cleaned, cover replaced, paint cured — plug back in and run exactly one test: a mug or measuring jug of cold water, plain microwave-safe glass or ceramic, one minute on full power, and you watch through the door. Water is the load; the microwave is never run empty. No sparks and hot water means the verdict in your row applies. Any spark at all means unplug and move one row down the table — the cause was not the one you fixed. Do not run a second test to be sure; certainty is not worth another arc.
The waveguide cover: what it is, how to judge it, how to replace it
What it is. The waveguide is the channel microwave energy travels down from the magnetron into the cavity. The cover is the flat rectangular panel — usually on the right-hand side wall, on the ceiling in some models — that sits over the opening where that energy enters. It is made of mica, a mineral sheet that lets microwaves pass through while keeping splatter, grease and steam out of the waveguide. It looks disconcertingly like a piece of dull beige cardboard, and it is not cardboard: it is a working, heat-resistant, electrically insulating part, and substituting actual cardboard for it — which people do, because it looks like cardboard — puts a flammable sheet inside a microwave.
How to judge yours. A healthy cover is flat, smooth, dry, and an even pale beige or grey all over. Replace it if you see any of: a brown or black scorch patch, especially one that does not wipe off; a hole, crack or split; edges that are peeling, flaking or crumbling; warping; or a patch that stays dark and damp-looking after cleaning. A faint, even yellowing with no patch, crack or softness is ageing, not failure — makers do not publish a colour chart, so the working rule is damage you can point to, not tint. If it sparked from the cover, the argument is already settled: a cover that has arced is a cover that gets replaced, even if the mark looks small, because the carbon is in the material, not on it, and it will arc again in the same place.
Replacement, step by step — plug out throughout:
- Unplug the microwave and leave it unplugged for the whole job. This work is done entirely from inside the open cavity; the outer cabinet is never opened, which is what keeps it homeowner work at all.
- Note your model number (inside the door frame) and order the cover for that model, or a plain mica sheet to cut yourself. A model-specific pre-cut cover is the simpler purchase; a universal sheet is the same material and cheaper, and one sheet usually yields more than one cover.
- Remove the old cover. Depending on the model it is held by one screw, by plastic clips or rivets, or it slides out of slots — ease it out gently rather than levering hard, and keep any screw or clips.
- Clean behind it. With the cover off, wipe the opening and the cavity wall around it with a damp cloth to remove every trace of carbon and grease — a new cover fitted over carbon residue inherits the problem. Let the area dry fully. If the metal around the opening is itself scorched, pitted or holed, stop here: that is no longer a cover job, it is the last row of the table.
- If you are cutting a universal sheet, lay the old cover on the new sheet and trace it exactly — outline, screw hole, clip slots and all — then cut with scissors or a craft knife. The old cover is the template; keep it until the new one is fitted and proven.
- Fit the new cover flat and flush, seated in its slots or fixed with the original screw or clips. It must sit tight against the wall with no gap and no bow — a loose cover collects splatter behind it.
- Leave the plug out until the cover is fully fitted. Then run the one proper test from step 4 above: cup of water, one minute, watch through the door. A faint new-part smell on the first run or two is normal; any spark is not — unplug and re-read the table.
Never use the microwave with the cover removed, loose, or “while the new one is on order.” Without it, every cooking splatter goes straight into the waveguide, and a small fix turns into the magnetron row.
Chipped paint and worn racks: the middle verdict
This is the cause the makers’ own pages barely mention and the repair blogs mention without a size limit, so here is the limit. The cavity is a metal box wearing a specialised heat-resistant coating. A small chip — a single spot, clean-edged, not rusted through, not beside the door seal, and not a pit burned deep by repeated arcing — can be repaired: with the microwave unplugged, clean the spot, sand the exposed metal and the chip’s edge lightly so the paint grips and no sharp raised edge remains, apply proper microwave cavity touch-up paint (sold for exactly this; ordinary paint of any kind is not a substitute), and let it cure for the full time the product states before any use. A rack or support with worn coating follows the same logic at part level: small, sound parts are replaced, not repainted at their tips, because a support’s job includes holding a metal rack off the wall, and a bent or worn support does that job badly.
The verdict flips to stop-and-replace when the damage is no longer a spot: a blistered or rusting patch, several chips, a hole, damage at the door edge or seal, or a wall that has been arcing long enough to pit. At that point the box itself is compromised, paint is decoration over a structural problem, and on a countertop microwave the economics agree with the safety — replacement, as the repair-or-replace section below sets out. What you must not do is the middle path of cleaning a badly damaged cavity, declaring it “probably fine,” and testing it repeatedly: each test arc lands on the same bare metal and deepens it.
Two popular instructions you should not follow
These corrections are the reason this page exists alongside the makers’ short ones, because both instructions rank well and both put readers at risk.
“Remove the waveguide cover and run the microwave to see if the sparking stops.” A major parts seller’s sparking guide advises exactly this — remove the cover, and if the sparking resolves, fit a new one. Do not. The cover is not a suspect you isolate by running without it; it is the shield that keeps food and moisture out of the waveguide, and manufacturer guidance is that the oven should not be run for any function without the cover in place. Running coverless can contaminate the waveguide and turn a cheap cover replacement into magnetron damage. Inspect the cover cold and unplugged — scorch, holes and cracks are visible without a single powered second — and replace it on sight evidence, not on a live experiment.
“Run it empty for a few seconds to test it.” One widely syndicated sparking guide gives an empty 15-second run as its test step. GE’s manuals warn the opposite: operating the microwave with no food inside for more than a minute or two may cause damage to the oven and could start a fire — the energy has nowhere to go but back into the machine’s own parts. Shorter does not make it a method; it makes it a smaller version of the same fault. Every legitimate test on this page uses a cup of water as the load, and one test is enough.
A third, smaller error travels with these: the cover described as a “cardboard or plastic panel on the ceiling.” It is mica, it is usually on a side wall, and the misdescription matters — a reader hunting the ceiling for cardboard will miss the scorched side-wall cover that is actually sparking, and a reader who believes it is cardboard may one day patch it with cardboard.
When the verdict is stop — and what repair or replace means
Leave the microwave unplugged and do not run it again, in any of these cases: sparking continues after the cause in your row was properly fixed; sparks come from behind the cover or cannot be located in the cavity; there is a loud buzz or crackle, a burning electrical smell, or smoke; the cavity wall is pitted, holed or heavily rusted; the waveguide cover opening or the metal behind it is scorched; or the door is damaged or does not close firmly. Samsung’s instruction for persistent sparking is to unplug and contact support or a service centre, and Whirlpool’s is the gentlest version of the same boundary — if arcing is caught at once it should not damage the oven; remove the offending item — which is precisely the single, explained, metal-item case, not a licence to keep cooking through a repeating fault.
For the economics, the cause splits the answer as cleanly as it splits the safety. A waveguide cover is one of the cheapest parts on the appliance, and a small paint repair cheaper still — on any microwave that is otherwise sound, those two causes are fix-and-keep at almost any age. A magnetron or waveguide fault behind the cover is the opposite end: professional labour beside a charged capacitor, on top of the part. On a countertop model that bill normally meets or beats the price of a new unit, so replacement wins; on an over-the-range or built-in model, where replacement adds removal and fitting, a technician’s quote is worth getting before deciding — the same installed-cost maths that decides a microwave that runs but does not heat. If you do call, the description that shortens the visit is your row of the table: where the sparks came from, whether one dish caused it, what the cover looks like, and what you have already replaced.
Frequently asked questions
Is a microwave safe to use again after it sparked once? Only after you have stopped it, unplugged it, and matched the spark to a cause in the table — and only once that cause is fixed. A single spark from a twist tie you then removed, with no mark left on the cavity or cover, is a closed incident. A single unexplained spark is not: unexplained means unread, and the safe move is the inspection in this article, not another cooking cycle to see if it happens again.
Why does my microwave spark when there is no metal in it? Because metal objects are only one of four cavity causes. A carbonised waveguide cover arcs at its burnt patch, exposed metal under chipped paint arcs at the chip, carbonised food splatter arcs where it sits, and a worn rack arcs at its bare tip — all with a cavity completely free of utensils. There is also a rarer fifth case: very dry, mineral-rich foods can throw tiny sparks at their edges; if sparks happen only inside one portion of food, move with the food when the dish rotates, and stop the moment that food is removed, that is the food, not the machine — stir it, add a little moisture, and do not use that as an explanation for sparks that also occur with a cup of water.
Can I just clean a burnt waveguide cover instead of replacing it? Clean a cover that is merely greasy — gently, unplugged, and dry it fully. Replace a cover that is scorched, brown- or black-patched, cracked or holed: the burning is carbon worked into the mica, not dirt sitting on it, and wiping does not remove it. Covers are among the cheapest parts on the appliance; this is not the place to economise.
My microwave only sparks with one particular plate. Is the microwave broken? Almost certainly not — the plate is. Gold or silver rims, metallic paint and foil linings arc exactly as GE describes, with sharp metal edges acting like antennas. Prove it with the water test in a plain glass or ceramic vessel: no sparks with the plain vessel means the microwave is fine and the plate leaves the microwave rotation for good. Check the wall and cover for a scorch mark from the incident before you close the case.
Can sparking ruin a microwave that was otherwise fine? Yes, and quickly — which is why “it stopped sparking on its own” is not good news. Each arc burns a little more of whatever it is jumping to: it deepens a paint chip into a pit, burns a cover through toward the waveguide, and, kept up, reaches the magnetron. A spark cause fixed the day it appears is usually the cheapest repair on this page; the same cause run for a month is how a cover-priced fault becomes a replacement-priced one.
This article is general information, based on the manufacturer support pages and manuals linked above. Models differ in cover location, fixings and rack arrangements; your microwave’s manual governs your machine. Nothing in this article is an instruction to open a microwave cabinet: work described here is done from inside the open, unplugged cavity only, and internal diagnosis and repair belong to qualified technicians because of the high-voltage capacitor hazard.