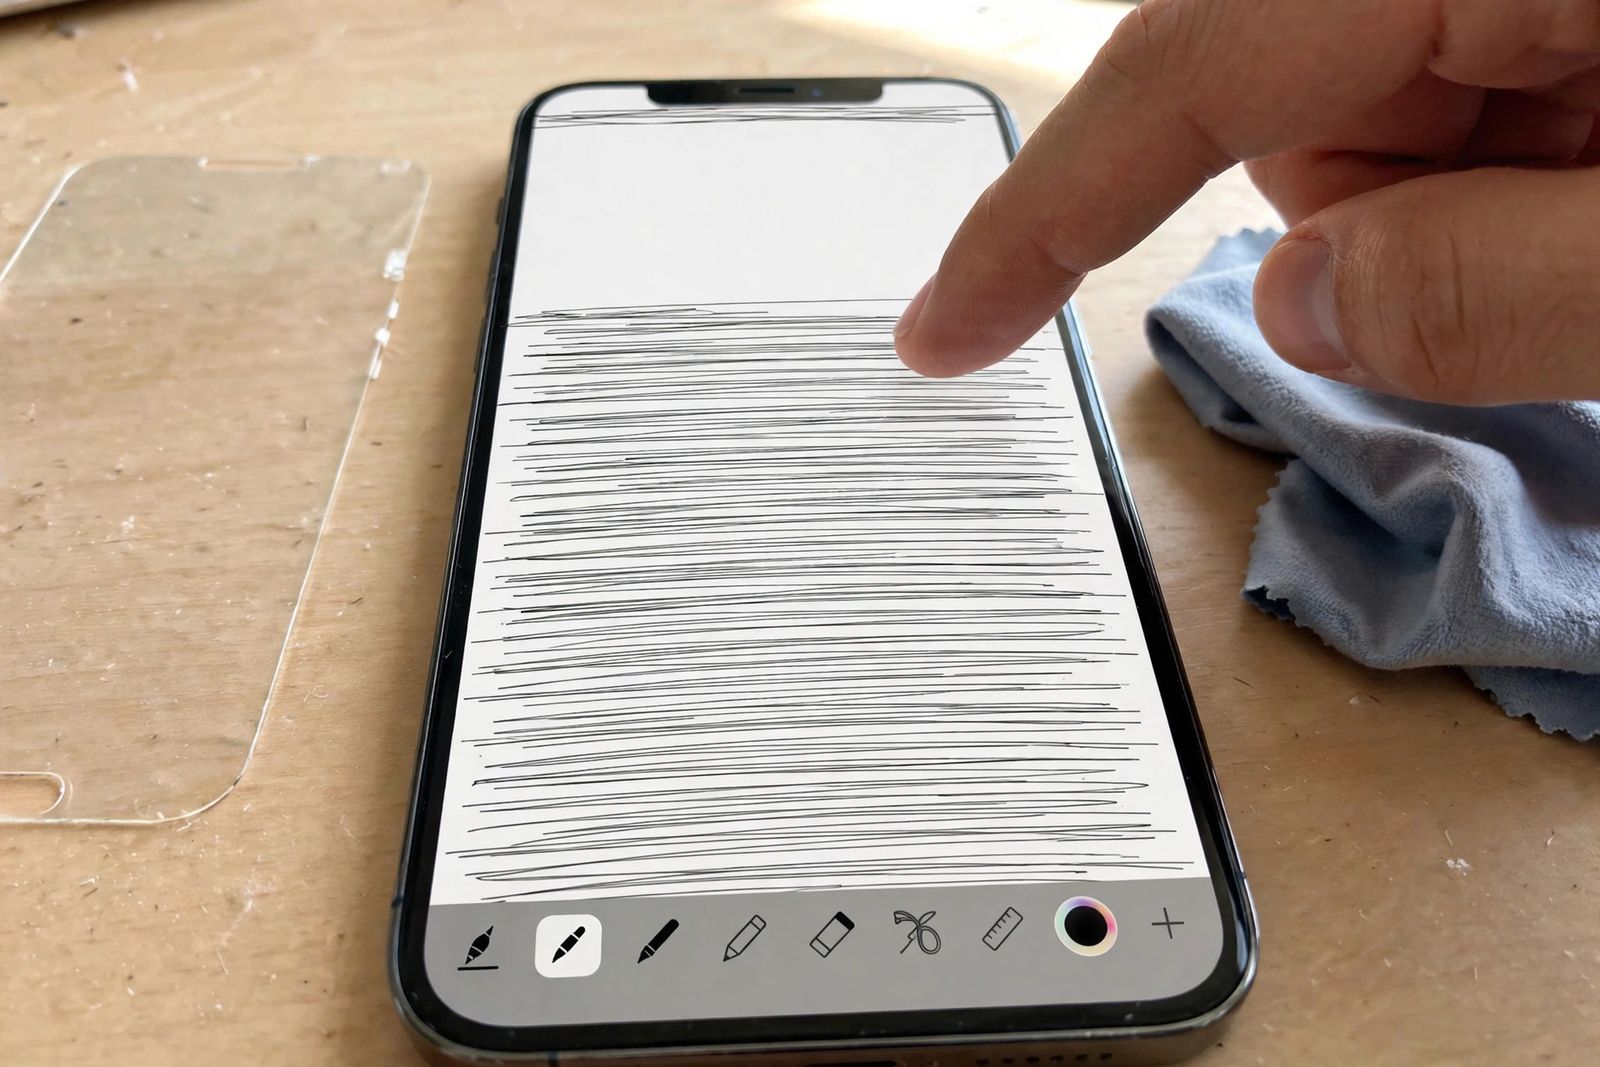
If your iPhone screen is not responding, do not start with a reset or a repair quote — start by matching your freeze pattern in the table below, because each pattern has a different first fix: a whole screen that is frozen needs the force restart for your model (the button table comes first, below, and it erases nothing), a single strip or corner that never responds needs the bare-screen test with the protector off, and a screen that stopped after a drop or after an update needs its own route, in its own order. Underneath every pattern sit the four checks Apple itself gives for a screen that is not working: restart the device, make sure the screen is clean and free of debris or water, disconnect any Lightning or USB-C accessories (and if the screen works after removing one, try a different outlet, cable or charger), and remove any cases or screen protectors — and if the screen still is not working after those, Apple says the device may need service. Nothing before the last section of this article erases anything on the phone, and the one step that can erase — Restore — is named as the last resort every time it appears, never as a routine fix.
First: force restart — the exact sequence for your model
A force restart is the only fix that needs no touch at all, which is why it comes first for a frozen screen: it restarts the software with the physical buttons while the touchscreen is ignoring you. It is not a factory reset. It erases no photos, apps, messages or settings. The sequence depends on the model family, and two details decide whether it works: the volume presses on current models are quick press-and-release taps, in succession — not holds — and the final hold is longer than feels natural. Apple notes the logo might take longer than 10 seconds to appear; letting go early is the usual reason the sequence “doesn’t work.”
| Your iPhone | Force restart sequence | Release when |
|---|---|---|
| iPhone 8 and later, including iPhone X, 11, 12, 13, 14, 15, 16 and newer, and iPhone SE (2nd and 3rd generation) | Press and quickly release Volume Up, press and quickly release Volume Down, then press and hold the Side button | The Apple logo appears (may take longer than 10 seconds) |
| iPhone 7 and iPhone 7 Plus | Press and hold the Side button and Volume Down together | The Apple logo appears (may take longer than 10 seconds) |
| iPhone 6s and earlier, and iPhone SE (1st generation) | Press and hold the Home button and the Side (or Top) button together | The Apple logo appears (around 10 seconds) |
If the logo appears and touch returns, the freeze was software — test the screen properly (the draw test in the pattern table below) rather than assuming it is cured, and note which app was open, because a freeze that returns in the same app is that app’s problem, not the screen’s. If nothing appears at all and the screen is black rather than frozen on a picture, that is a different complaint with a different first step — an hour’s charge before the same force restart — and it is covered in iPhone not turning on. If the logo appears but the phone never reaches the Lock Screen, skip to the after-an-update route below: a phone that starts and stalls is not the same fault as a phone whose touch has died.
The freeze-pattern table: match your pattern, follow its order
This is the diagnostic the top guides scatter across separate sections. Read down the first column, find the row that describes your screen exactly — not approximately — and work that row’s steps in the order given. The order inside each row is the point: each step rules out a cheaper cause before the next step spends anything, and no row reaches a repair before its free tests are done.
| Your freeze pattern | What it most likely is | Ordered response — do these in this order |
|---|---|---|
| Whole screen frozen — a picture is showing, nothing responds anywhere, buttons still click | Frozen software: iOS or one app has locked up with the display on | 1. Force restart with the table above for your model. 2. If touch returns, run the draw test (row 2, step 2) once to confirm no dead area was hiding under the freeze. 3. If it freezes again in the same app, close and update that app; if it freezes everywhere, update iOS (Settings > General > Software Update, or via a computer as in row 4). 4. Only if freezes keep returning with everything updated: back up, then the computer Update route in row 4 |
| Only the top strip (or one strip, corner or area) never responds — the rest of the screen works normally | A dead zone in the touch layer, or a protector/case fault sitting exactly over that area — the two are separated by the bare-screen test, not by guessing | 1. Remove the case and screen protector and clean the glass (Apple’s steps, next section). 2. Draw test: open Notes, start a note, tap the pen/draw icon and drag one finger slowly in lines across the whole screen, top to bottom and side to side — where the line breaks or jumps is the dead area. 3. Repeat with the protector off: if the gap moves or disappears, the protector was the fault — refit or replace it. 4. If the same gap stays in the same place in every app, with bare glass, it is the display — that pattern is a service case, and no reset fixes it |
| Stopped responding after a drop — with or without a visible crack | Impact damage inside the display or to its connection; a touch layer can fail under unbroken glass | 1. Do not keep pressing hard on the screen, and do not charge it if the glass is loose, the screen is lifting or the back is raised — those are stop-now signs (see “When to get service”). 2. Force restart once, with the table above: if touch returns fully and the draw test is clean, watch it for a day — an intermittent fault after a drop often returns. 3. Run the draw test: a dead strip after a drop is the display naming itself. 4. If touch is still dead or patchy after one force restart and the draw test, book service and say it started with a drop — do not work through software resets first; they cannot reconnect hardware |
| Stopped responding after an update — the freeze began during or just after an iOS update, or touch became slow and long-press-like afterwards | An update that has not finished cleanly, a touch bug the next update fixes, or a touch setting that now filters your taps | 1. Force restart once (table above). 2. Check Settings > Accessibility > Touch > Touch Accommodations: if it is on, its Hold Duration makes the phone ignore any touch shorter than the time set — turn it off temporarily and test normal taps (details in the settings section below). 3. Install any further iOS update — via a computer if you cannot tap reliably (Finder on a Mac, the Apple Devices app or iTunes on a PC). 4. If the screen is still unusable, use recovery mode and choose Update — never Restore first (full route in the update section below) |
| Fails with a screen protector on, or with wet hands — missed taps, jumpy or phantom touches, worse at the edges or after rain, washing or a workout | Something sitting between your finger and the touch layer, or on it: a thick/lifted/bubbled protector, a case pressing the edges, water, sweat or grease confusing the sensor | 1. Dry the screen and your hands completely; wipe the glass with a soft, dry, lint-free cloth. Gloves block touch unless they are made for touch screens. 2. Unplug the charger and any Lightning or USB-C accessory and test again — if touch behaves unplugged, swap the outlet, cable and charger one at a time, exactly as Apple directs. 3. Remove the case, test; remove the protector, test on bare glass for a normal session of use. 4. If bare, dry glass works perfectly, the accessory you removed last was the cause — replace or refit it. If bare glass still misses or invents touches, your pattern is not this row — run row 1’s force restart, then treat what remains as row 2 or row 3 |
Two rules govern every row. First, change one thing at a time: the reader who removes the protector, unplugs the charger, dries the screen and force-restarts all in one go may fix the phone and learn nothing — and when the fault returns next week, they start from zero. Second, a pattern that survives its whole row is information, not failure: a dead strip that persists on bare glass after a force restart has been diagnosed by its own row, and the diagnosis is the display. That is what you take to the service appointment.
Apple’s four checks, done properly
The pattern table leans on Apple’s screen page, and its four steps deserve their full working form rather than the one line each usually gets:
- Restart the device. For a screen that responds intermittently, an ordinary restart is the step; for a screen that responds nowhere, the restart is the force restart in the table above — same step, button version. Apple’s page lists “restart” without separating the two, which is why frozen-screen readers stall on it: you cannot drag a power-off slider on a screen that ignores you, and you are not meant to.
- Make sure the screen is clean and free of any debris or water. Dry, soft, lint-free cloth; dry hands. Water on the glass is not a trivial cause — droplets and wet fingers are read by the touch layer as touches or as noise, which is why the wet-hands pattern in the table is a real pattern and not user error.
- Disconnect any Lightning or USB-C accessories. Apple’s wording continues: if your screen works after removing an accessory, try using a different outlet, cable, or charger. A charger that makes touch jumpy or inventive only while plugged in has identified itself — replace the charging chain, component by component, before suspecting the phone.
- Remove any cases or screen protectors. Not “check” them — remove them, and test on the bare phone. A case pressing on a display edge and a protector lifted over one strip both produce symptoms that read exactly like hardware damage, and this step is the only way to separate the two for free.
If the screen still is not working after all four, Apple’s page ends where this article’s service section begins: you might need to set up service for the device. Everything between here and there — the settings check, the computer update route — exists for the two patterns Apple’s short page does not separate out: the after-update freeze and the phone that taps by itself.
The settings check: when the phone is filtering your touches on purpose
One cause of a “dead” screen is not a fault at all. Touch Accommodations, at Settings > Accessibility > Touch > Touch Accommodations, exists to change how the iPhone reads touch for people with tremors or fine-motor difficulties — and when it is switched on unintentionally (a borrowed phone, a child in Settings, a restored backup carrying old settings), it makes a healthy screen behave like a broken one. Apple’s guide to adjusting how iPhone responds to touch describes what it can do: recognise faster or slower touches and ignore multiple touches. In practice:
- Hold Duration means a touch is not recognised until your finger has stayed down for the duration set. Quick, normal taps are ignored — the screen feels dead to fast touches and responds only to long presses. That mismatch — long press works, tap doesn’t — is this setting’s fingerprint.
- Ignore Repeat treats multiple touches within the time set as a single touch, so rapid repeated taps vanish.
- Tap Assistance decides whether the initial or final touch location counts, which can make taps land somewhere other than where you aimed.
The test is reversible and costs nothing: note the current settings, turn Touch Accommodations off, and test ordinary taps, swipes and typing. If normal touch returns, nothing was ever broken — turn the feature back on only with settings you actually need. While you are on the Touch screen, also check Haptic Touch (Fast or Slow) if it is specifically press-and-hold previews that feel wrong — that is a duration setting for touch-and-hold, separate from the screen-wide filtering above. What this check cannot explain is a dead area: settings filter every touch everywhere, so a strip that never responds in any app is not a settings problem, whatever this screen shows.
After an update: the computer route, Update before Restore
If the pattern table’s update row leaves you with a screen you still cannot use — or an iPhone that freezes on the Apple logo while starting — the remaining software route runs through a computer, because it needs no taps from you:
- Connect the iPhone to a computer with a cable. On a Mac with macOS Catalina or later open Finder; on an older Mac open iTunes; on a PC use the latest Apple Devices app or iTunes.
- Put the phone into recovery mode with the same buttons as the force restart, but keep holding the final button past the Apple logo until the Connect to computer screen appears: iPhone 8 and later — Volume Up tap, Volume Down tap, then hold the Side button; iPhone 7 — hold Side and Volume Down together; iPhone 6s and earlier — hold Home and Side (or Top) together.
- When the computer offers Update or Restore, choose Update. Update reinstalls iOS and keeps your data; Apple’s own recovery guidance is explicit that Restore reinstalls iOS and erases all your data, and that if you have not tried updating yet, you should try updating first.
- If the download takes more than 15 minutes, the phone may exit the Connect to computer screen on its own. Let the download finish on the computer, then repeat the button sequence to put the phone back into recovery mode and continue.
- Restore is the last step, not a step. Choose it only if Update fails — knowing it erases the phone and you will be setting up from your last iCloud or computer backup. Back up first wherever the screen still lets you: if the computer already trusts the phone, a backup in Finder or the Apple Devices app needs no taps on the phone itself.
One boundary worth knowing before you start: recovery mode cannot help a phone that cannot enter it — Apple lists a button that does not work or sticks as a service case, because the button sequences above are the only way in. And a phone whose touch problems come with it also draining unusually fast or shutting down unexpectedly may have two faults sharing one visit: the battery side has its own ordered check, and arriving with both patterns written down gets both diagnosed in one appointment.
Two things the top guides get wrong
The success percentages are invented. One ranking guide for this exact problem publishes a table of fix “success rates” — force restart 65%, iOS update 45%, recovery mode 55%, screen cleaning 15%, removing the case 10% — and states that its quick fixes “resolve 70% of touch response issues.” No source is given for any of those numbers, and none exists to give: Apple publishes no success rates for these steps, and no repair dataset behind the table is named. Another ranking result titles itself “[100% Success].” A symptom that includes physically damaged touch layers — the after-a-drop row above — cannot be fixed 100% of the time by software steps, by definition. Treat any percentage attached to a fix in a guide as marketing, not measurement: the honest version of the same information is an order (which step to try first, and why), which is what the pattern table gives you. The same caution applies to unsourced repair prices and timings quoted as general facts — a screen price depends on the model, the part and the date, and belongs on Apple’s service pages or a written quote for your phone, not in a guide’s table.
A symptom is not a board-level diagnosis. Another ranking guide’s table maps symptoms straight to internal components — total unresponsiveness plus grey lines to a “damaged Touch IC” needing logic-board repair, ghost touch to “digitiser failure” needing a screen repair — as if the component could be read off the behaviour. It cannot, from outside the phone. The same ghost touch is produced by moisture on the glass, a charger feeding interference, a case pressing an edge, and actual display damage, and Apple’s own page separates those four with the free checks in this article before any service conversation. A dead strip after a drop does point at the display — the pattern table says so — but it points there because it survived the bare-glass test, not because the symptom alone names a chip. Any guide that quotes you a board repair from a symptom list is skipping the tests that might have made the repair unnecessary.
When to get service
Book Apple or an Apple Authorized Service Provider when any of these is true: the screen still is not working after Apple’s four checks and a correct force restart; a dead strip or area stays in the same place on bare glass, in every app, on the draw test; touch stopped after a drop and did not fully return after one force restart; the screen taps or swipes by itself with nothing plugged in, no case or protector on, and a dry screen; recovery mode cannot update or restore the phone, or a stuck or broken button prevents entering it; or any stop-now sign is present — a screen that is lifting or raised, a swollen back, abnormal heat on the charger, or any smell. On that last group, stop charging and pressing on the phone and get it seen: none of those is a software symptom.
Take three things to the appointment: the pattern (which row of the table — whole screen, one strip, after a drop, after an update), what you changed one at a time and what each change did, and your backup status. That turns the visit from a fresh diagnosis into a confirmation. Check coverage before paying anyone: a touch fault with no impact or liquid damage on a phone under warranty or AppleCare+ is Apple’s problem to fix, and a display replaced by Apple or an authorized provider keeps the phone’s parts history clean in Settings > General > About > Parts and Service History — worth asking any independent shop about before they open the phone, since a non-genuine screen can be recorded there as an unknown part.
Frequently asked questions
Why is my iPhone screen not responding but the phone is on? Because the phone and its touch layer are separate systems. A phone that rings, vibrates or answers Siri behind an unresponsive screen is running — the fault is frozen software (the force restart answers it) or the display’s touch layer (the pattern table answers that). Match the pattern first: whole-screen freeze, one dead strip, after a drop, after an update, or protector/wet-hands interference each has its own ordered response.
Will a force restart erase anything? No. A force restart only restarts the software using the buttons; photos, apps, messages and settings stay exactly as they are. The same is true of recovery mode with Update. Only Restore erases the phone, which is why it is the last step in the computer route, never the first.
Why does only the top of my iPhone screen not work? A fixed strip that never responds — top, side or corner — while the rest works is either something sitting over that strip (a lifted or bubbled protector, a case pressing the edge) or damage to the touch layer beneath it. The test that separates them is free: remove case and protector, then draw lines across the whole screen in the Notes app. A gap that stays in the same place on bare glass is the display, and it is a service case.
Why does my iPhone tap things by itself? Ghost touch has four ordinary causes, in the order to test them: moisture on the glass or trapped under a protector (dry everything), a charger or accessory feeding interference (unplug it — if the tapping stops, swap the outlet, cable and charger one at a time, as Apple directs), a case or protector pressing the display (remove both), and display damage, usually after a drop. Ghost touch that survives all four tests, dry and bare and unplugged, is a service case.
My iPhone screen stopped working after an update. What do I do? Force restart once. Then check Touch Accommodations (Settings > Accessibility > Touch) — Hold Duration switched on makes normal taps appear ignored. Then install any further iOS update, via a computer if you cannot tap reliably. If the screen is still unusable, use recovery mode and choose Update, which reinstalls iOS and keeps your data. Restore, which erases, is only for when Update fails.
Can I back up my iPhone if the screen does not work? Often, yes. If iCloud Backup was on, a recent backup may already exist — check it from another device signed into the same account. If a computer already trusts the phone, connect it and back up in Finder or the Apple Devices app without needing the screen. What you generally cannot do is tap a Trust prompt or enter a passcode on a completely dead screen — which is why the backup check belongs before the repair, not after it.
How long should I test a screen without its protector before deciding it is faulty? There is no Apple-published duration, and guides that name one — ten minutes is a figure in circulation — have invented it. The test is not timed, it is patterned: use the phone normally on bare glass through the situations that failed before (typing, scrolling, the draw test across the whole screen). If the dead area or missed taps return in the same place, the protector was not the cause, however long you waited.
This article is general information, based on the Apple Support pages linked above — “If the screen isn’t working on your iPhone or iPad,” “Restart an unresponsive iPhone,” Apple’s Touch Accommodations guidance in the iPhone User Guide, and Apple’s recovery-mode guidance (Update before Restore; a download over 15 minutes may exit the recovery screen) — checked in November 2026. Button sequences and menu names are given per model family as Apple publishes them; if your model’s wording differs slightly, Apple’s page for your device is the deciding source, and the order of the steps — match the pattern, force restart, bare-screen test, Update before Restore — stays the same.