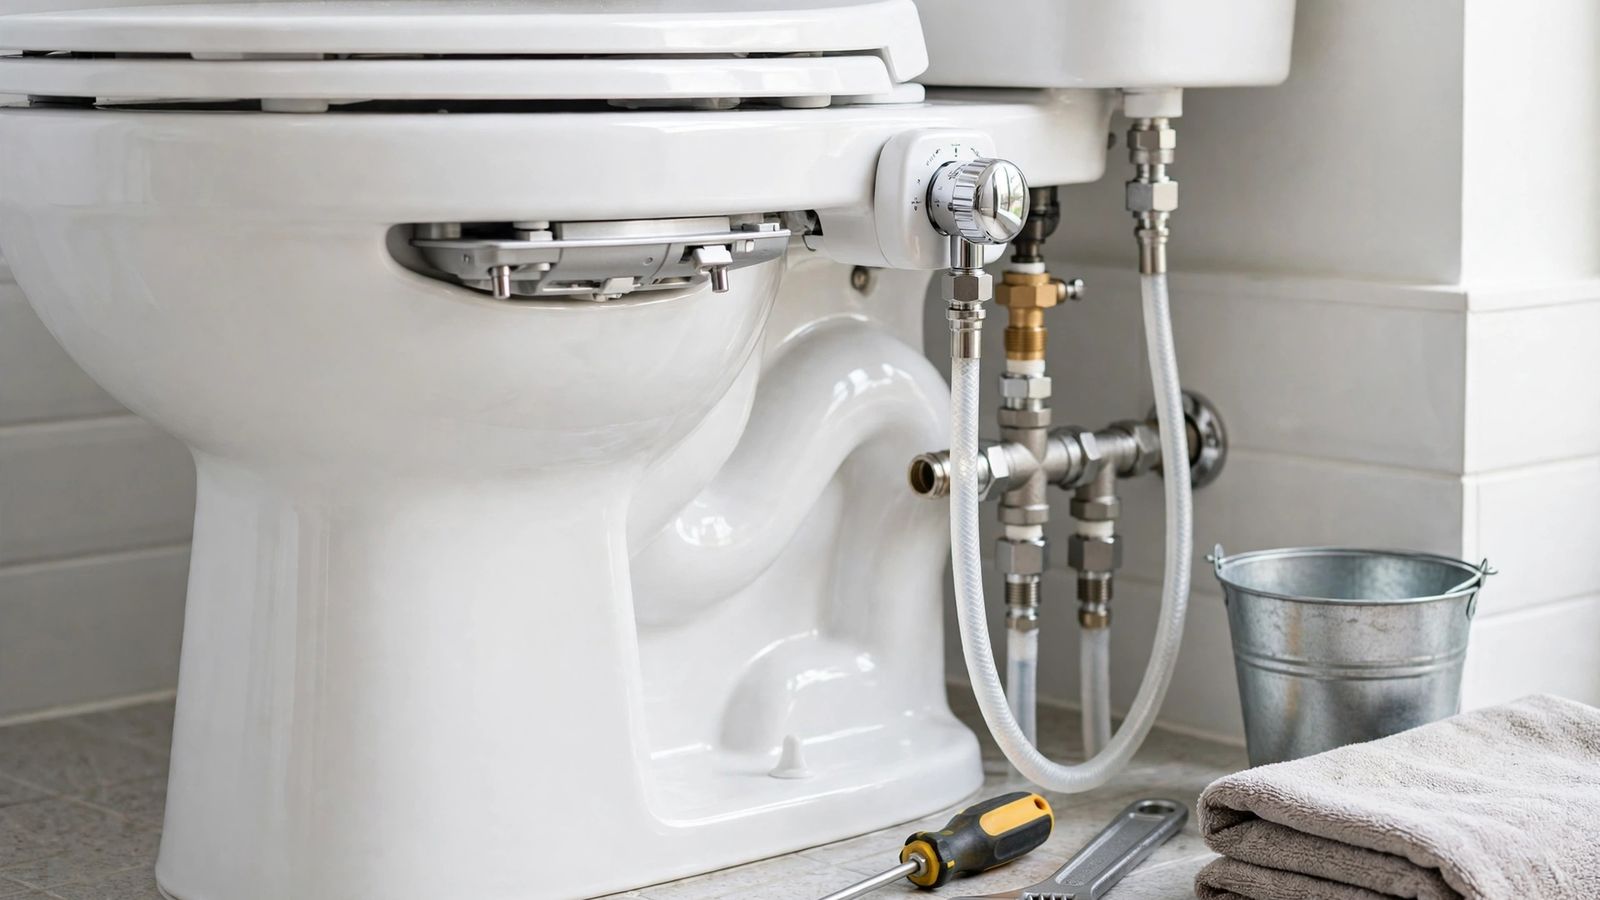
How to install a bidet attachment takes about 10 to 20 minutes on a standard toilet, with a screwdriver, a towel and a bucket — most connections are hand-tight, so a wrench is only backup. The sequence: shut off the water and flush the tank empty, take the seat off, screw the kit’s T-adapter onto the fill valve under the tank where the supply hose was, reconnect the supply hose to the bottom of the adapter, mount the attachment plate under the seat, run the bidet hose from the adapter to the attachment, then turn the water back on slowly and check every joint for leaks. Nothing is cut, drilled or glued. Whether it really takes 15 minutes is decided by the checking done first — so this guide begins there.
Before You Start: Check the Fit
Most failed installs are fit problems discovered halfway through — run these checks first.
Can you reach the fill valve under the tank? The T-adapter goes on the fill valve connection at the underside of the tank. Bio Bidet’s pre-installation notes state it plainly: at the fill valve under the tank, NOT down at the water supply coming from the wall. LUXE Bidet’s NEO manuals agree — and add that if you cannot access the fill valve, contact them for alternative fittings instead of improvising. No visible tank connection usually means a skirted toilet, whose porcelain hides the plumbing. Skirted toilets are generally workable — TUSHY publishes a separate skirted route — but no accessible connection and no manufacturer workaround is a stop point, covered below.
Is your supply line a flexible hose? The line from the wall valve to the tank must be flexible. LUXE, Brondell and Bio Bidet all require it: 7/8 inch at the tank end, 3/8 or 1/2 inch at the wall valve. A rigid metal pipe leaves no room for the T-adapter; swap it for a flexible toilet connector first — cheap, but a separate job, so know before you open the box.
Will the attachment sit flat? The plate mounts on the flat area behind the bowl. One-piece toilets with a French curve, where the tank sweeps down into the bowl in one curve, can leave no flat surface — TUSHY states its attachments will not sit flat on that shape. Run a hand behind the bolt holes: flat is fine; curved means asking the manufacturer before ordering.
Will your seat work over the top of it? Your existing seat bolts hold the attachment, so the seat matters too. A flat seat underside sits best; LUXE warns that hinge tabs or a curved underside can stop it sitting flat, and bolts too short or thick may not pass through the brackets. Bowl shape is the least of it: round and elongated both work — TUSHY rates its attachments for most standard round and elongated bowls — because the plates adjust to the bolt holes, a standard 5.5 inches apart.
Does the shutoff valve actually work? Turn it clockwise and flush. If the tank does not refill, it works. If it only slows the water, is seized, or weeps when touched, stop — that valve comes first; it is also the valve you would need in a hurry if a fitting failed. A toilet that already misbehaves around its fill valve is a separate repair — see toilet keeps running.
Warm-water models: is the sink close enough? A non-electric warm-water attachment heats nothing itself; it runs a second hose to the hot connection under your sink. The sink must be within that hose’s reach, and its hot valve must turn. Check before choosing one; the sink connection is covered after the main steps.
What You Need
Everything plumbing-related should be in the box: the attachment with adjustable mounting plates, the T-adapter (most kits use a 7/8-inch top connection), the thinner bidet hose — some have a mesh filter at one end — rubber washers for every fitting, and, in some kits, adhesive seat bumpers. Check the washers first — one left in the packaging is the commonest cause of a first-day leak.
From your own drawer: a flathead screwdriver, an adjustable wrench in case a supply nut is stubborn, a towel and a bucket. No thread-seal (PTFE) tape is needed: these fittings seal on their washers, not their threads.
How to Install a Bidet Attachment, Step by Step
The sequence follows the manufacturers’ own instructions — LUXE Bidet’s installation guide, TUSHY’s install guide and Bio Bidet’s attachment manuals agree on the core of it. Where brands differ, it is noted; your kit’s manual wins any argument with a general guide.
Step 1: Shut off the water and empty the tank
Turn the shutoff valve clockwise until it stops. Flush, holding the handle down so the tank empties fully. If the tank refills, the valve is not closed — deal with that first.
Step 2: Remove the toilet seat
Lift the hinge caps to expose the bolts. LUXE’s method: unscrew them from the top with a flathead screwdriver while holding the nuts underneath the bowl so they do not spin. Set the seat and hardware aside in order — the same bolts usually go back on. One exception: a few models (LUXE’s NEO Plus line) slide their plates under loosened hinges without removing the seat; if your kit says slide-in, follow its method.
Step 3: Disconnect the supply hose from the tank
With the towel and bucket under the connection, unscrew the supply hose’s nut from the fill valve — usually by hand, the wrench only if stuck — and let the water trapped in the hose drain out. This is the only wet moment in the job, and it is a cupful, not a flood — the water is off and the tank is empty.
Step 4: Fit the T-adapter to the fill valve
First, the washer: the adapter’s top connection must have its rubber washer seated inside, flat and fully in place — Bio Bidet’s manuals specify the cone washer sits narrow side up. Thread the adapter’s top onto the fill valve connection where the supply hose came off, and connect the supply hose to the adapter’s bottom. The side port stays open for now; the bidet hose goes there in Step 6.
Tightening follows one rule at every joint, stated by every major manufacturer in some form: hand-tight, snug, and no more. TUSHY’s guide calls finger-tight “perfect” and warns against cross-threading and overtightening; LUXE has you hand-tighten first throughout. If a joint weeps once the water is back on, shut the water off and add a small extra turn — about a quarter turn — rather than cranking it: overtightening damages plastic fill-valve shanks and adapter threads, and a damaged thread leaks worse than a loose one. The other fault is cross-threading — a nut that turns once and binds is misaligned, not sealed. Back it off and start again, straight.
Step 5: Mount the attachment and refit the seat
Place the attachment on the bowl with its mounting plates over the seat bolt holes, rotating the plates until they line up — they are adjustable because bolt spacing and bowl shapes vary slightly. The nozzle should sit centered in the bowl and, per TUSHY’s manual, as close to the back rim as possible without touching it, so it has room to extend and retract. Set the seat back on top, pass the bolts through the plates and bowl holes, and tighten evenly until both are stable. If a gap remains at the front, fit the kit’s adhesive seat bumpers under the seat — Bio Bidet supplies them for exactly this.
Step 6: Connect the bidet hose
Run the bidet hose from the T-adapter’s side port to the inlet on the attachment. If one end has a mesh filter, that end belongs at the T-adapter — LUXE specifies this. Check both ends for gaskets, hand-tighten both, and route the hose in a gentle curve, kink-free.
Step 7: Turn the water on slowly and check every joint
Open the shutoff valve slowly, counterclockwise, and let the tank refill. Then check every new joint — adapter to fill valve, supply hose to adapter, hose to side port, hose to inlet — running a dry finger or tissue around each: dampness you cannot see is easy to feel. Check again after the first few uses; a joint dry under tank pressure but weeping while the bidet sprays is still a leak. If one drips, use the leak table below before reaching for the wrench.
Set the Water Pressure Before First Use
Do not test the spray standing in front of the toilet — with no weight on the seat, an attachment can spray straight out of the bowl. Sit down, then turn the control knob slowly from off. Manufacturers’ first-use advice is the same: open it gradually, because household pressure varies and the top of the dial is stronger than expected.
If the spray is still too strong at a low dial setting, the bidet branch is getting too much pressure. Where the T-adapter has a shut-off lever, partly closing it throttles only the bidet feed; turning down the wall valve also works but slows the tank’s refill too, since both share one line. If the spray is too weak: valves fully open, hose checked for kinks, inlet filter and nozzle cleaned — mineral scale narrows both, and a spray that weakens over months is usually scale, not failing parts.
If It Leaks: Match the Drip to the Cause
| Where it drips | Likely cause | Fix |
|---|---|---|
| Top of the T-adapter, under the tank, all the time | Washer missing, flattened or seated crooked — or cross-threading | Water off, open the joint, reseat or replace the washer (narrow side up on cone washers), rethread straight, hand-tight |
| At a hose end | Gasket missing at that end | Water off, check both hose ends for their black rubber gaskets, reseat, hand-tighten |
| Only while the bidet is spraying | A downstream joint, or the nozzle body | Recheck hose ends under pressure; a weeping body is a warranty problem, not a tightening problem |
| Bottom of the adapter, at the supply hose | The original hose’s own washer is worn | Replace the washer or the supply hose — the same parts logic as a supply-side drip in how to fix a leaky faucet |
| Anywhere, with the adapter body cracked | Overtightening | Replace the adapter; tape and sealant cannot repair a cracked pressurized fitting |
The pattern: on washer-sealed fittings, force almost never cures a leak — opening the joint and fixing the seal does. Knowing how to install a bidet attachment includes knowing how its seals work, not just its steps.
Warm-Water Models: The Sink Connection
A warm-capable attachment installs on the toilet exactly as above; the extra work is under the sink. Turn off the sink’s hot valve, clockwise — TUSHY’s manual cautions that the valve and water may be hot. Disconnect the sink’s hot supply hose, fit the kit’s mini adapter (typically 3/8 inch) to the valve, reconnect the sink’s hose to the adapter, and run the bidet’s warm hose from the adapter’s side port to the attachment’s warm inlet. Turn the hot valve back on and check both new joints as you did on the toilet side.
Two details matter. If you fit a warm-capable model without connecting warm water, some kits — LUXE’s dual-temperature models are the clear example — include a cap for the hot inlet; fit it, because an open inlet leaks the first time the dial turns. And if the sink’s hot side delivers no hot water at all, that is a house problem, not a bidet problem — start with no hot water in house.
When Not to DIY
Stop and change plan — to the manufacturer’s support line for alternative fittings, or to a plumber — when any of these is true:
- You cannot access the fill valve at all. Concealed in-wall plumbing, some wall-hung toilets, and fully skirted designs with no access leave nothing to attach to. Manufacturers keep alternative adapters and sink-feed routes for some of these; where none exists, it is a plumber’s job.
- Your toilet is a flushometer. Flush-valve toilets have no tank and no fill valve, so there is nothing for a standard T-adapter to split. TUSHY’s workaround feeds its attachments from the sink supply within a limited distance; outside that route, do not attempt one.
- The shutoff valve is seized, corroded, or leaks when moved. Every step depends on it; valve replacement is quick work for a plumber, risky force-work for a first-timer.
- Threads are already damaged on the fill valve or fittings. A new adapter cannot seal against a stripped thread, and forcing it can turn a small repair into a tank replacement.
- You find existing water damage — soft flooring, staining, a supply line that already weeps. Fix that first; a bidet adds more pressurized joints to what is already failing.
Frequently Asked Questions
How long does it take to learn how to install a bidet attachment — and to do it? Manufacturers pitch 10 minutes or less (TUSHY) to under 30 minutes (LUXE). With the fit checks done first, 10 to 20 minutes is fair; a rigid-line swap or a stuck seat bolt adds time.
Will a bidet attachment fit a round toilet? Usually yes. Bowl shape matters far less for attachments than for bidet seats, because the plates adjust to the standard seat bolt holes. A flat area behind the bowl, a fairly flat seat underside, and bolts long enough to pass through the plates matter more.
Why is my bidet leaking after installation? Almost always a washer problem — one left in the box, seated crooked, or damaged by overtightening — followed by cross-threaded nuts. Work through the leak table: open the joint, inspect the seal, rethread straight, hand-tighten, and add a small extra turn only if it still weeps.
Sources: LUXE Bidet’s NEO installation guide and NEO owner’s manual, Bio Bidet’s installation guide and Essential attachment manual, and TUSHY’s installation guide and Fresh/Spa manuals. Your kit’s manual is the final authority.