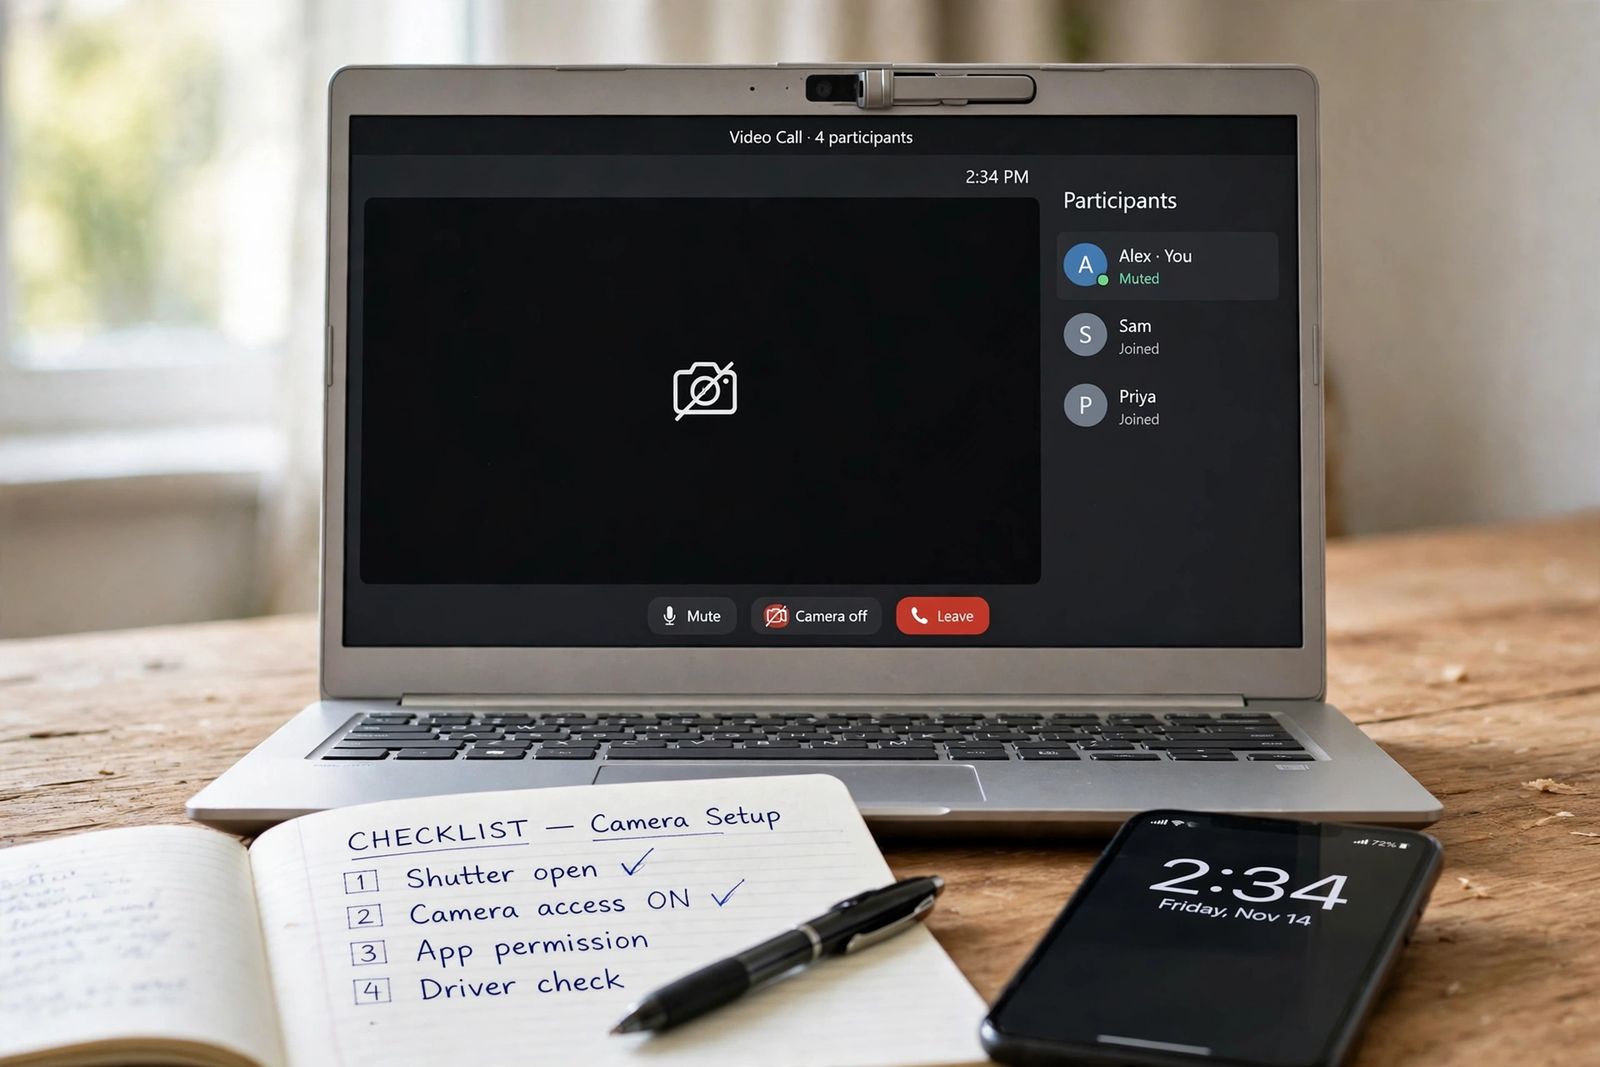
If your laptop camera is not working, the camera itself is usually fine — what has failed is one link in a short chain between the lens and the app in front of you, and reinstalling the driver fixes only the last link. Work the chain in order and stop at the link that answers it: first the physical privacy shutter, switch or camera key, then the Windows camera permission, then the permission and camera choice inside the one app that fails, and only then the driver. One test splits the whole problem before you start: open the built-in Windows Camera app. If the Camera app shows your picture but Zoom, Teams or Meet shows black, the camera, its permission at the Windows level and its driver are all already proven — your fault lives inside that one app, and the driver steps cannot help you. If the camera fails in the Camera app too, the fault sits below every app, and the chain below is your route. The laptop pictured above is the first case mid-call: the meeting is running, the other participants are there, and only the camera preview is black — the notebook beside it carries the chain in the order this article works it, with the first two links already ticked off.
The split test: works in the Camera app, or works nowhere?
Do this before changing a single setting. Close Zoom, Teams, Meet, your browser and anything else that might be holding the camera, then open Start, search for Camera, and open the Windows Camera app. Microsoft’s camera guide builds its own diagnosis on exactly this test, and states the reading plainly: if the camera works in one app but not another, the issue lies with the app’s settings. There are only two outcomes, and each one routes you to a different half of this article:
| What the Camera app shows | What it proves | Where your fault is |
|---|---|---|
| A normal picture of you | The lens, shutter, Windows permission and driver all work — in one move | Inside the failing app only: its selected camera, its own permission, or another app holding the camera. Go to the app branch (chain link 3) and skip the driver entirely |
| A black screen, a slashed-camera icon, or an error such as 0xA00F4244 | No app can currently reach a working camera — the block is at or below the Windows layer | The physical control, the Windows permission, a maker’s privacy mode, or the driver. Work the full chain from link 1 |
| The Camera app works, but the failing app is a website (Meet in a browser, for example) | The camera works; the browser was never given it, or gave it to the wrong device | The browser’s own site permission for that page — covered in the app branch; there is no Windows per-app switch for a browser to find |
One caution about the light beside the lens: it tells you an app has opened the camera, nothing more. A lit light over a black preview means the camera started and something is covering, blocking or already using it. A light that never comes on in any app means no app is reaching the device at all, which points lower — permission off at the device level, the device disabled, or the driver. Read the light with the split, not instead of it.
If instead the laptop’s whole screen is black while the machine itself is clearly running, you have left this fault altogether — that is a display failure, not a camera failure, and laptop screen is black runs the separate test sequence that tells a failed built-in screen from a laptop that never started. This article is for a working screen with a dead camera picture inside it.
The ordered check chain — the asset
Every guide for this fault lists roughly the same fixes. What none of the top results gives you is the order with a verdict at each link: each step below either fixes the camera or proves that link healthy and moves you down exactly one link, so you never reinstall a driver for a closed shutter or hunt through app settings for a camera Windows itself cannot see.
| Link | The check, exactly | If the camera returns | If it does not |
|---|---|---|---|
| 1. Physical control | Slide the privacy shutter over the lens fully open; press the camera key on the top keyboard row (with Fn if your model needs it); slide any side privacy switch away from its camera-off icon; on Lenovo, also turn Camera Privacy Mode off in Lenovo Vantage | The lens was covered or the camera was switched off at the hardware layer — no software was ever broken | The hardware layer is open. Move to link 2 |
| 2. Windows permission | Settings > Privacy & security > Camera: turn on Camera access, then Let apps access your camera, then — the one people miss — Let desktop apps access your camera | Windows was blocking every app, or every desktop app, at once | Windows is allowing the camera. Read the split again: Camera app works → link 3; Camera app fails → link 4 |
| 3. The one app | In the failing app’s video settings, select the built-in camera by name; in a browser, allow the camera for that site; close every other app that could be holding the camera (error 0xA00F4243 means one is) | The fault was that app’s choice, its site permission, or a rival app — the camera never failed | The app was not the block. If the Camera app also fails, you are on link 4 whatever this app says |
| 4. The driver | In Device Manager: Enable device if offered, Scan for hardware changes if the camera is missing, Roll Back Driver if the fault began with an update, Uninstall device + scan + restart if the driver itself is stuck — the maker’s driver for your exact model over a generic search result | Windows and the camera are talking again | The chain is exhausted. What remains is firmware (camera disabled in BIOS/UEFI) or the camera module and its hinge cable — the stop-testing section |
Keep the split taped to the chain as you work: “works in the Camera app” keeps you on link 3 and forbids link 4; “works nowhere” forbids link 3 — no app setting can restore a camera that Windows’ own app cannot open. Most wasted hours on this fault come from working the wrong half, and the split exists to make that impossible.
Link 1: the shutter, the switch and the camera key
This link is first because it costs ten seconds, needs no settings, and produces a perfect imitation of a dead camera: the camera starts, the app opens, and the preview is black or shows a camera with a slash through it. Microsoft’s guide makes the same point about its switch step — with the switch off, the device may not recognise that a camera is installed at all, or may show exactly that slashed-camera image.
- The sliding shutter. Look at the lens in the top bezel and slide the small cover fully to the open side until the lens is completely uncovered. A half-open shutter gives a dark, blurred smear rather than a clean black, which is its own clue. Dell’s camera guide starts with this same check — on models such as the Latitude 7340 the shutter is a physical slider beside the lens, and the model’s manual states which way uncovers it.
- The camera key. Many laptops carry a camera icon on one of the top-row keys. Press it once (some models need Fn held as well) and retest. Dell documents F9 as the camera on/off key on select models, where it works an electronic shutter; Lenovo’s IdeaPad guidance gives F8 or Fn + F8, and stresses that the key differs by model — read your own top row for the camera icon rather than copying a key from a guide. On HP’s documented shutter keys, the detail runs backwards from what most people expect: the key’s light on means the webcam is off. A lit key is not confirmation the camera is live; it is the off signal.
- The side switch. Some HP models put a privacy switch on the side of the laptop or beside the camera itself: sliding it towards the camera icon switches the webcam off, sliding it away switches it back on. Business models from several makers use the same idea — run a finger along both edges before you conclude your model has none.
- The maker’s privacy mode — Lenovo’s extra layer. Lenovo adds a software switch that sits below Windows: Camera Privacy Mode in Lenovo Vantage. Open Vantage, go to Device > My Device Settings > Display & Camera, and find it. The naming is the trap: with Privacy Mode on, the camera is disabled — in every app, even with every Windows permission correctly on. Turn it off and retest in the Camera app. Two honest limits: on Lenovo models with an infrared camera or Windows Hello face sign-in, Lenovo may hide this toggle entirely, because Hello manages the camera instead — a missing toggle is not a fault, it means this layer is not yours to check; and older machines shipped Lenovo Settings rather than Vantage, where the same idea appears as a camera privacy setting to move from Private to Normal.
If the preview returns at any point in this link, you are done — and note what it means: the driver, the permissions and the apps were innocent the whole time. If nothing changes, the lens is uncovered and the hardware layer is open; move down one link.
Link 2: the Windows permission, in its three layers
Windows does not have one camera permission; it has three stacked switches, and the camera works only when every layer above the app you are using is on. Open Settings > Privacy & security > Camera (on Windows 10 the path is Settings > Privacy > Camera) and check them top to bottom:
- Camera access — the device-level master switch. If this is off, nothing on the laptop can use the camera. If it is off and greyed out, an administrator controls it: on a work or school laptop that is a policy, not a fault, and your IT team is the fix.
- Let apps access your camera — the switch for apps as a class, with an individual switch under it for each app in the list.
- Let desktop apps access your camera — a separate master switch, further down the same page, for everything that did not come from the Microsoft Store.
Layer 3 is where the most repeated error in guides to this fault does its damage, so it gets its own correction before you go hunting for a switch that does not exist:
There is no individual Zoom, Teams or Chrome switch in Windows Settings. Several top-ranking guides for this fault tell you to open the Camera permission page and “enable your specific app — Zoom, Teams, Chrome” in the list. Microsoft’s own guide states the rule those pages miss: only apps installed from the Microsoft Store appear in that per-app list, and “you can’t turn off camera access for individual desktop apps” — browsers such as Microsoft Edge and conferencing apps such as Microsoft Teams are desktop apps, governed entirely by the single Let desktop apps access your camera switch. So if Zoom or Teams has no camera while the Camera app works, do not scroll the Settings list looking for it: check that the desktop-apps switch is on, then go to link 3 and fix it inside Zoom or Teams themselves. And the reverse also holds — there is no Windows switch that blocks Zoom alone, so a camera that works in the Camera app and in one calling app but not in another was never blocked by Windows at all.
While you are on this page, one more reading: the list also shows which apps last used the camera. An app you do not recognise holding recent camera access is worth closing before link 3. Then retest in the Camera app — not in the meeting app — so the result belongs to this link and not to the app above it.
Link 3: the app branch — when the Camera app works and your call does not
Stay on this link only while the split says the Camera app works. Your camera is proven; what is left is everything between that working camera and this one app.
- The wrong camera is selected. Calling apps pick a camera automatically, and a laptop that has ever met a USB webcam, a virtual camera, a capture device or a phone-as-camera may still be pointing at it. Open the failing app’s video or device settings and choose the built-in camera by its name — on HP machines it typically appears as the HP True Vision camera, on Lenovo as Integrated Camera; Dell models list the integrated webcam similarly. Microsoft’s split reading ends here for most people: the camera worked, the app was looking elsewhere.
- Another app is already holding it. A camera serves one app at a time in practice, and Windows names this failure when you let it: error 0xA00F4243 (also shown as 0xA00F4289) means, in Microsoft’s error table, that another app or process is using the camera. Close every other video app, recording tool and browser tab that could have it — completely, not minimised — and if the holder is not obvious, Microsoft’s route is Task Manager: right-click the app using the camera and choose End Task. Then test the failing app alone.
- The browser’s own permission (for Meet and browser calls). A website needs the browser’s permission on top of everything in link 2, and browsers remember a “block” answer permanently until you reverse it. In the browser’s site settings for the meeting page, set the camera to Allow, confirm the built-in camera is the selected device there too, and reload the page. A camera that works in the Camera app and in a desktop calling app but not in one website is this setting, every time — there is no fourth Windows layer to find.
- Repair the app, not the camera. If the failing app is the Windows Camera app itself while other apps work, repair the app: Settings > Apps > Installed apps > Camera > Advanced options, Repair first, then Reset if Repair changes nothing, as OBSBOT and Microsoft’s ecosystem both describe. Read the limit plainly, because one rival overstates it: Repair and Reset fix the Camera app’s own state. They do not check or repair permissions, drivers or a disabled device, whatever a guide claims — a camera that fails in every app will still fail after a reset.
- Antivirus and security software. Microsoft lists antivirus blocking among the common causes of this fault, and its error table carries a code for it — 0xA00F4246, camera locked by security software. Check your security program’s webcam or privacy protection setting and allow the failing app there; do not simply switch protection off and leave it off.
If the camera now works in the app that failed, stop. If you arrived here with a working Camera app and the app still fails after its camera choice, its rival apps and its own permissions are all clean, update or reinstall that one app — the camera has already given you its evidence. If the Camera app also fails, leave this link: your fault was never in the app, and link 4 is where it lives.
Link 4: the driver — last, and in this order
The driver is the link the short guides reach for first, which is exactly backwards: it is the only link whose fixes restart the machine, remove devices and can make a working setup worse, and the three links above it fix most cameras for free. Enter it only with a “works nowhere” split, and work it in this order — each step is stronger than the one before, and you stop at the first that works.
- Run the troubleshooter first on Windows 11. Microsoft starts its Windows 11 guidance with the automated camera troubleshooter in the Get Help app, which runs diagnostics and attempts fixes itself; the same troubleshooter is reachable at Settings > System > Troubleshoot > Other troubleshooters > Camera > Run. Let it finish before you remove anything by hand.
- Check the device is present and enabled. Right-click Start and open Device Manager. Look under Cameras first, then Imaging devices, then Sound, video and game controllers — Microsoft lists all three because where a camera sits depends on its driver. If your camera is there with a disabled marker, right-click it and choose Enable device (if the menu offers Disable device instead, the camera is already enabled — that reading is straight from Microsoft’s 0xA00F4244 steps). If the camera is missing entirely, choose Action > Scan for hardware changes and watch whether it returns.
- Check whether Windows has disabled it in Settings. On Windows 11, Settings > Bluetooth & devices > Cameras lists connected cameras and can hold a camera in a disabled state; enable it there if yours is shown disabled, then retest.
- If the fault began with an update, roll back — do not update. In Device Manager, right-click the camera, open Properties > Driver and choose Roll Back Driver if the button is offered, then restart and retest. Microsoft gives the rollback this exact place, for this exact timing. Chasing a newer driver for a fault an update caused is how a one-click fix becomes an afternoon.
- Otherwise, look for the update in the right two places. Run Settings > Windows Update > Check for updates, including Advanced options > Optional updates, where camera driver updates often sit uninstalled. Then, if Windows offers nothing, take the driver from your maker’s support page for your exact model — Dell via SupportAssist or the model’s driver page, HP via HP Support Assistant or its Software and Driver Downloads page, Lenovo via support.lenovo.com or Vantage’s update check — in preference to Device Manager’s Update driver > Search automatically, which can only find what Microsoft’s catalogue already holds and frequently reports that the best driver is already installed on a machine whose camera is still dead.
- Uninstall and let Windows rebuild it. The strong step, kept last: in the camera’s Properties > Driver, choose Uninstall Device and tick Attempt to remove the driver for this device if offered, then Action > Scan for hardware changes, restart, and test in the Camera app. Microsoft’s sequence is exactly this, and it is a rebuild of the Windows-to-camera conversation — it cannot repair a camera the firmware has switched off or a module that has failed, which is why it is not step 1.
- External USB cameras: try the built-in UVC driver. If the failing camera is a USB webcam rather than the built-in one, Microsoft offers a specific fallback: in Device Manager, Update driver > Browse my computer for drivers > Let me pick from a list, and select USB Video Device — the standard driver Windows carries itself. Microsoft’s own warning travels with it: the built-in driver may not support every feature of the maker’s driver, and Windows Hello face recognition in particular may stop working on a camera that relied on the maker’s extensions.
Two Microsoft features worth knowing before you conclude the driver is dead. On Windows 11 version 24H2 and later, Basic camera mode (reached from the camera’s settings page) strips out maker plug-ins and hardware acceleration — Microsoft offers it precisely for cameras that a maker’s extra software layer is breaking, and it can separate “the driver is bad” from “the maker’s add-on on top of the driver is bad”. And keep Microsoft’s error codes beside you while you work this link; they are the camera telling you which link it thinks is broken:
| Error code | What Microsoft says it means | The link it points to |
|---|---|---|
| 0xA00F4244 | The system cannot detect the camera | Link 4 presence checks first, then the firmware check below |
| 0xA00F4243 (0xA00F4289) | Another app or process is using the camera | Link 3 — close the holder; this is not a driver error |
| 0x80070005 | Access denied to the camera | Links 2–3 — permission, not hardware |
| 0xA00F4292 | Camera access restricted by policy | Link 2 — an administrator controls the device |
| 0xA00F4246 | Camera locked by security software | Link 3 — your antivirus or privacy suite |
| 0xA00F4294 | Video start failed | Link 4 — driver or the Basic camera mode test |
| 0x80004005 | General error, often hardware or driver failure | Link 4, then stop-testing |
| 0xC00D7167 | A camera component needs a restart | Restart the laptop, then retest before changing anything |
Works nowhere after the chain: the firmware switch
One layer sits below the driver, and it explains the camera that is missing from Device Manager entirely, untouched by scans, reinstalls and rollbacks: the camera can be disabled in the laptop’s BIOS or UEFI firmware, in which case Windows is not failing to find a broken camera — it is correctly reporting a camera the firmware has switched off, and no Windows fix can reach it. Restart, enter setup with your maker’s key at the logo screen, and look for the camera setting: Dell places it as Enable Camera under Integrated Devices; Lenovo places Integrated Camera under Security > I/O Port Access, set it to Enabled and save with F10. Menu names vary by maker and model — your model’s support page and manual are the authority for yours — and if the setting is already enabled, change nothing else in there and leave. A camera that reappears after this step was never a driver problem at all, and every reinstall aimed at it was guaranteed to fail; that is why the guides that put BIOS first and the guides that never mention it are both wrong — it belongs here, after the chain has proven the fault is below Windows, not before the free links have had their chance.
When to stop testing
Stop and hand it over — to the maker’s warranty service if covered, a repair shop if not — when the chain is exhausted and any of these is true: the camera is still absent from Device Manager after a scan for hardware changes, a driver rebuild and a firmware check; the camera works at some lid angles and drops at others, or its failure tracks the screen being moved (the camera’s cable runs through the display hinge alongside the screen’s, and a worn cable is a repair, not a setting); the fault began immediately after a screen repair, a drop or liquid exposure — tell whoever you hand it to, because that timing points at the module and its connector; or camera access is greyed out by a work or school policy, which only your administrator can lift. Do not keep reinstalling drivers against a camera Windows cannot see at the firmware level, and do not open the display assembly of a machine under warranty to chase the module. Bring your chain results — shutter checked, the three permission layers, the split result, which driver step you reached, and any error code word for word. That record is real diagnostic work, and it should shorten both the conversation and the quote.
Frequently asked questions
Why is my laptop camera showing a black screen? Because something between the lens and the app is interrupting the picture: a closed privacy shutter or camera key, a Windows permission layer left off, another app already holding the camera, a maker’s privacy mode (Lenovo Vantage), or a driver that stopped talking to Windows. The split test separates them — if the Windows Camera app shows a picture, work inside the failing app; if it does not, work the chain from the shutter down.
Why does my camera work in the Camera app but not in Zoom or Teams? Because the camera, its Windows permission and its driver are all proven by the app that works — the failing app is selecting a different camera, was never given the camera inside its own settings, or is being beaten to it by another app that still holds it (error 0xA00F4243). There is no per-app Zoom or Teams switch to find in Windows Settings: Zoom, Teams and browsers are desktop apps, covered by the single “Let desktop apps access your camera” switch, and controlled individually only inside each app itself.
What does error 0xA00F4244 (NoCamerasAreAttached) mean? In Microsoft’s table, that Windows cannot detect the camera at all. That is a presence problem, not a permission problem: check the camera in Device Manager (enabling it if disabled, scanning for hardware changes if missing), confirm it is not disabled under Settings > Bluetooth & devices > Cameras, and check the firmware switch if it never appears. The neighbouring code 0xA00F4243 means the opposite situation — the camera is detected, and another app is using it.
How do I turn off Lenovo Camera Privacy Mode? Open Lenovo Vantage and go to Device > My Device Settings > Display & Camera, then set Camera Privacy Mode to Off — despite the name, “on” is the state that blocks the camera in every app, over and above Windows’ own permissions. If your model has an infrared camera or uses Windows Hello face sign-in, Lenovo may not show the toggle at all; in that case this layer does not apply to your machine.
Should I update my camera driver from a driver-updater site? No. Take camera drivers from Windows Update (including its Optional updates) or from your laptop maker’s support page for your exact model — Dell, HP and Lenovo all publish them that way and all three advise the model-specific route. A third-party driver utility adds a layer nobody in this chain can vouch for, and if your camera broke right after an update, the correct move is usually the opposite of updating: roll the driver back in Device Manager.
My camera stopped working after a Windows update. What broke? Most likely one of two things Microsoft names at the top of its guide: the update replaced or removed the camera driver, or the newer Windows version stopped granting some apps camera access by default until you allow it again. So check the permission page first (link 2), then — only if the camera fails everywhere — roll the driver back (link 4, step 4). That timing is the one case where the driver genuinely is a prime suspect.
This article is general information, based on Microsoft Support’s “Camera doesn’t work in Windows” guide including its error-code table, Dell’s camera troubleshooting and BIOS guidance, HP’s published webcam privacy-switch and shutter-key procedures, and Lenovo’s camera guidance covering ThinkShutter, the camera key and Vantage Camera Privacy Mode, all linked or named above and checked in November 2026. Shutter positions, camera keys, firmware menus and privacy software vary by brand and exact model — your laptop’s user guide and support page are the authority for your machine. If the laptop is under warranty, run the chain, record the results, and let the maker’s service do any opening.